Search Results

Hydroponics 101 “ Introduction to Hydroponics

By definition hydroponics is a technique of growing plants (without soil) with water containing dissolved nutrients.  No soil is used but in most cases a growing medium is used to support the plant’s root system.  A few examples of popular mediums are perlite, vermiculite, Rockwool, coconut coir, clay pellets, peat moss, sand, and even small pebbles.  The basic idea behind the medium is to allow water to flow but also allow oxygen to be available to the roots.  Even if you are not planning on growing hydroponically, I would definitely recommend learning some about the subject since many of the concepts can help you get a different perspective to have a better understanding about plants needs in various states of growth even with conventional soil growing.  If you really think about it if you have ever added water soluble plant food while watering your indoors plants, you technically have already done some hydroponic gardening.

Advantages:
The primary advantage if hydroponics is the increased speed of growth in you plants.  This is possible because you are making life really easy for your plants, they just relax and just keep getting bigger.  Even with a small root system they are getting exactly what they need to thrive thus spending more energy upstairs instead of expanding their root system.  This is possible by careful control of nutrients in the water solution which the plant is completely dependent since the growing medium does not provide any nutritional support.  Another benefit is automation, though some work is required to monitor nutrient levels and pH of the solution once everything is setup you can walk away knowing that your plants will be happy.  Given the in most cases the systems are basically closed very little water is lost to evaporation so that means less wasted water (and less times you have to add water)

Disadvantages:
To create a large scale setup, there can be a significant cost to get started in hydroponics.  Purchasing water/air pumps various nutrient solutions during various growth stages, monitoring equipment, pH balancing, etc.  No worries though, there is a cheap solution to all of this which is my current project which I will write on shortly.  When automation fails, a simple pump failure can kill off your plants in hours depending in your medium since they plants require short and frequent watering since they have no way of maintaining the moisture over a long period of time.

How it works:
The great thing about hydroponics is essentially anything that holds water can be used to create a hydroponic system.  Even commercial solutions use your regular old Rubbermaid storage totes and 5 gallon buckets.  The uniqueness begins with the method in which you get the solution to your plants which I will explain some of the popular methods in detail below:

  • Wicking — This is one of the simplest and cheapest methods of hydroponics.  The basic concept is you take a material such as cotton (shredded sock/T-shirt) and surround it with growing medium and place one end in the nutrient solution.  This is where the name implies, the solution is wicked to the roots of the plant.  You can make this even simpler by using a medium that has some wicking properties itself (perlite/vermiculite are good examples) and suspend the medium directly in the solution.  Mediums such as peat moss, Rockwool, and coconut coir should not be placed directly in the solution since they may absorb too much solution and suffocate the plant.
  • Bubbler — This is also a simple and inexpensive solution where you suspend the roots directly in the nutrient solution and by leveraging a powerful air pump and air stone you create enough oxygen around the roots to prevent suffocation.  This can also work as flavor of aeroponics (which I will explain more below) where the force of the rising bubbles create a light spray to keep the roots moist which are suspended in air.  One benefit of this method is limited points of failure air pumps are normally pretty reliable and even if you neglect keeping your solution up the bubbling can create enough moisture to keep your plant alive for quite awhile.
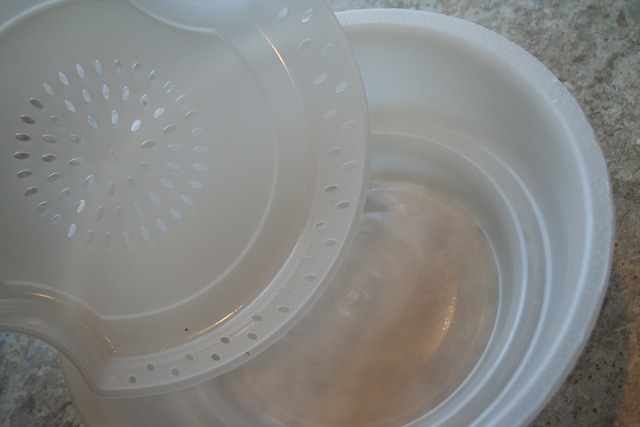
  • Ebb and Flow — A simpler way of thinking about this is flood and drain, using a water pump at a specified interval you flood the growing area with nutrient solution allowing it to slowly drain back into the reservoir.  You then repeat this process keeping the roots/medium at the desired wetness.  This method is a little more expensive than the previous methods since it requires a pump and timer that can turn off/on several times a day at short intervals.  Just to give you an idea how to build a system like this, find a Rubbermaid tub with a pretty deep lid.  Flip the lid over and place a small hole in the bottom (idea it will drain but slower than pump can fill) add some plants with medium, hook up a timer and you have a system.  A major advantage to this method is that it gives you more control over the watering which can be very important especially if you are growing plants that are accustomed to slight drying out periods.
  • Drip — This method uses a timer (slow constant drip is also an option) and a water pump to provide nutrient solution to all of your plants using rubber tubing.  This does have an advantage over Ebb Flow were you can control specific watering needs of plants at different stage and the ability to spread out your plants with a little extra tubing.
  • Aeroponics — Aeroponics is the process of growing plants in an air or mist environment without the use of soil or an aggregate medium.  Now there are some schools of thought one what exactly is considered a “mist” which separates aeroponics from “pure aeroponics” but for this discussion we will define it as directly watering roots just hanging in the air.  If you have heard of the AeroGarden this is a commercialized version of this technique, so this can definitely be an easy means of entry into aeroponics.  There are two typical ways to get nutrients to the exposed roots: fog and spray nozzles both of which providing a fine mist to the tender roots.  Both of these methods due have some drawbacks though.  Ultrasonic foggers can accumulate sediments from the nutrient solution on their discs but can be periodically cleaned and occasionally need replacement of their ceramic/Teflon discs.  Nussle on the other hand can get clogged due to the same sediments so though these methods are close to “Set it and forget it” you do need to check on them periodically for maintenance.  Though these techniques sound really complicated and expensive they really are not too bad.  You can use Pond Foggers which run $10-100+ depending on the number of discs they hold which directly to the volume of fog they will produce.  If you are doing a small experimental setup a one disc is a good place to start.  If you do go the larger setup route I definitely would advise spending a little extra for Teflon coded discs since they will hold up considerable better to the nutrient solution.  As for sprayers most of the materials for this can be found in the sprinkler aisle of you local Home Depot.  You can also create your own by drilling some small holes into a sealed (one open end for water input) PVC tubing, though cleaning a setup like this could be troublesome.

Hydroponics is obviously much different than conventional soil growing, but it definitely can be fun and rewarding to grow effectively in an unconventional way.

Healthy Choice Cafe Steamers for seed starting/hydroponics

prods_steamer_image

IMG_1477

Many times I see some packaging and eventually get an idea how I can reuse it with some minor modifications for starting seeds or some other purpose in the garden. I had one of these moment as soon as I opened my Healthy Choice General Tso’s Spicy Chicken Café Steamer   In case anyone is wondering what the purpose of this new packaging is, I could try to explain it but I will allow their marketing department do it for me:

“Our innovative product line utilizes a new and unique microwave Steam Cookerâ„¢–so you can lock in all the naturally fresh flavors of restaurant-inspired meals by steaming them yourself. With new Healthy Choice Café Steamers, vegetables stay bright and crisp, meat and seafood are juicy and tender, rice is moist and fluffy, and pasta is firm.”

After being delighted in the science of their frozen food steaming technology, I discovered I could easily repurpose the packaging completely as-is.

My first initial thought was to use this for starting seeds since it is the perfect size and depth for seeds starts before requiring their first transplant. As an added bonus they already have great drainage holes and even a reservoir in case of excess watering or allowing for wicking if I am going to be away from my seedlings a couple days.

My second thought was hydroponics, which is the process of growing vegetables without using soil. The basic idea is the plant gets all it needs from the nutrient solution which is applied always keeping the roots wet in the preferred growing medium. By adding a growing medium such as coconut fiber or Rockwool, adding some nutrient solution and an air bubbler to the bottom portion of this tray you have a cheap hydroponic system.  It is even big enough to support at least three small plants.

With either option the removal tray is also easily removable incase of overwatering or to change nutrient solution with very little disturbance to the plant(s).

One other benefit use is actually consuming the contents (preferable before used for gardening) which I did try and though the packaging has some interesting uses after you eat it, the meal tastes just about as bad as any other TV dinner I have eaten.

pH needs of plants in soil or hydroponics

With the exception of some of my acid loving plants and flowers I normally do not have to worry much about the pH of my soil.  This is because I have amended my gardens with nutrient rich soils in raised beds over my alkaline clay I get naturally in my area.  This and the fact that due to natural and manmade causes the rainfall is slightly acidic and given the average range for the sweet spot of most edible vegetables (see table below) is 5.8 to 6.0 having your soil slightly acidic this is perfect.

Now when it comes to hydroponics this is entirely different.  My tap water has a pH of around 7.5 and the fluctuation of plant using nutrients and transpiration can cause great havoc on the pH on your hydroponic system.  Now this creates a challenge but also an opportunity to have control with great precision your pH and keep your plants growing in the sweet spot for the healthiest plants and the greatest yields.

So whether you are growing hydroponically, or simply trying to figure out why your Fennel didn’t do so well last year take a look at the table below, hopefully for some hints of what happened.

Recommended pH Ranges of Vegetables/Herbs

Plant Low High Plant Low High
Artichoke 6.5 7.5   Millet 6.0 6.5
Asparagus 6.0 8.0   Mint 7.0 8.0
Average 6.3 7.8   Mushroom 6.5 7.5
Basil 5.5 6.5   Mustard 6.0 7.5
Bean 6.0 7.5   Okra 5.5 6.0
Beanroot 6.0 7.5   Olive 5.5 6.5
Beet 6.0 6.8   Onion 5.5 6.5
Broccoli 6.0 6.8   Paprika 7.0 8.5
Brussel Sprouts 6.0 6.8   Parsley 5.0 7.0
Cabbage 6.0 6.8   Parsnip 6.0 6.8
Calabrese 6.5 7.5   Pea 5.8 7.0
Carrot 6.0 6.8   Peanut 5.0 6.5
Cauliflower 6.0 6.8   Pepper 5.5 6.0
Celery 6.0 6.5   Peppermint 6.0 7.5
Chicory 5.0 6.5   Pistacio 5.0 6.0
Chinese Cabbage 6.0 7.5   Potato 4.5 6.5
Chives 6.0 7.0   Potato, Sweet 4.5 6.0
Corn Salad 6.0 6.5   Pumpkin 6.0 6.8
Corn, Sweet 5.8 6.8   Radish 6.0 6.8
Courgettes 5.5 7.0   Rice 5.0 6.5
Cress 6.0 7.0   Rosemary 5.0 6.0
Cucumber 6.0 6.8   Rutabaga 6.0 6.8
Eggplant 5.5 6.0   Sage 5.5 6.5
Fennel 5.0 6.0   Shallot 5.5 7.0
Garlic 5.5 7.5   Sorghum 5.5 7.5
Ginger 6.0 8.0   Soybean 5.5 6.5
Horseradish 6.0 7.0   Spearmint 5.5 7.5
Kale 6.0 7.5   Spinach 6.0 6.5
Kohlrabi 6.0 6.8   Squash 6.0 6.8
Leek 6.0 8.0   Swede 5.5 7.0
Lentil 5.5 7.0   Swiss Chard 6.0 6.5
Lettuce 6.0 6.5   Thyme 5.5 7.0
Marjoram 6.0 7.5   Tomato 6.0 6.5
Marrow 6.0 7.5   Turnip 6.0 6.8
Melon 6.0 6.8   Upland Cress 6.0 6.5

Cheap fogger hydroponics final results

IMG_1862

In case you missed them here is the original post on the creation of this fogger hydroponic system, and the latest update (before this one).

The plants still are still looking pretty healthy with the exception of a little phosphorus deficiency, but the blame goes on me for that one.  Been a little busy at work and have been neglecting the plants.

I decided to end this experiment since their roots were starting to get tangled and I want to use these plants for another project.

IMG_1866

These roots are healthier than they look, some soil leached in when I put some of my pepper plants on top of the hydroponic box.

IMG_1869

This pepper plant look really good, haven’t decided what to do with it yet.  Maybe the victim volunteer for the next hydroponic experiment.

Simple and cheap homemade ebb and flow hydroponics system

007
Though not my first hydroponic system this is is definitely a little more complicated than my last attempt of an fogger system created last year.  This time I decided to go with an Ebb and Flow system, where the concept it pretty simple, flood the planting area with water nutrients and let it drain, wait a defined amount of time and then repeat.  For this build I had a few requirements:

  • Must be inexpensive: Hey this is the cheap vegetable gardener site
  • Must be small: I have a limited space to grow and nutrients can be expensive and given what I am growing is legal don’t really need $20 basil
  • Must be safe from flooding: Though this is running in my garage, I really don’t want to come in with 10/20 gallons of water/nutrients on my floor.
  • Could be adapted for alternate hydroponic system.

Given these requirements, this is what I came up with and how I built it:

Materials

  • 18 gallon opaque Rubbermaid container (happened to have one of these around
  • 5 gallon basin — SLUGIS box from Ikea ($5.99)
  • vinyl tape (plumbers tape)
  • 1 inch hole saw
  • 1 inch threaded (diameter) to 3/4 PVC adapter
  • 3/4 inch threaded (diameter) to 1/2 in hose adapter
  • 2 3/4 inch PVC caps
  • Cheap pond/fountain pump (100 GPH)
  • 1 foot of 1/2 inch plastic tubing
  • 2 foot 3/4 inch PVC pipe (only need couple inches but smallest length I could buy)
  • aquarium/food grade silicon (optional I used this to ensure very watertight seal but found not necessary)

Construction

Take the 5 gallon basin and drill two 1 inch holes in the middle of each side.  One whole should be drilled from the top and the other should be drilled from the bottom.�
009

Take both threaded adapters and apply liberal amount of vinyl tape.
010

Screw in the 1/2 inch hose adapter from the bottom with just barely enough clearance to pop through.  When the pump stops the water will drain through this same hole.
014
For the overflow pipe, screw in the 3/4 inch PVC adapter in from the top until hand tight.
013

Take both caps and drill in a bunch of holes slightly smaller than your media.  The basic idea is you don’t want some Hydroton clay balls falling into your pump or reservoir.

Cut about 2 inches of 3/4 PVC pipe and attach to overflow and top with PVC cap with dozen or so holes in it.
007

Lastly attach the 1/2 plastic tube to your pump and place everything on top of your 18 gallon Rubbermaid tub (which fits perfectly and is very sturdy)  Fill with water nutrients and hook up your water pump to a 24 hour timer (or grow box controller)
016

004
Here is the Ebb & Flow system in action, as you can see very simple but very cheap and versatile.

Growing with hydroponics in the grow box

IMG_1595

There has been some major changes since I started the plants above in my cheap DIY hydroponic setup about a month ago.  Since then I have added a couple of pepper plants I saved from thinning.  I must say the plants are doing better than I expected.  I am still using the same homemade nutrient solution, 2 pumps of liquid plant fertilizer and half a teaspoon of Epsom Salts. 

The sickly plant on the bottom left is a cloning experiment which is not going great but the plant is growing roots and apparently surviving.

IMG_0373 

Some views from below:

IMG_1650

 IMG_1653

IKE