Saving some more pumpkin puree
12.5 years ago pie, pumpkin, recipe

I cooked up another pumpkin to make some more puree to last be though the rest of the year. This time I used silicon liners which made the removal of the frozen pumpkin pucks a piece of cake.
Last year I made a delicious pumpkin pie with some of this puree, this year I decided to be a little more health conscious and used this recipe for a low carb, gluten free pumpkin pie. Just as delicious, but with almost half the calories and none of the sugar/carb rush/

How to Freeze pumpkin puree
12.5 years ago freezing, halloween, pumpkin

After making my own pumpkin puree last year, I can’t go back to the old stuff in the cans. Last year I put the pumpkin puree into individual 1/2 cup plastic containers. This worked ok but given our full freezer it was pretty common for these hockey pucks to fall out from where they were wedge breaking on the floor (if I was luck enough to get my foot out of the way)
This year I am using a different technique to freeze these to use in pumpkin pie, pumpkin cheesecake (low carb version), pumpkin ice cream, or pumpkin bread this holiday season. Before you can freeze the pumpkin puree you need to get it from the pumpkin.

Step 1: Clean the pumpkin. Use a little water and scouring pad to remove loose dirt

Step 2: Remove stem and cut pumpkin in half. This will take a little muscle to get through but using a serrated blade should make quick work of this little pumpkin.

Step 3: Scoop out seeds and innards. Using an ice cream scoop scrape out the seeds and the stringy innards, you don’t have to get this completely clean as you can see below. I also decided to save a few seeds with hopes to grow my own sugar pumpkins next year using the seed saving techniques I have wrote about last year.

Step 4: Cut the pumpkin into smaller equally sized pieces. Once you have all the seeds and gunk out slice up the pumpkin halves into several equally sized pieces.

Step 5: Cook the pumpkin. Places pieces in a casserole dish and cover with top or if yours are overflowing your largest casserole dish like mine you can simply cover the dish with a piece of aluminum foil. Place in a preheated oven at 350F and cook the pumpkin for 45-90 minutes. The pumpkin is done cooking when you can slice through the pumpkin flesh with an edge of a fork with almost no effort.

Step 6: Blend. Use a large metal spoon to scape the pumpkin away from the skin and place into a blender and blend until smooth. If you have a very dry pumpkin like mine you might need to add a little water to get a good cortex going like above.
Step 7: Freeze. Scoop your pumpkin puree into a couple of cupcake pans and freeze for 24 hours. Then using both your thumbs apply a little pressure on the bottom of each frozen pumpkin puck to dislodge. My wife had a great idea of using those silicon cupcake liners to make getting them out easier….though we just purchased those a day too late so I had to deal with the muscle and cold finger technique. Place your dislodged pumpkin pucks into a freezer bag removing extra air with a straw and should be good to use for about 12 months…which is perfect when more pumpkins arrive and the process repeats.

Each puck is approximately 1/2 cup so just pull out and defrost as many as you need for your recipe. Given there are no additives or sugar involved I have also used this same puree as baby food, which our daughter seemed to enjoy, but I opted for some fresh banana bread for myself.

Making homemade pumpkin ice cream
13.4 years ago pumpkin, recipe

Looking for some more ways to use up some of my pumpkin puree, I decided to make some pumpkin ice cream. Here is the pumpkin ice cream recipe I used.
Tags: pumpkin
Pumpkin with 259,764J of energy smashing a car
13.5 years ago pumpkin
For most people watching a pumpkin dropped on a car from a crane is good enough…though the scientist in me wants to know how much force did this pumpkin have on impact. If I have you curious as well I did the math below…
WARNING MATH/PHYSIC CONTENT!!!
UPDATE: It has been too long since I have thought about physics…thanks for the corrections to my incorrect memory of Weight/Mass in the comments…calculations have been updated.
The easiest way to calculate this is to simply calculate the kinetic energy of the pumpkin with the following formula:
KE=(mv2)/2
First to determine the mass…for a pumpkin that weighs 1169 pounds that converts to 530.2 kg.
Next we need to determine the velocity of the pumpkin. Since in the video they do not say the height I am going to do an estimate of 50 meters given the cars and people look pretty small when the pumpkin is released. By neglecting wind resistance (because I am too old and tired to think about differential equations again) this I can calculate the velocity of the pumpkin right before impact by taking the square root of 2*9.80665*50 to get 31.3 m/s or 112.7 KPH or 70 MPH.
Now I simply plug in these numbers to find the kinetic energy:
KE = (530.2 * 31.32) / 2
KE = 259,764 joules
Just to put this into perspective here are some other events to compare to:
| Event | Joules of Energy |
| Swinging of a baseball bat | 80 J |
| Shooting an elephant gun | 1200 J |
| Shooting an M16 gun | 1690 J |
| Exploding 1 gram of TNT | 4184 J |
| Dropping a 1169 lb pumpkin | 259,764 J |
Have a happy and safe Halloween
Making a pumpkin pie from scratch
13.5 years ago halloween, pie, pumpkin

While out picking out pumpkins for my daughters I saw some nice organic heirloom pumpkins (Winter Luxury Pie) and decided to try my hand in using a couple of these to make a pumpkin pie instead of using canned pumpkin. One note make sure you are using a pumpkin labeled as a sugar or pie pumpkin, using your standard jack-o-lantern variety will lead to very watery and less velvety pie. So in the end, not only does this give you a better tasting pie, but given a organic pumpkin cost $6 a can you also save quite a bit of money with just a little additional work.
Step 1: Clean the pumpkin. Use a little water and scouring pad to remove loose dirt
Step 2: Remove stem and cut pumpkin in half. This will take a little muscle to get through but using a serrated blade should make quick work of this little pumpkin.
Step 3: Scoop out seeds and innards. Using an ice cream scoop scrape out the seeds and the stringy innards, you don’t have to get this completely clean as you can see below. I also decided to save a few seeds with hopes to grow my own sugar pumpkins next year using the seed saving techniques I have wrote about last year.
Step 4: Cut the pumpkin into smaller equally sized pieces. Once you have all the seeds and gunk out slice up the pumpkin halves into several equally sized pieces.
Step 5: Cook the pumpkin. Places pieces in a casserole dish and cover with top or if yours are overflowing your largest casserole dish like mine you can simply cover the dish with a piece of aluminum foil. Place in a preheated oven at 350F and cook the pumpkin for 45-90 minutes. The pumpkin is done cooking when you can slice through the pumpkin flesh with an edge of a fork with almost no effort.
Step 6: Blend. Use a large metal spoon to scape the pumpkin away from the skin and place into a blender and blend until smooth. If you have a very dry pumpkin like mine you might need to add a little water to get a good cortex going like above.

That is it. With my 5 pound pumpkin I purchased for $5 I got 6 cups of pumpkin puree, which is enough to make 3 pumpkin pie or 6 loafs of pumpkin bread and if my math is right about $30 compared to buying the canned variety. After making a pie and a loaf of pumpkin bread this left me with 3 cups of pumpkin goo, which I put in 6 half-cup containers which I froze to make some more pie for Thanksgiving.
Pumpkin Pie Recipe

Ingredients
- 2 cups of pumpkin puree (see above)
- 12 oz. can of evaporated milk
- 1/2 cup of brown sugar
- 1/3 cup of white sugar
- 1/2 teaspoon salt
- 2 eggs + 1 egg yolk
- 2 teaspoons cinnamon
- 1 teaspoon ginger
- 1/4 teaspoon nutmeg
- 1/4 teaspoon cloves
- 1/2 teaspoon lemon zest
Directions
- Mix sugars, salt, spices, lemon into large bowl. Beat in eggs then pumpkin puree. Finally add the evaporated milk and whisk until thoroughly combined.
- Pour mixture into chilled pie shell and make at 425F for 15 minutes. After 15 minutes reduce temperature to 350F. Bake 45-50 minutes, or until a knife inserted near the center comes out clean.
- Cool on a wire rack for 2 hours
- Note: If you are lacking some of the spices above…you can replace the spices above with pumpkin pie spice.
Tags: pumpkin
How to save pumpkin seeds
14.5 years ago harvest, pumpkin, seed saving, seeds
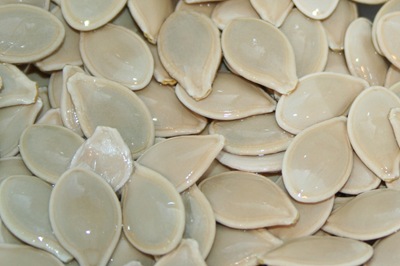
The kids and I carved several pumpkins this year but we waited carve the three pumpkins we grew in our backyard until Halloween since these were the seeds I wanted to save for planting next year. First, I know exactly how these pumpkins were grow, organically and free of any pesticides. Second, I was able to let these pumpkins grow undisturbed until the day I picked the seeds, so the seeds should definitely be mature.
The process is very simple, while getting the “goo” as my 5-year-old would say out of the pumpkin set the seeds aside and add to a colander. Give them a good rinse and remove any orange “goo” that may have snuck in. Pat dry with a towel and let the seeds dry on wax or parchment paper for a couple days. Once they are dry to touch put them layered on a paper sack and let them dry for a few weeks until putting them in homemade seed packets until the are ready for next year.
If you have way too many seeds than you need (I know I do) you can also use the great recipe to roast some of you extra seeds as a snack:
CVG’s Roasted Pumpkin Seeds
- Extra pumpkin seeds
- 1/2 tsp oil
- 1/2 tsp of Worchester sauce
- 1/4 tsp of seasoning salt
Directions: Add ingredients to bowl and mix well. Lay on a single layer on a cookie sheet and bake at 325 for about 25 minutes being sure to flip the seeds after about 10 minutes. Eat as soon as you can without burning your mouth.
Tags: cheap, garden seeds, organic vegetables, outdoor plants, vegetables


