Search Results

How to Prepare Your Vegetable Garden for a Harsh Winter

According to Game of Thrones fans everywhere, winter is coming. And while this may mean snowmen, Christmas decorations and mulled wine for some, for the keen gardener it can mean fingernails bitten to the quick and sleepless nights worrying about cabbages.

clip_image002
Image credit: vegetable garden

Well, maybe we wouldn’t go quite that far – but after all the effort you’ve put into your vegetables, you won’t want your hard work to go to waste for next year. Fear not – we’ve got a guide on how to make sure that your vegetable garden is both ready for next year and useful throughout winter. Here’s how…

Harvest

First things first, take in all of the vegetables that are ready to be harvested and make the most of them. Make sure that you cure and store your produce properly, and you might just end up with a stash that will last all winter long!

Clear out

After you’ve collected all of your delicious vegetables but before you get started on the chutney, it’s time to clear up your yard. If you’re tempted to put this job off, think of it as a treat for your future self when you’re planting more vegetables in the spring. You’ll be glad you put the groundwork in when May rolls around! While you’re there, prepare perennial vegetables for survival by removing old foliage and stems.

Make your garden useful throughout winter

Though it may seem like all plants are dead in winter, there are a few vegetables that will actually be ready for harvesting when it’s very cold outside, so with a little preparation and clever planting you can make your garden produce food until late in the season.

  • Carrots are actually sweeter when harvested after the frost. Plant them around late August or early September and cover them with straw for a little insulation.
  • Plant kale and collards in mid-August and harvest young leaves from October onwards.
  • It’s best to plant Spinach around four to six weeks before the first frost of winter – again, cover with straw, then harvest in late winter or early spring.
  • November is the ideal time to plant overwintering onions.
  • Don’t have space in the pantry for all of your produce? Don’t worry – your garden can act as a fridge. Bury cabbages, with their roots still attached and a marker in the soil above so you don’t lose them, and dig them up when you fancy bubble and squeak. Potatoes and carrots will also keep when buried in the garden, but add some straw over the top to protect them.
  • Give your vegetables lots of compost and a layer of mulch, for nutrients and protection. And, while the soil is a great protector for vegetables – especially root vegetables – it won’t hurt to give them a little water before a big freeze, when it may be difficult for your plants to reach water. However, be wary of over-watering, which can lead to cold, soggy roots and very unhappy plants.

Plant a cover crop

You may not be using your whole garden to grow overwintering vegetables, so to keep your soil ship shape and ready for spring it’s a good idea to plant a cover crop such as buckwheat or rye. These plants will suppress weed growth, feed bees and keep soil in place, then they’ll act as a ‘green manure’ for your garden by breaking down and providing your soil with lots of lovely nutrients.

About The Author

This guest post was written by Ricky Peterson. Ricky is a keen gardener and loves spending time outdoors, he works at Swallow Aquatics, who sell various pond and garden supplies. Ricky also likes to travel and loves hiking and climbing.
History of growing tomatoes upside down

Date Description Reference
May 21st 1983 Marshall Edward Wagnar of Bolton grows 2200 upside down tomatoes using a 4 inch plastic drain pipe filled with sawdust in his 14,000 square foot greenhouse. Star News
July 16th 1992 Robert H. Hood of Birmingham creates upside down planter from 1 gallon cans and also grows strawberries in the tops. The Tuscaloosa News
July 17th 1999 Jimmy Wood of Arkwright starts growing tomatoes from 5 gallon buckets hanging from his garage as an experiment. Herald Journal
July 17th 1999 Christine Berryhill of Spring Valley shows her technique of growing tomatos upside down using 5 gallon buckets. Times Daily
Dec 5th 2003 Using planters as upside down platers. Lodi News Sentinel

Go Green in the Veggie Patch

GoGreenInVeggiePatch

Vegetable gardeners inherently have a leg up on the casual nature lover: they’re already doing their part for the environment by growing their own vegetables in the first place. Mass-produced horticulture can be a pretty massive strain on the environment when you factor in the nasty effects of pesticides and the sometimes wasteful techniques employed by factory farmers. The agribusiness is a sticky one; while it provides much of our nation with balanced nutrition and a range of job opportunities, it’s tough to deny the toll it takes on Mother Nature.

Vegetable gardens, while often small and discreet, are a common way for homeowners to allay their environmental impact. Here are a few tips to keep in mind in order to get the most out of your veggie plot while wounding the least of the environment:

1. Compost. Of course, that means a little extra effort on your end, but it’s well worth it. We all know what an ecological perk homegrown compost can be, so don’t skip out. Use what you have on hand – eggshells, grass cuttings, newspaper, manure, whatever it may be. Just make sure you’ve got something you can throw together to make your own organic fertilizer.

2. Accessorize. Eco-friendly garden maintenance is a lot easier when you have a little help. Make things easier on yourself by equipping your vegetable patch with the right supplies. Make your own plant markers or purchase recycled materials that will help you separate your squash from your spinach. Put out a rain barrel and make use of precipitation to water your plants at a later date. Look around for trowels and spades made with bamboo or other organic materials – there are plenty of brands out there that are selling earth friendly gardening tools.

3. Simplify. Certain vegetables offer up low maintenance, low effort endeavors that can produce surprisingly high yield. Potatoes, green beans and carrots are all pretty easy to grow, and don’t require much attention. Make some room and plant a few of your favorites; there won’t be much more you have to do other than some routine upkeep. The environmental benefit comes in what you don’t end up spending on potentially harmful garden care products

That’s it! Well, of course, that’s not all of it – but those are some great places to start. Follow these Eco-friendly tips in your vegetable garden and spread the word! What are you and your friends doing to stay green in the veggie patch?

Author: Kristina Ross is a writer by trade and gardener by habit. She’s currently a freelancer and blogger for Save On Energy.

Easter Lilies Blooming

Nope, this is not a mix up in the date in this post. Last Easter we received as a gift from a friend, after the foliage had died off I planted I planted the bulb and what was left of the foliage in one of my garden beds. Given how the plant is forced to bloom in March/April I was pessimistic that it would even bloom at all, let alone this season. Well guess I will take it as a late summer surprise.

How to make your own onion sets

008

For a couple years now I have attempted to start onions from seeds and the same thing happens each year.  All is going well, good strong seedlings, then I run out of space in my grow box and the poor seedlings get kicked out to fend for themselves a few weeks to early leading to very few survivors.

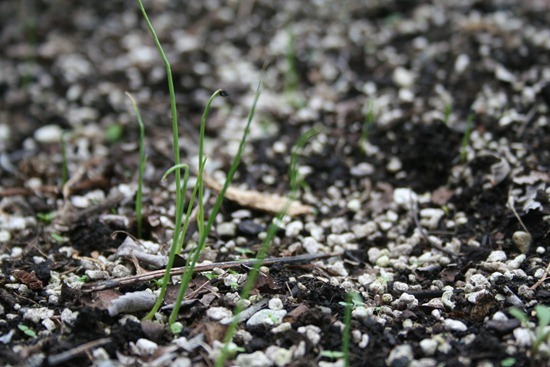
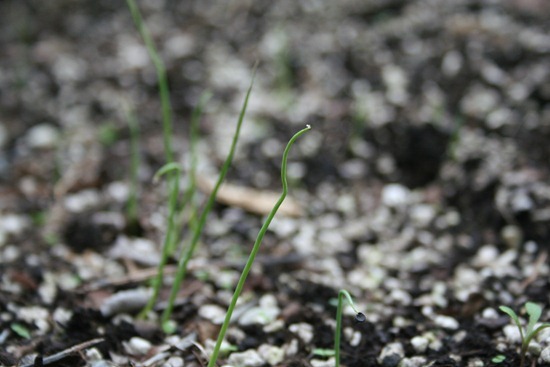
This summer I decided to try something new, during the end of July I spread onion seeds generously over about two square feet of my garden.  Now after a month and a half I have some nice little onion seedlings coming up.

007

I plan on keeping them in the ground until after the first frost the leaves will go yellow/brown and I will harvest my onion sets and lay them out to dry for a few days and store them in an old mesh container where I have bought onion sets a couple of years ago.  Where I can replant them this spring as soon as the soil can be worked.

The benefits of growing your own onion sets is you can grow varieties from species that you can not find even at your favorite online seed company.  Obviously the sets are also much cheaper than buying them already in the set form.  You can grow the onion sets to the specific size you want, which is important because small onion sets grow up to be onion bulbs with the larger ones growing up to become onion flowers.

The best part of this with the amount of rain we have been getting here in the Pacific Northwest the past month, I haven’t even had to water these seeds, so other than a few minutes of sprinkling the seeds, no real effort on my side.

Latticework that Works!

image

Lattice fencing has been a go-to tool for gardeners forever. Its classic crisscross or grid structure has remained unaltered since its inception for one reason: it works! And as we all know, if it ain’t broke, don’t fix it.

Indeed, the lattice is the one "fixing" things – it provides privacy fencing for yards, serves as a blank canvas for clinging vines and ivy, helps climbing vegetables to reach new heights, keeps out unwanted critters, and functions as the main building material for decorative arbors, trellises, screens, pergolas and more!

Let’s learn a bit more about lattice by delving into two of its main purposes: vertical gardening and natural pest control.

Vertical Vegetables

image

One of the wonderful things about the overlapping strips in latticework is the structural support they provide for climbing vines and vertically-growing plants and vegetables.

In the world of trellis climbers, you can’t go wrong with selections such as tomatoes, cucumbers, melons, peas and pole beans.

Once the frost threat passes for your region, lay out your garden in front of your lattice incorporating each plant’s specific spatial needs – this info can be found on the transplant’s nursery container.

After placing each transplant in its specified hole, cover with soil (mixed with compost for nourishment) and water liberally. From here, attach each of the climbers to the lattice by looping a soft piece of twine around the main stem of each plant and tie the loose ends to the lattice.

As the plant grows, the twine will guide the stems to grow vertically against the lattice. As soon as the vegetables ripen, harvest them and enjoy a homegrown bite of your hard work!

Natural Pest Control

Another fantastic use for lattice is as a tool for border control for those annoying animals that threaten to move into your home, completely uninvited. Just take a look around at all of the crawl-space homes surrounded with lattice under-fencing and you will understand the widespread infestation issues that lattice solves in such a lovely manner!

But more to the point is how to keep hungry critters like rabbits and deer from feasting on the fruits (and vegetables!) of your labor: installing lattice fencing is a great way to keep their grubby little paws off your peas and carrots and little hooves away from your rose bushes.

Although a picket fence works well as an exterior border surrounding your entire yard, if it is not at least 6 feet tall it may not thwart all deer, as some can clear that height in a single leap. Rather than installing a completely new fence, consider adding a level of lattice at the top of your existing fence.

Attaching a length of lattice to the upper railing of your fence not only provides the additional height to keep the deer at bay but it also adds texture and interest to your fence and can soften the entire look of your yard if you allow vines or ivy to grow on the lattice. Plus, you are repurposing what you already have which is a great way to save some green for the planet and your wallet!

When it comes to rabbits, here’s a quick tutorial on installing a lattice border around your garden:

image

You’ll need:

  • Wire rabbit fencing, with openings no larger than an inch: Ensure you have enough wire for the length of your entire garden area that is at least four feet wide
  • Decorative lattice, in the same length as the wire fencing and at least three and a half feet wide
  • Garden trowel

To build your border:

  • Use the garden trowel to dig a narrow channel around the perimeter of your garden, approximately 12 inches deep
  • Bury the wire rabbit fencing in the trench – there should be 12 inches below the surface and three feet above ground
  • Fill in the trench halfway, leaving six inches of space from the surface
  • Enclose the wire rabbit fencing with the lattice, burying the lattice approximately six inches deep
  • Replace the remaining soil and firmly pack the ground around the new fencing

With this type of border, you have form and function. The decorative lattice masks the presence of the wire rabbit fencing, at least partially, and cursory garden admirers may not even notice it, depending on the style of lattice you choose. By burying the fence in the ground, you discourage burrowing and digging and at three feet tall, even Bugs Bunny will have difficulty breaching your barrier!

What other garden projects do you plan to complete with lattice?

Chris Long, a long-time store associate at a Home Depot in Illinois, writes for the Home Depot website. He enjoys writing on outdoor projects ranging from lattice to lumber and fencing.

IKE