Search Results

Planting seeds outside


I always enjoy any seeds I required to start outdoors since they normally thrive with little effort from myself other than the occasional watering and given I live in the rainy Seattle area that does start until mid-June. Even if you have started many of your seeds indoors to extend your growing season some seeds should always start outdoors since they are sensitive to transplant shock. If you have been to a garden center or nursery lately you can get an idea by what types of plants can be transplanted easily. If you are now looking at your seed packets wondering if you should plant these indoors or outdoors here are my suggestions:
Plants that can be started indoors:
Broccoli, Cabbage, Cauliflower, Celery, Cucumbers, Cukes, Eggplant, Herbs, Kale, Leeks, Lettuce, Muskmelons, Onions (seed), Parsley, Peppers, Swiss Chard, Summer squash, Tomatoes, Zucchini

Plants that should be started outdoors:
Beans, Beets, Carrots, Cilantro, Corn, Cucumbers, Garlic, Muskmelons, Onions (sets), Peas, Potatoes, Radishes, Scallions, Spinach, Turnips, and Winter/Summer squash

You can see from the list there are some plants on both lists which shows that it is definitely possible to transplant some of these sensitive plants, but if you want to avoid the hassle and avoid killing a few plants without requiring surgical precision I would recommend opting for the direct seed planting approach.

Hopefully now you have an idea what you can plant so now comes how to actually do it. Your seed package which will normally give instructions something along the lines of planting the whole package of seeds in a row and thin out to the appropriate spacing. This has been the basic method that many gardeners have been doing for years. This normally leads to thinning 70% of the seedlings or so of the row, which is time consuming and since you can save seeds over a few years this method will definitely be more costly. To avoid this, I plant 1-2 seeds at the proper spacing, if the seeds have been saved for a couple years I add a couple extra seeds since even with proper seed storage the germination rates can decrease over time. After a week or two I simply thin the weakest of the seedlings by chopping them off with a small pair of scissors being careful to not disturb the seedling next to it. If you want to give your larger seeds a little head start, try soaking them in lukewarm water (add inoculants if they are in legume family) overnight before planting them.

Following these steps you should have some great activity in your garden with minimal maintenance and cost.

Healthy Choice Cafe Steamers for seed starting/hydroponics

prods_steamer_image

IMG_1477

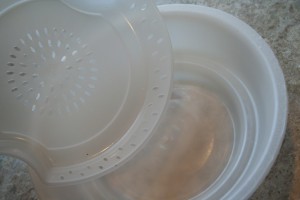
Many times I see some packaging and eventually get an idea how I can reuse it with some minor modifications for starting seeds or some other purpose in the garden. I had one of these moment as soon as I opened my Healthy Choice General Tso’s Spicy Chicken Café Steamer   In case anyone is wondering what the purpose of this new packaging is, I could try to explain it but I will allow their marketing department do it for me:

“Our innovative product line utilizes a new and unique microwave Steam Cookerâ„¢–so you can lock in all the naturally fresh flavors of restaurant-inspired meals by steaming them yourself. With new Healthy Choice Café Steamers, vegetables stay bright and crisp, meat and seafood are juicy and tender, rice is moist and fluffy, and pasta is firm.”

After being delighted in the science of their frozen food steaming technology, I discovered I could easily repurpose the packaging completely as-is.

My first initial thought was to use this for starting seeds since it is the perfect size and depth for seeds starts before requiring their first transplant. As an added bonus they already have great drainage holes and even a reservoir in case of excess watering or allowing for wicking if I am going to be away from my seedlings a couple days.

My second thought was hydroponics, which is the process of growing vegetables without using soil. The basic idea is the plant gets all it needs from the nutrient solution which is applied always keeping the roots wet in the preferred growing medium. By adding a growing medium such as coconut fiber or Rockwool, adding some nutrient solution and an air bubbler to the bottom portion of this tray you have a cheap hydroponic system.  It is even big enough to support at least three small plants.

With either option the removal tray is also easily removable incase of overwatering or to change nutrient solution with very little disturbance to the plant(s).

One other benefit use is actually consuming the contents (preferable before used for gardening) which I did try and though the packaging has some interesting uses after you eat it, the meal tastes just about as bad as any other TV dinner I have eaten.

Hometown seed giveaway #2 (Survival Seeds)

image

Hometown Seeds has again graciously offered up a selection of their non-GMO non hybrid survival seeds.  These are advertised to keep in storage for 5-10 years but also are open pollinated so you can grow them this year, collect the seeds and create your own stockpile in preparation of any future catastrophic food shortage.

They include a selection of the following varieties:

  • Lincoln Peas
  • Detroit Dark Red Beets
  • Kentucky Wonder Brown Pole Bean
  • Yolo Wonder Pepper
  • Champion Radish
  • Lucullus Swiss Chard
  • Black Beauty Zucchini
  • Waltham Butternut Winter Squash
  • Bloomsdale Longstanding Spinach
  • Scarlet Nantes Carrots
  • Long Green Improved Cucumber
  • Rutgers Tomato
  • Golden Acre Cabbage
  • Romaine Paris Island Cos Lettuce
  • Golden Bantem Sweet Corn
  • Yellow Sweet Spanish Onion


They will be sending me the seeds to no restrictions on where these can be mailed to, so simply add a comment by 2/16/2010 2/19/2010 and I will randomly select a winner in one week.

Update — 2/16/2010

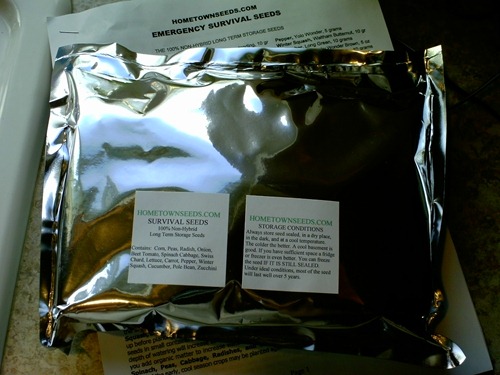
I got the seeds in the mail from Hometown Seeds and I was very surprised in the weight of these seeds.  Well over a lb of seeds in this package.  They come in a sealed lightproof wrapper as you can see below:

005

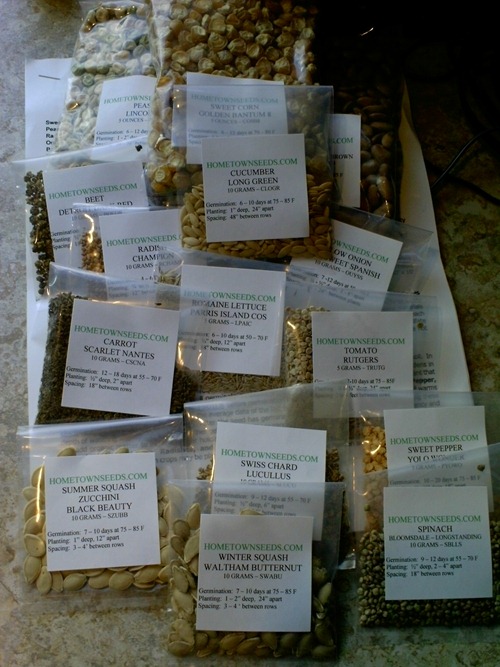
Though the seeds would last longer if I kept them in this packaging, though I just had to rip it open to see what was inside (winner’s package will not be opened):


006

As you can see there are quite a few seeds in this package so you may want to think about who you may want to share these with if you win.

And the winner of the CVG seed stash is…

After a week of waiting over a week I haven’t heard back from Aly so I have picked an alternate winner, I reran the CVG Contest Winner Pickorama and the new winner is Angela, please send me an email using the contact link at the top of the page with your name/address and I will get the seeds sent out as soon as possible.

image

How to grow seeds in your garden

IMG_1474

Because of a strange heat wave we had in June, I seem to be growing more seeds than vegetables this year.  Now as they say when life gives you lemons, make lemonade.  In that spirit I am planning on increasing the number of plants I will allow to completely go to seed this year.

I have always saved cilantro seeds, the first time it was almost an accident my daughter liked the pretty white flowers and after neglecting my garden at the end of the summer I had perfectly dried cilantro seeds on the plant.  Free and renewable supply of seeds, what could be better.  If I don’t have you convinced here are some more reasons:

Cheap: You really can’t beat free.  With the price of seeds increasing depending on the variety of seeds you grow this could save you a considerable amount of money per year.

Easy: The creation of seeds of seeds is a completely natural process that has been happening for millions of years.  In many cases you can do practically nothing other than harvest the seeds before the birds do.

Natural selection:  With a little attention you can hand select only your best plants to harvest seeds from.  If the plant survived to produce seeds it has to be at least a little disease tolerant and if you intentionally pick plants that bolted early you can also establish your own slow bolting variety.

Limited availability: Even with all the resources on the internet your favorite seed company may not always carry your favorite varieties or in some cases just a few seeds might be hard to come by.  If you play your cards right you may even be able to make a few bucks selling your rare seeds.

Seed Exchange: If you collect seeds you more than likely will get more seeds than you need for the next 2-3 years from a single plant.  This is a great supply to use for local or mail seed exchanges.  Not only are you supplying someone else with seeds they need but also adding seeds to your collection which you can harvest and repeat the process again.

Growing sprouts: If you are paying for seeds growing sprouts for some plant varieties can be pretty expensive…unless your seeds are free.  This is a good healthy way to use up some of those extra seeds you can’t get rid of any other way.

This year I am planning on harvesting spinach, pea, carrot, and radish seeds (along with my previous onions and cilantro) so stay tuned for more details.

How to grow onions and not onion flowers

2279

Last year, I grew a lot of onion seeds but unfortunately not many large onions I could use in the kitchen.  I have learned a few things since then which hopefully can help you not have the same problem.

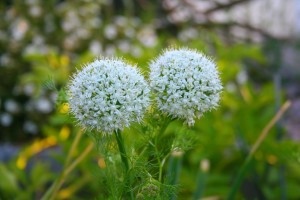
Use small onion sets: Last year I selected all of the largest onion sets in the 100 count bag which from some of my experimentation this year proves why almost all of my onions bolted to seed.  Smaller onion sets were much less likely to bolt to seed during normal temperature fluctuations.  Now what should you do with those large onion sets?  Why not think of them as flower bulbs since that is what they will end up eventually.  Given you know the onions will grow pretty small so you can plant a 1-2 inches apart and they do make a quite attractive flower and as an extra bonus you can collect the onion seeds for next year.

Grow from seeds: Well if you are like me with all of your plants bolting to seed on the positive side that gave you a considerable number of onion seeds.  Now you have a couple choices here, you can plant some seeds at the end of the summer which will create basically small onion sets which will go dormant over the winter and pop back up during spring.  The other option is to plant seeds indoors 9-10 weeks before last spring frost and plant seedlings the size of a pencil or smaller into your garden.

Try a different onion variety: The ultimate reason flowers bolt is temperature fluctuations which tricks the onion that it has completed its biennial (2 year) growing pattern which results into the onion jumping into its last stage of its life, flowering.  Now unless you are growing in a heated greenhouse or grow box, unfortunately you don’t have too many options in controlling the weather.  Fortunately you can select onion varieties that are more tolerant to temperature fluctuations.

Hopefully with these tips you can grow a few less onions flowers and a few extra onions.  Though if you still get a few onion flowers you do have a couple choices.  Pull it up and user the smaller onion in your kitchen or simply embrace the flower and the bees it will attract and get plenty of onion seeds for next year.

IKE