My Tomato Planting Adventures
11.1 years ago guest post, pests, tomato

Tomato Plants are not known for being forgiving. They are not beginner plants. Tomatoes give seasoned gardeners nightmares. So why is it that I keep torturing myself by trying and trying to grow them?
Maybe I like a challenge.
Maybe I think that I’ll do better with a difficult crop, since my luck with “easy” plants is sporadic at best.
Maybe I really like Salsa.
Ok, so it’s mostly that last one. I like to do things for myself, and making salsa with my own tomatoes would be awesome.
Of course, my need to do everything for myself is part of my problem. When I first decided that I was going to take on tomatoes, I wanted to start from the very beginning, no pre-grown seedlings for me. I read up on how to grow my own seedlings and then I found the tip that was going to save me time, effort, and frustration.
I could direct-sow my seeds right in the garden as long as there was four months between frosts in my area! That was perfect! As soon as it started to get warm I would plant my seeds and I’d have tomatoes in no time.
So I spent the entire second weekend of March preparing my “garden” (an unearthed portion of my back yard). I had the hose system all prepared so I wouldn’t get water on the leaves or fruit; I’d read about those nasty black spots. I had chosen an area that had a decent sun/shade ratio, so I was happy with that. I had chosen the perfect tomato cages for when it was time to use them. I sat down Sunday night, exhausted, but with the taste of homemade salsa on my mind.
That Wednesday my heart broke because of frost. I swore I’d never enjoy snow again.
I looked at the weather report. I read gardening blogs. Looks like I had jumped the gun. Apparently Mother’s Day is a really popular day to plant tomatoes. Seedlings, of course, but supposedly it only took 5-6 weeks to grow seedlings. I still had plenty of time. But I wasn’t going to take a shortcut this time. I decided to pot them.
Two weeks later, I had managed to drown all of my newly planted tomato seeds. I was told by a friend that there was no way the seeds could survive the daily dousing I’d been giving them, so I didn’t end up living with false hope that I’d have tomatoes any time soon.
By this time, I was frustrated. I stayed home from work for two days and read everything I could about planting tomatoes. I was going to try this one more time.
I used a special seedling soil mix. I kept my plants in a warm, but dark area. I watered less often, but was sure that my seeds didn’t get dry.
They sprouted. I repotted them in a 6-pack, each plant in their own little home. I had a special spray bottle for my tomato plants. After germination, I had them in the light almost constantly, but not quite, after all, too much light was as harmful as not as much.
All that was in my head were facts about tomatoes. I coddled those poor plants, but they were making it. I fertilized them. I petted them so to “train” them to be strong. I may have talked to them a bit. I was getting ridiculous.
I of course had been depriving myself of salsa because I knew my own homemade salsa would be worth waiting for. I finally caved and made some from store-bought tomatoes. That moment (hour) of salsa-goodness reminded me why I was doing this, and I remembered to relax. After all, gardening is supposed to be good for you.
3 of my plants made it to my garden. 2 bore tomatoes. Many of those tomatoes were either spotted or devoured by bugs. But I did have one nice batch of salsa to show for all my hard work.
Since then, I’ve given in and bought seedlings. Some years I still start from seed. To my dismay, my second year yielded fewer tomatoes than my first. But then the third year was pretty good. I’ve learned lots of tricks, and I’ve turned my focus to other plants, but tomatoes have probably taught me more gardening lessons than any other vegetable. Most of all, they’ve taught me that I need to relax and have patience. I’ve also learned that the world doesn’t end when plants die, as sad and frustrating as it can be.
What gardening lessons have you learned?
Mackenzie Kupfer has been a lover of all things green since the age of six when she began gardening with her Nana. She is currently an online publisher for the tomato cage supplier, Avant Garden Decor. In her free time, Mackenzie enjoys attending garden shows, hiking, and collecting ceramic tea sets.
How To Make A Tire Planter
11.1 years ago cheap, container garden, DIY, guest post, planter, tires
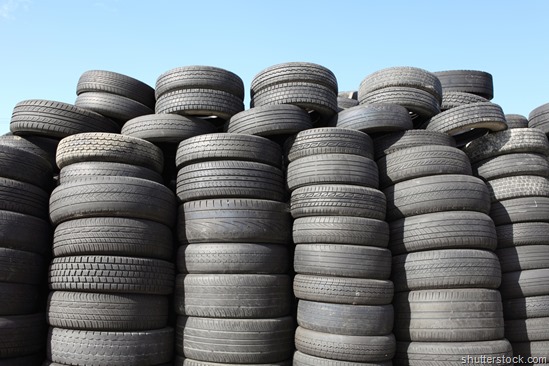
Used tires are a difficult waste product to dispose of as they take up a great deal of space and are discarded in large volumes every year. Through recycling a tire and turning it into a planter, you create something useful and attractive for your outside space for free and help the environment at the same time by keeping the tire out of landfill.
Try asking at your local garage or a breakers yard for unwanted tires, business owners are usually only too happy to give them to you as they normally have to pay to have them taken away. For this reason they are often dumped illegally by unscrupulous people.
If you want ‘how to’ videos then head for YouTube and you will find plenty but if you follow these step-by-step instructions then you will get the hang of this wonderfully simple and fun project in very little time.
First up you will need:
- An old tire or tires
- Box cutter knife
- Leather work gloves (for cutting)
- Chalk
- Paint (weather resistant)
- Soil & some compost
- Whatever you want to plant – flowers, vegetables etc
- Old clothes – tires are dirty!
- Elbow grease!
How to do it:
1. Find some used tires. Car tires are the easiest to get hold of and use for this, but if you have the space, you could use larger tires from a lorry or tractor. Create tall planters by stacking the tires to achieve the desired height.
2. Wash well with a degreaser and leave to dry. Old tires are usually quite oily and in need of a good scrub. This prepares the surface for painting and ensures adhesion.
3. (This step is optional). If you wish to open up the top of your tyre for extra planting space, remove one of the side walls using a sharp knife. With a little elbow grease and a very strong, sharp blade you can cut through and remove the side of the tire. Mark a guideline to follow using white chalk. Take care and wear a pair of leather gloves for added protection. If you will be stacking your tires, only cut the one that will be placed at the top, as the lower ones will need both sides in place to hold their shape. Lorry & tractor tires are much thicker so cutting them requires a powered grinder (or leave them as they are – much easier!)
4. Get creative! – Paint your tire using an oil based exterior (weather resistant) paint. Bright colors make a great impact in a contemporary space, or you could simply use white. If you are feeling adventurous though there is nothing to stop you painting polka dots, stripes, a pattern or whatever you like!
5. Leave the paint to dry fully. Have a rest!
6. Position your planter and fill it with soil and a bit of compost. Prepare for planting.
7. Plant up. Flowers, vegetables, herbs, strawberries, a tree or an architectural feature plant, the possibilities are endless. A stack of tires makes an excellent potato tower, as you can produce a large crop easily using minimal space. Once ready, simply knock your tower over and retrieve your crop. (You may wish to line your tire with plastic to prevent the possibility of any chemicals leaching into edible plants).
8. Sit back and enjoy your planter. Your new tire planter will last for years as it is made from an incredibly durable, weather resistant material. You have created something beautiful and practical and aside from your time and any paint you may have purchased, you project is both environmentally friendly, fun to make and free!
ABOUT THE AUTHOR
Felix is a member of the evergreenhedging.co.uk team. We are part of Greenshutters Nurseries & Garden Centre based near Taunton in Somerset which was established in 1980.
Doing a Garden Makeover or Building from Scratch? Here are the Tools You’ll Need
11.2 years ago garden maintenance, garden planning, guest post
The first tool, and perhaps the most important tool for any project, is a solid plan of action. The list of tools needed for a garden makeover or for building a garden from scratch will change slightly depending on your plan. The term garden encompasses many different outcomes.
This article focuses on the tools needed to build a vegetable garden. Plan your garden in accords with what you consume and with ideas that suite plants that grow in your area. Consider seasonal changes and whether or not your garden will need a greenhouse or a hoop house for extending your gardens growing season.
Giving your garden shape:
The second set of tools that are important are a ball of twine and marking stakes. These two tools allow your garden to move from one dimensional planning into a three dimensional form. Stake out the area that will become your garden and then stake out any features that you might consider putting into the garden. These may include raised beds, pathways, irrigation/hose bibs, a greenhouse, and a planting table. Using twine and stakes allows the gardener to see exactly how space is going to be used, and it breaks up a large project into manageable pieces.
Implementing Garden Elements:
The third set of tools that you will need to focus on are the tools that will actually help you begin to create the elements that make up your garden plan.
If you are creating raised beds than you will need a saw, a drill, and wrenches/hammer for fastening the wood pieces together. You might also consider buying a raised garden bed kit.
If your garden plan calls for an in-ground garden, then you will need a sturdy shovel and perhaps a tiller for turning the earth. It is also recommended that you use a soil screen and a wheelbarrow for sifting the soil. Most experts agree that an in-ground garden needs to be dug down to a minimum of 18 inches. Expert gardens may dig down to 2 feet and replace the bottom six inches of soil with compost/manure.
Sifting the soil helps to promote root growth from plants, especially root crops such as carrots and potatoes. Note: Even with a tiller, a shovel is still needed to dig down deep enough to create a productive in-ground garden. For raised beds do not forget to factor in the cost of soil, to fill them. Long term projects can recycle aged compost in to new beds to help build up soil levels over time. This is not only free it improves soil composition for plants. If your garden plan calls for yearly expansion, then consider building the raised beds first, planting a cover crop and using garden produced compost to fill them over time.
Standard Garden tools:
A sturdy wheelbarrow, shovel, hoe, a bow rake, and hand tools for weeding amid your vegetables are all that are necessary for maintaining a garden. This means that the cost of buying tools to start a garden is a relatively low cost investment. Even the creation of a compost-system can be done free of charge. It is a wonder that more people do not take up gardening as both a means of producing food and as a hobby.
After all, nothing is a better return on your time investment than a vegetable garden. It continues to produce regardless of the economy, and when recession hits, its value outshines even the best investment.
About the Author: Thad works with O’Connor’s Lawn—Your source for riding lawn mowers . Thad is an outdoor enthusiast who enjoys writing about landscaping and lawn care.
Tips to choose plants for indoor gardening
11.2 years ago guest post, planter

Indoor gardening is one of the best ways to decorate your home. These are simple to maintain provided you give a good amount of attention and care to the indoor plants. Even people having limited space could work wonders and end up getting a rewarding experience. Choosing the right set of plants for your indoor garden could give you some of the best enjoying experience. However, choosing these plants for your indoor garden for your home or office is always a complex affair. At times, even the people from the nursery staff are seen struggling for choosing the plants if you fail to give the right picture of indoor garden or the things you want in the garden. If you select wrong plants for your indoor garden, you may end up creating a mess at your space. Hence it is always recommended to research about the same. The below is the list of helpful tips to choose proper plants for your indoor gardening mission. Let’s check them out:
Check your space size
There are number of plants fit for indoor gardening but each one has its own space requirement. Hence before you choose any check its exact space requirements. Select the right plant for your space, which you are supposed to be filled. Always keep in mind that most of the indoor space doesn’t need any light for plants to blossom and that the flowering the plants and the ones having the variegated leaves simply need higher amounts of light levels as compared to the other plants. The plants, which are seen doing good with the full or partial amount of shade are best suited to live inside the gardens and can move anywhere inside your home or office.
Consider the weather conditions
Another factor that you need to consider is the weather conditions. You are supposed to select a plant as per the weather conditions you have at your space and its surroundings. If you choose flowering plants then make sure you understand very well that these require good amount of light levels but the plants including the gorgeous Phalaenopsis orchid are seen doing good at spaces where you have high humidity levels like the bathrooms and kitchens. Also, the Phalaenopsis orchid does not require direct sunlight or being placed over any draft, hence the areas that are overly air conditioned are certainly not the appropriate for such delicate kinds of plants.
Check the size
Once you have considered the above two factors, it’s time to consider the element of size. The small size flowering plants including the bamboo and cacti could be a good option for placing them over the coffee table or at the spaces with limited amount of space. The herbs are often considered as the ideal option for small size window boxes and palms including thatch palm or the love palm plants. These appear good in the different free standing pots seen over your room’s corner wherein you want to put some little larger plant.
Consider the factor of time
While choosing plants, you need to consider your attentiveness and active participation time as well. The evergreen and Cacti plants would hardly require any effort whereas the violets and several other exotic plants are called as temperamental and demanding in terms of time. Avoid going for a plant, which demands careful controlled amount of water feeding when you know you hardly have time to do so where there is a possibility of forgetting to the feet the water as well. The fact is, most of the indoor plants die down due to over watering hence you are supposed to check the moisture levels of the soil before you start watering your plants abruptly. This will help you in preventing things like the water logging. If you use the sub irrigation over the decorative pots, then make sure the plants would require more amount of water at the roots.
Know the good performing indoor plant options
There is a wide range of indoor plants, which you could choose for your indoor garden. A few of these could be chosen as per the above considerations, while there are few specific high performing indoor plants. These plants could be planted inside any and every indoor garden as they are among the high performing plants. These include Cast iron plant, Dragon tree, Love Palm, Thatch Palm, Hearth Leaf Philodendron, Devil’s Ivy, Mahogany tree, Peace lily, Aroid palm and Mother in law’s Tongue.
Final word
A good array of plants inside your indoor garden could do wonders provided you choose the right amount of plants for your space. However, choosing your indoor plants for your indoor space is always a complicated thing. When it comes to choosing them, consider the above tips.
About The Author: Alia is a writer/blogger. She loves writing travelling and reading books. She contributes to Gamification
How to construct a raised vegetable garden
11.2 years ago guest post, outdoor seed starting, planter, vegetable bad
If you have a messy child who loves to plant and play around the garden, but who you are fed up of cleaning up after a day of joyful dirty exploration, a raised garden bed may be the ideal solution you are so deeply looking for. This type of bed is easy enough to build, takes around 2 hours to build from start to finish, and will set you back by around $200 – $300.

Recommended materials
Although you could use pretty much any type of wood you wish to make the bed, it is recommended that you use some form of rot-resistant wood, which isn’t coated in anything which may be harmful if eaten; after all, you are about to plant vegetables in it, and we all know how much children love to put anything and everything into their mouths. Next, you need to select your plot of ground. Ideally it will be somewhere with plenty light, and a maximum of 4ft wide, so that the children can reach into the middle without climbing or falling into it, however it can be as long as your elected choice of timber allows. For the best drainage, you should remove the grass on your elected plot, and tile it under the soil. The following set of instructions will allow you to make a bed 4ft wide by 10ft long, but you can change the values to suit your needs.
The frame
Firstly, you should cut an 8ft length of your elected timber in half, to create your 2 4ft ends. Hold one of your 10ft lengths on its end, and line up one of your 4ft cuts so that the face of your 10ft length covers the cut end of your 4ft length. Using a drill or screwdriver, attach the two pieces together through the back of the 10ft board, and into the cut end of the 4ft length. It is advisable to use 3 x 3” screws, but you can essentially use as many as you wish to ensure it is sturdy. Do the same thing for all sides, so you should now have the outline of your bed in a basic rectangle shape. Once all the sides are attached, use a framing square to ensure all the corners sit at a 90 degree angle, and adjust where necessary.
Corner support
Now that you have your bed in a perfect rectangle, you want to keep it that way. So attach a piece of wood to each corner, which should give you a triangle shape at each of your corners. Again, attach these pieces with as many screws as you feel necessary.

Select your spot
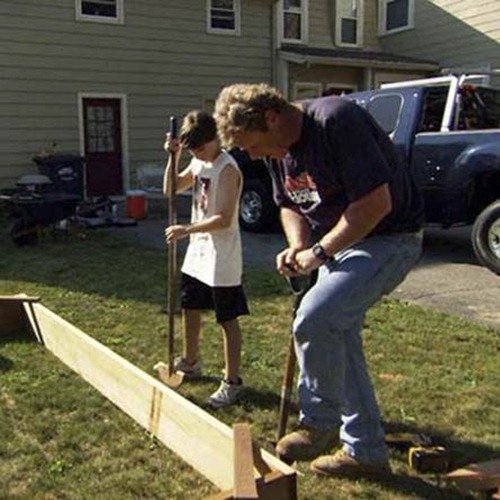
Now you can move your frame to your elected sunny spot, and mark out where it will lie by drawing a line around the outside of your frame with a shovel or spade.
Preparing the ground
Now you know where your bed is going to sit, take the frame out of the way again, and remove the grass layer where your bed is going to sit. After you have removed the grass, try to turn the soil a bit so that you will have good drainage.
Making sure all is level
Lift your frame back into its final sunny resting place, and remove soil from around the edges of the frame so that all sides are level with one another.
Secure your frame
The next step involved settling your frame into place, to ensure it doesn’t move. You should cut 10 2ft lengths of wood, and create a spike at one end by cutting diagonally from around 5” up the long side, into the middle of the short side on both sides. Once you have make all of your stakes, hammer them at least 18” into the ground, and 2.5ft intervals along the outside of the long edges of your frame. Once they are in the ground, secure your stakes by drilling through them and the frame of the bed so that they are 100% in place. Then put a stake into each corner, and secure the same way. Finally, you need to put one stake into the middle of each short edge, but only secure with screws on one side.

Adding your soil
You can now remove the unscrewed edge of your bed, and use your wheelbarrow to empty a combination of soil and compost to fill the bed until the soil sits around 2-3” from the top edge of the frame.
Complete your frame
You can now put the short edge of your frame back into place, and secure with screws like you did with all of the other sides. As a finishing touch to your masterpiece, you can use a saw to cut the top of all of the stakes so that they sit level with the rest of the frame.

Let the fun begin!
Now that your bed is completed, you can begin to plant your vegetables and plants. Just remember to keep them well watered, and you’ll be eating home-grown vegetable soup in no time at all!
Author Bio: Peter Smith loves gardening at his free time. He also gives online gardening tips to people, click here to go to his site. Apart he is an experienced freelance writer.
How good are the latest gardening tools? Let’s talk
11.3 years ago garden maintenance, garden sheers, gardening tools, guest post
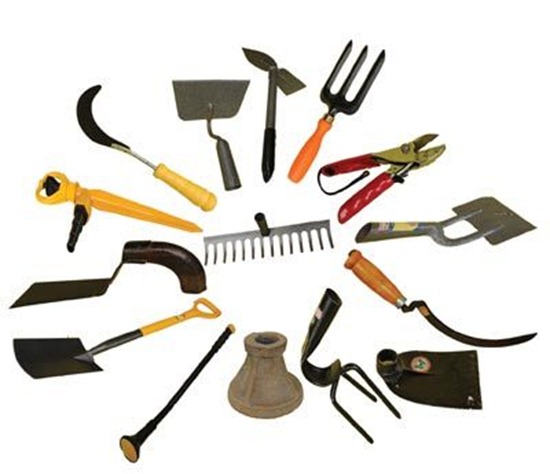
For true garden lovers, taking care of their yard is more than just an everyday task. Hard-working garden owners take pride in their yards, and with the necessary tools in their garage, they find it easier to make their yard look fantastic. Here is a list of the latest gardening tools that help to keep your yard in tiptop shape.
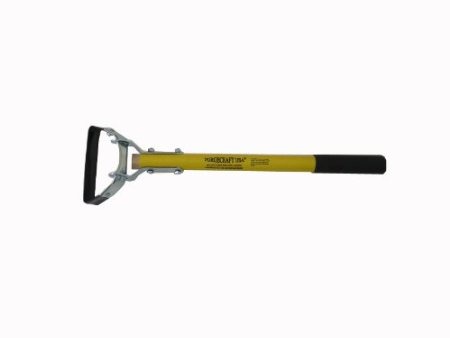
Hula Hoe
Hoes help you to make rows, dig furrows, loosen the soil and kill weeds. This tool is also known as stirrup hoe that makes weeding an easy job. The stirrup hoe is a long-handled tool that makes you work easily without too much bending. Its blade oscillates to and fro like the hips of a hula dancer. This oscillating blade also helps to slice weed roots below the soil surface. Since the blade swivels to and fro it cuts on both pull and push stroke, making it easy to handle in closed spaces between plants and along the edge of flower beds. When the blade starts losing its sharpness you have to replace it with a new one.
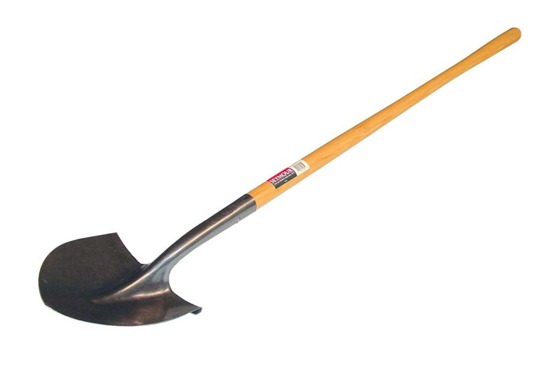
Shovels
A good long-handled shovel is used for mixing large quantities of dirt, compost, soil and other related materials. The long handles of the shovel minimize strain on your back and shoulders. The handle is slightly tilted so that your hand remains in a natural position thereby reducing the pressure on hand and wrist. You can also use the shovel for planting trees and shrubs.
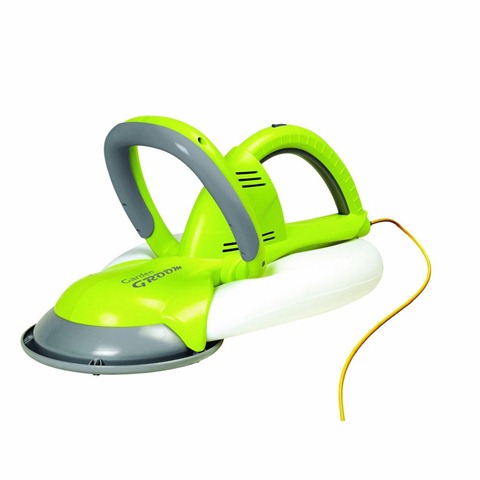
Electric Garden Groom
You no longer need to waste time cleaning up hedge trimmings than trimming them. Garden groom is a wonderful invention that is ergonomically designed to trim your hedge. The groom uses its big rotary blade for trimming and collects all the cuttings in its built-in-cavity bag to keep your yard free from debris. Thus the tool makes disposal easy without requiring you to sweep up afterwards which is the most labor intensive part.
Gas powered three-in-one Push Lawn Mower
Ideal for smaller garden, the compact design is easy to handle in closed spaces and features three-in-one cutting system that includes side discharge option, mulching and a rear bag collection. Simply fold the handle and keep it aside when not in use. Its mulching option returns the essential nutrients back into the soil resulting in a healthier and greener lawn. You can adjust the height of the handle for more comfortable pushing. Overall the Lawn mower is designed to be an user-friendly tool.
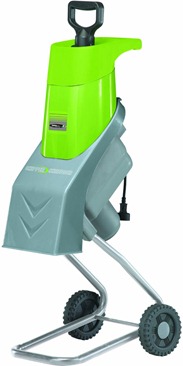
Electric chipper or shredder
This machine powered with electricity makes quick work out of leaves, pruned branches and plant debris. Converts your garden’s rubbish into beautiful munch or compost material thus saving your job of reduce, reuse and recycle. Its lightweight design makes you comfortable in moving it around the yard. The machine is also provided with a safety hopper lock that stops the motor from operating when opened. So there are no more smoky fumes in your garden.
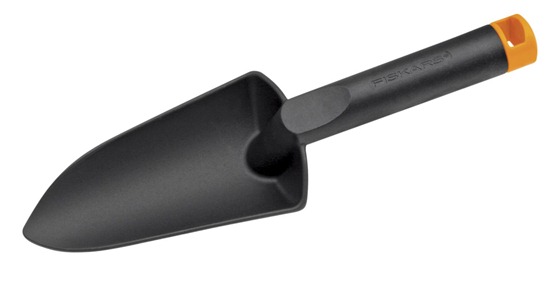
Hand Trowel
Trowels are ideal for digging holes in garden beds; planting small annuals, herbs and vegetables; planting container gardens and mixing soil with compost, fertilizer and other potting mixes. Look for the latest one piece design where the handle will always stay firmly with the head as you take it deep into tough soil. The latest versions have an easy-to-grasp handle. Overall it offers a hassle free performance.
Hand Pruners
Hand pruners are of two types: the anvil type with a deep sap groove and the bypass type which functions like scissors. Anvil pruners do not require much of hand pressure and is easy to cut. Bypass pruners functions well in tighter spaces. Both the models can be used to cut branches up to 1 inch in diameter. The sap groove prevents the blade from sticking when used to cut sappy wood. Hand pruners reduce pressure and impact on wrists. If you take proper care then these pruners will last longer.
Bulb Planters
This tool can be used to make a perfect hole for planting bulbs and other bedding plants. Its long handle saves your back and makes planting easy. For easy operation, simply moisten the soil before planting. Take the planter to the position where the bulb has to be placed and twist the tool to dig hole to the desired depth, then take out the tool from the hole. Now all you need to do is simply drop in seeds or bulbs without straining your back.
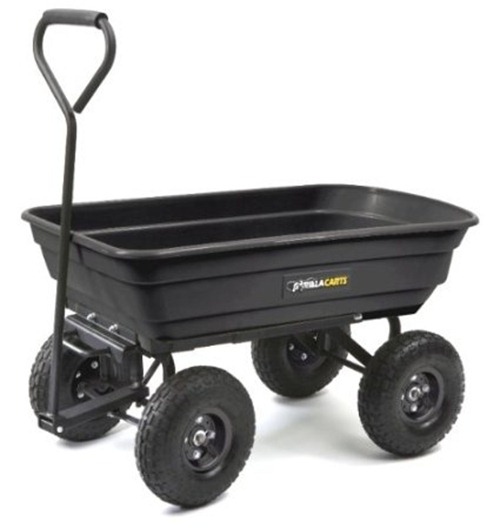
Wheel barrow/ Garden cart
These carts are not only used to transport heavy and bulky materials such as soil, garden debris, plants and compost but also to carry concrete mixing containers. Its light weight makes lifting and managing extremely easy. The latest carts have cushioned loop handle for comfort and powder coated steel frame for extra durability.
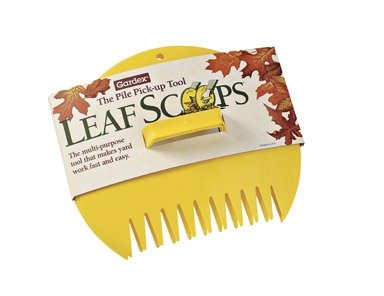
Poly Leaf Scoops
Poly leaf scoops can be used to pick up leaves, thorny or poisonous plant trimmings, pine needles, weeds and gum balls without harming your hands. It is also used for bedding mulch and peat moss. Poly leaf scoops are ideal for all seasons.
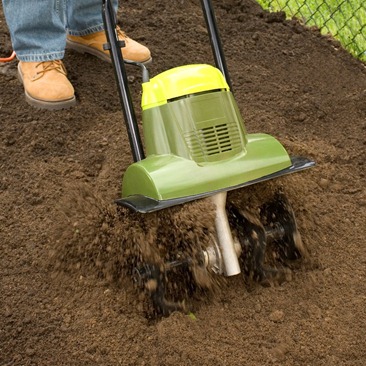
Electric Garden Cultivator/Tiller
Cultivators are generally used to open up and aerate the soil. The tines of this tool help in mixing of materials and loosening weed roots. If you have smaller rocks on your garden soil, no worry, the tiller kicks them out of the soil and to the top where they can be easily removed. Because of its light weight it digs very well without requiring much of man handling or intense arm and back workouts. The only thing you have to do is remove the tines after each use and clean them, which is quite an easy job.
Visit your favorite store and grab these latest tools to make gardening even more enjoyable.
About The Author: Alia is a writer blogger. She loves writing, travelling and reading books. She contributes to Joshia Pastore

