Growing in dirt outside
15.2 years ago cilantro, cucumbers, garlic bulbs, indoor growbox, onions, outdoor seed starting, peas, tomato
I haven’t done many posts in a while about regular old gardening in actual dirt so figured a good time to do an update. Though I enjoy indoor seed starting in my LED grow box and computerized grow box, some plants need to be started outdoors. Today my daughters and I planted the last these plants for fall outdoor planting.
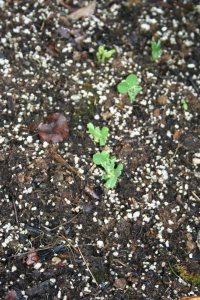
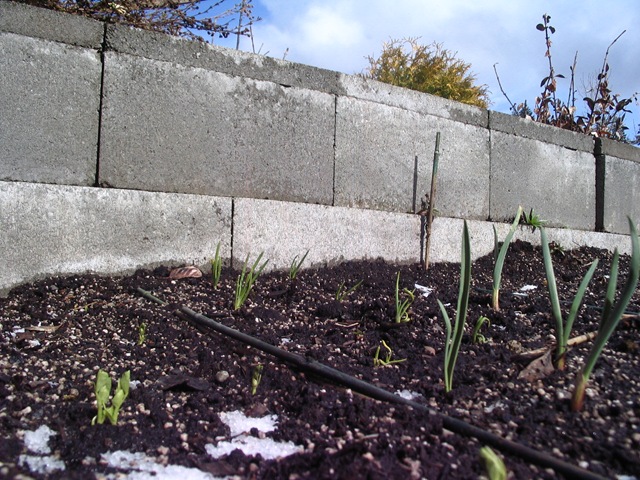
A few weeks ago, we planted garlic, onions, spinach, and peas which are doing well. I love growing these plants no matter how late your spring comes these plants are hardy they are pretty hard to kill off.
Today we planted carrots, lettuce, and cilantro leaving a little space left to do some successive cilantro planting in a couple weeks to ensure I have enough for salsa by the time the tomatoes are ready this summer.
Speaking of tomatoes, they along with jalapeño peppers, and cucumbers (actually flowering) are doing great in the computerized grow box. In the LED grow box I have pumpkin, Black Eyed Susan, small sunflowers, and Purple Coneflowers using Grodan Gro-Blocks.
Nice to finally see some stuff in the ground though still hoping the weather gets better before my cucumbers try to escape the grow box.
Tags: cheap, cilantro, garden seeds, garlic bulbs, growbox, led, outdoor plants, pepper plants, salsa garden, tomato plants, vegetables
Ultimate cheap cold frame/greenhouse
15.2 years ago cheap, outdoor seed starting
For using windows they found lying around from homes in the neighborhood getting torn down the end result looks great. Functional and doing some serious reduce/reuse/recycle in the process.
Adding windows to the top would be nice, but sure finding the right ones for a weatherproof fit could be difficult.
Instructables via Make
Tags: cheap
Chemistry of Gardening: What nutrients do plants need?
15.3 years ago alfalfa pellets, fertilizer, outdoor seed starting
 If I ask my four year old what it takes for a plant to grow she can quickly respond with response, “Sun, water, air, and soil” This is a great answer for photosynthesis since plants need energy from the sun. They leverage the carbon dioxide (CO2) from the air and water (H2O) to create starches and sugar. Now the soil part of this answer is where things get a little more complicated. Soil gives plants the ability for roots to expand and grow but also provides many nutrients to help them as well.
Similar to humans, plants need various minerals to live healthy lives. The primary macronutrients Nitrogen (N), Phosphorus (P), Potassium (K) are required to sustain life. These are the nutrients that plants consume significant amounts which is why these are advertised in big letters on the outside of packages of fertilizer.
MACRONUTRIENTS – PRIMARY
| Nutrients | Benefits | Signs of Deficiency | Sources (N-P-K) |
| Nitrogen (N) | Provides energy to allow vegetative growth. Leafy plants can’t get enough, root plants need very little, fruiting plants need plenty in beginning but too much later in growth cycle will result in big/tall fruitless plants. | Light green to yellow leaves; growth stunted | Bloodmeal (14-0-0) Alfalfa meal (7-3-4) Soybean meal (6-1-2) Cottonseed meal (6-2-2) Fish emulsion (5-2-2) Chicken Manure (3-4-3) Compost (1-1-1) Cow Manure (.2-.2-.2) |
| Phosphorus (P) | Makes plants more stress resistant, allows for fast growth, encourages bloom and root growth. | Red or Purple leaves; cell division slowed | Bonemeal (4-12-0) Chicken Manure (3-4-3) Alfalfa meal (7-3-4) Compost (1-1-1) |
| Potassium (K) | Helps with photosynthesis process, immunities to disease, and increased quality of fruit. | Vigor reduced; susceptible to disease; thin skin; small fruits | Alfalfa meal (7-3-4) Greensand (0-0-3) Wood ash (0-1-3) Chicken Manure (3-4-3) Compost (1-1-1) |
We could live off a simple food like gummy bears for quite a while, but our quality life will decrease once we picked up scurvy and exhibit significant bone and muscle loss. The same idea goes for plants, they can live simply on the primary macronutrients but they will live poor and possibly fruitless (literally) lives. This is where the secondary nutrients come in. With the exception of Calcium, these are not consumed in nearly the volumes as the primary macronutrients though supplementation may be required.
MACRONUTRIENTS – SECONDARY
| Nutrients | Benefits | Signs of Deficiency | Sources |
| Calcium (Ca) |
Helps with cell wall structure imperative for strength of plants |
Growing points of plants damaged | Dolomitic limestone, gypsum, egg shells, antacids |
| Magnesium (Mg) | Required as part of the chlorophyll required for photosynthesis | Yield down; old leaves white or yellow | Epsom salt, Dolomitic limestone, organic material |
| Sulfur (S) | Required for to allow plants to create protein, enzymes, and vitamins. Helps with seed, root growth, and resistance to cold. | Light green to yellow leaves; growth stunted | Rainwater, gypsum |
Finally are the macronutrients, these are the nutrients that most of the time, as long as you are not growing with hydroponics. should exist in your soil and rarely need to be supplemented due to the small amounts that are consumed by plants, nevertheless are still very important for plant growth.
MICRONUTRIENTS
| Nutrients | Benefits | Signs of Deficiency | Sources |
| Boron (B) | Helps in production of sugar and carbohydrate s. Essential for seed and fruit development. |
Small leaves; heart rot (corkiness); multiple buds | Organic Matter and borax |
| Copper (Cu) | Helps in plant reproduction | Multiple buds; gum pockets | Copper sulfate, neutral copper |
| Chloride (Cl) | Helps with plant metabolism | None known | Tap water |
| Iron (Fe) | Helps in formation of chlorophyll | Yellow leaves; veins remain green | Iron sulfate, iron chelate |
| Manganese (Mn) | Helps in breakdown of carbohydrates and nitrogen | Leaves mottled with yellow and white; growth stunted | Manganese sulfate, compost |
| Molybdenum (Mo) | Helps in breakdown of nitrogen | Varied symptoms | Sodium molybdate, compost |
| Zinc (Zn) | Regulates growth and consumption of sugars by the plant | Small, thin, and yellow leaves, low yield | zinc oxide, zinc sulfate, zinc chelate |
Nutrient Deficiency Information from “The Vegetable Gardener’s Bible”
Now you are armed with plenty of information, though unfortunately you can not act on any of this without knowing the chemical composition of your soil. If you simply went by the signs of deficiency (for example yellow leaves) could be caused by one or many nutrient deficiencies. Fortunately you can get this information to act on by running a soil test on your soil. There are a couple options for this if you are simply concerned about primary macronutrients there are cheap DIY home tests, electronic testers, or you can send a sample to a soil lab to give primary/secondary macronutrient and micronutrient levels and recommendations to get your soil back on track. You may also want to check with your local municipal office they may have a cheaper/free option available to you.
Just remember, your perceived lack of a green thumb my have nothing to do with your ability but the chemistry of soil you are working with.
Tags: alfalfa pellets, cheap, compost, garden seeds, led, organic vegetables, outdoor plants, vegetables
Planting seeds outside
16.1 years ago germination, outdoor seed starting, seed storing

I always enjoy any seeds I required to start outdoors since they normally thrive with little effort from myself other than the occasional watering and given I live in the rainy Seattle area that does start until mid-June. Even if you have started many of your seeds indoors to extend your growing season some seeds should always start outdoors since they are sensitive to transplant shock. If you have been to a garden center or nursery lately you can get an idea by what types of plants can be transplanted easily. If you are now looking at your seed packets wondering if you should plant these indoors or outdoors here are my suggestions:
Plants that can be started indoors:
Broccoli, Cabbage, Cauliflower, Celery, Cucumbers, Cukes, Eggplant, Herbs, Kale, Leeks, Lettuce, Muskmelons, Onions (seed), Parsley, Peppers, Swiss Chard, Summer squash, Tomatoes, Zucchini
Plants that should be started outdoors:
Beans, Beets, Carrots, Cilantro, Corn, Cucumbers, Garlic, Muskmelons, Onions (sets), Peas, Potatoes, Radishes, Scallions, Spinach, Turnips, and Winter/Summer squash
You can see from the list there are some plants on both lists which shows that it is definitely possible to transplant some of these sensitive plants, but if you want to avoid the hassle and avoid killing a few plants without requiring surgical precision I would recommend opting for the direct seed planting approach.
Hopefully now you have an idea what you can plant so now comes how to actually do it. Your seed package which will normally give instructions something along the lines of planting the whole package of seeds in a row and thin out to the appropriate spacing. This has been the basic method that many gardeners have been doing for years. This normally leads to thinning 70% of the seedlings or so of the row, which is time consuming and since you can save seeds over a few years this method will definitely be more costly. To avoid this, I plant 1-2 seeds at the proper spacing, if the seeds have been saved for a couple years I add a couple extra seeds since even with proper seed storage the germination rates can decrease over time. After a week or two I simply thin the weakest of the seedlings by chopping them off with a small pair of scissors being careful to not disturb the seedling next to it. If you want to give your larger seeds a little head start, try soaking them in lukewarm water (add inoculants if they are in legume family) overnight before planting them.
Following these steps you should have some great activity in your garden with minimal maintenance and cost.
Tags: cheap, cilantro, garden seeds, garlic bulbs, herb garden, outdoor plants, pepper plants, tomato plants, vegetables


