Black Bean and Corn Salsa Recipe
14.8 years ago corn, peppers, recipe, salsa

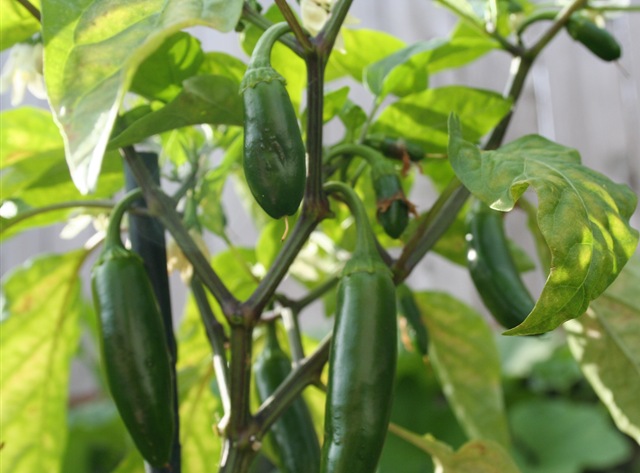
My jalapeños peppers have been growing like crazy and I have had to start harvest to prevent the plants from stop producing. Given my tomatoes are still green I have been itching to do something with them, I decided to make some corn salsa. Given I couldn’t find a recipe that matched the ingredients I had on hand I decided to make my own.

CVG Black Bean and Corn Salsa Recipe
- 2 ears of corn (1-1/2 cups frozen corn)
- 1 small onion (chopped)
- 1/4 cup chopped cilantro
- 1/4 cup sliced green onions
- 2-3 cloves of garlic (chopped)
- 1/4 cup white vinegar
- 3 T sugar
- 1 chopped seeded jalapeño
- 1 chopped unseeded jalapeño
- 1-1/2 cups black beans (canned)
Directions: Cook corn for 2 minutes in boiling water and submerge in ice cold ice water. This helps stop the corn from cooking any more and also make handling while cutting the kernels a little more pleasant. Cut off kernels and add to bowl. Chop/slice remaining ingredients and add to bowl, stir, and refrigerate and serve chilled.
If you like your salsa a little spicier leave both pepper seeded.
Tags: cilantro, garden seeds, garlic bulbs, led, outdoor plants, pepper plants, salsa garden, tomato plants
How to freeze herbs
14.8 years ago cilantro, freezing, herbs, mint, peppermint
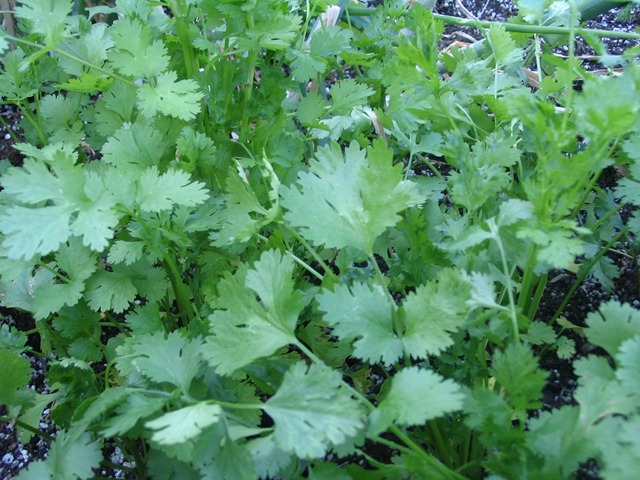
One of my goals in my garden is to make salsa entirely from ingredients from my own garden. In the past I have come close only requiring the purchase of a couple jalapeño peppers from the grocery store but this year with much effort and a strangely hot summer for the Pacific Northwest I have all the ingredients growing in my garden. Though unfortunately the ingredient cilantro could be my elusive ingredient since hot weather means great growth then subsequent bolting. My solution to this problem is successive planting and freezing herbs.
Now drying is also a viable option though I prefer freezing since many moist herbs can lead to mildew without the right equipment to dry efficiently. Frozen herbs also maintain the same potency for several months in the freezer as fresh so no guessing on measurements of your frozen herbs.
There are actually a few different methods for freezing herbs, each of which depends on how you plan on using them later.
The first method is great for keeping the herbs texture and flavor intact. The process is nearly identical to that of freezing berries.
Flash freezing herbs
- Pick the best freshest herbs you can find
- Wash and pat herbs dry
- Lay on layer of wax/parchment paper on cookie sheet
- Freeze overnight
- Place leaves in freezer bag(s), using a straw to suck out excess air
If you are planning on using your herbs in soups or stews, I would definitely recommend the ice cube method.
Ice cube tray method
- Pick the best freshest herbs you can find
- Wash and pat herbs dry
- Hand chop (or use food processor) leaves
- Put chopped pieces into ice cube trays and fill with water of stock
- Freeze overnight
- Place cubes in freezer bag(s), using a straw to suck out excess air. You may also put the trays right into the freezer bag sucking out the air if you wish.
Note: Also try mint with a little extra water to add to drinks during the summer (or winter)
Now if you are planning on using your herbs for dishes that require oil such as Pesto with your Basil. This is a great time to do a little up front preparation.
Ice cube tray method (with oil)
- Pick the best freshest herbs you can find
- Wash and pat herbs dry
- Add 1/3 cup of oil for each 2 cubs of herbs to food processor or blender
- Put chopped pieces into ice cube trays
- Freeze overnight
- Place cubes in freezer bag(s), using a straw to suck out excess air. You may also put the trays right into the freezer bag sucking out the air if you wish.
Now in a few months you can add some parmesan and have some previously frozen pesto in the middle of winter.
Tags: cilantro, herb garden, outdoor plants, pepper plants, salsa garden
Growing peppers at high latitudes
15.1 years ago hydroponics, indoor growbox, peppers

Here in the Seattle area we are, as you say, latitudelly challenged. We are fortunately to have the Pacific Ocean to give us mild winters and summers though our distance from the equator provides our plants with less intense light and a relatively short growing season for summer crops. One in particular difficult summer crop are peppers.
This is important because one of the major exports of my garden are the ingredients to allow me to make homemade garden salsa (tomatoes, garlic, onions, cilantro, jalapeño peppers) Al ingredients come from my garden (except for jalapeño peppers) This year I am determined to fix this.
I have a couple strategies for doing this, the first is to “start early” pepper plants require 80-110 days from seedling to harvest, timing is everything. Given our late winters here over the past couple years, I don’t really have much of a cushion here and would also be nice if the peppers were ripe when the tomatoes are getting red as well. To get a head start many weeks ago I planted several jalapeño pepper seeds and they currently are turning into some great looking pepper plants in my grow box. As they have grown I have potted them up to encourage them to continue to grow vigorously.
Not wanting to put my eggs peppers in one basket, I have decided to try a few different techniques in case one completely fails I hopefully have a couple backups:
- Grow pepper plant in grow box in WonderSoil
- Grow pepper plant hydroponically using a Grodan Gro-Blocks
- Grow pepper plant in the ground beside my tomatoes
- Grow pepper plant in large pot in sunniest location
I honestly can not really predict the outcome of this experiment. The grow box as the advantage of accurate temperature control but the CFLs though work great can’t compare to full sun. On the other hand outdoors has the great light intensity of the actual sun though given the pepper plants can stop growing lacking 60 degree nights and at least 70 degrees during day. Given we don’t have too many nights greater than 60 degrees the grow box might have a chance.
UPDATE — 05/25/2009
Plant grown in WonderSoil in grow box at temperature controlled to remain above 60 degrees at night and a high of 80 during the day. This is amazing results compared to the 2.5 inch plants I started with less than a month ago.

Plant grown hydroponically using a Grodan Gro-Blocks also in temperature controlled grow box.

Plant grow in actual dirt outside in good light

Plant grown in pot outside…well this one is already out after some high winds and cold mornings this one was looking pretty bad to I brought to the infirmary (the grow box) to bring it back to life, which seems to have done wonders.

The obvious winner at this point is the pepper plant in WonderSoil in the grow box, though I have noticed some recent growth in the outdoor plant now the weather has started warming up, so might be some time for Mother Nature to redeem itself. Overall I have been very impressed with the results of the grow box but still need to see if I can get flowers and fruit…until the next update…
UPDATE — 06/20/2009
We were blessed with some warm weather so the outdoor potted plant has been doing great blossoming and almost a dozen of good sized peppers growing.
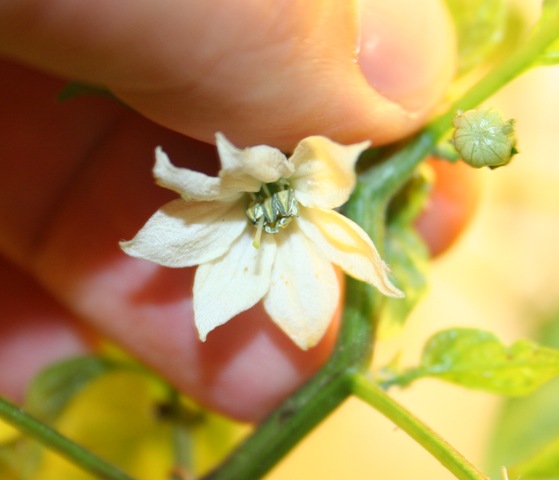
I have seen plenty of blossoms on the pepper plants in the grow box though I have not have and fruit set. I have two theories what is causing this, first is we have hat some hot weather with the garage getting over 85 degrees even with best exhaust and airflow it was hard to keep the temperature from exceeding 90 degrees which causes the blossoms to drop. The second reason is I have been attempting to hand pollinate the flowers with the absence of some nice bees to do the work for me. I have been using a fine paintbrush without much luck. Switching to having better airflow and using a Q-Tip to simulate a bees bottom.
The plant I had in the ground eventually got overtaken by a pumpkin plant which I removed and moved to the grow box given it had not shown any significant signs of growth since I transplanted it there.
Right now seems the best method is grow the pepper plant to about 18 inches and just let mother nature take care of things at that point.
Tags: cheap, cilantro, garden seeds, garlic bulbs, growbox, led, outdoor plants, pepper plants, salsa garden, tomato plants, vegetables
Growing in dirt outside
15.2 years ago cilantro, cucumbers, garlic bulbs, indoor growbox, onions, outdoor seed starting, peas, tomato

I haven’t done many posts in a while about regular old gardening in actual dirt so figured a good time to do an update. Though I enjoy indoor seed starting in my LED grow box and computerized grow box, some plants need to be started outdoors. Today my daughters and I planted the last these plants for fall outdoor planting.
A few weeks ago, we planted garlic, onions, spinach, and peas which are doing well. I love growing these plants no matter how late your spring comes these plants are hardy they are pretty hard to kill off.
Today we planted carrots, lettuce, and cilantro leaving a little space left to do some successive cilantro planting in a couple weeks to ensure I have enough for salsa by the time the tomatoes are ready this summer.
Speaking of tomatoes, they along with jalapeño peppers, and cucumbers (actually flowering) are doing great in the computerized grow box. In the LED grow box I have pumpkin, Black Eyed Susan, small sunflowers, and Purple Coneflowers using Grodan Gro-Blocks.
Nice to finally see some stuff in the ground though still hoping the weather gets better before my cucumbers try to escape the grow box.
Tags: cheap, cilantro, garden seeds, garlic bulbs, growbox, led, outdoor plants, pepper plants, salsa garden, tomato plants, vegetables
How to collect and save onion seeds from your garden
15.4 years ago onions, seed saving, seed storing

Last year I collected cilantro seeds and they were a great success in my garden that this past Spring I made a commitment to myself that I would try to collect more seeds this season. Though I wanted to get more I was able to collect seeds from my onions, jalapenos, and cilantro. The jalapeno seeds were pretty easy I set some seeds aside on a paper towel while making some salsa. After they appeared to be dry I threw them in a brown paper lunch bag.
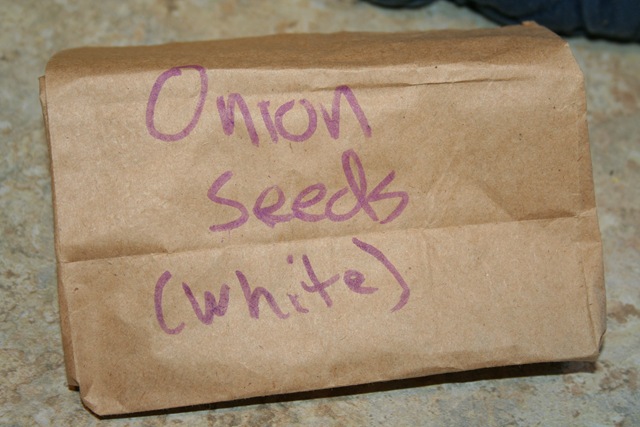
For the onions once the florets (flower balls you see above) got real ugly and dry and I could see the black seeds emerging I placed them in a paper bag before the birds got to them. I then put the bag on top of our kitchen cabinets and forgot about them for couple months. Today I pulled the bag down and confirmed they definitely were dry. To separate the seeds from the pods I broke apart (which happens easily) and placed the contents into a metal strainer. I gently broken open any remaining pods and agitate the strainer. This causes the small black seeds to move to the bottom, allowing the pods to float to the top and forcing many of the stems to fall through.

I then skimmed off as many of the stems/pods as possible leaving and putting the seeds into a brown paper bag until I can get into town to buy some more manageably sized brown envelopes (recovering from Seattle snowstorm)
After a few minutes of work I now have hundreds of onions seeds which I probably only have use for couple dozen. Seed exchange anyone?
Tags: birds, cheap, cilantro, garden seeds, led, salsa garden, vegetables
First tomato of the season
15.8 years ago tomato

Well it is official I have my first official red tomato of the season this morning while watering. It was from a hanging basket my dad gave to me for Father’s day called "Tom’s Tumbler" which should cascade over providing lots of cherry tomatoes.

I also noticed some of my "Early Girls" were also starting to produce so fresh garden salsa should be coming soon.
Tags: led, salsa garden, tomato plants


