Giveaway: $1354.83 worth of fresh produce
14.4 years ago giveaway, harvest, seed saving, seeds
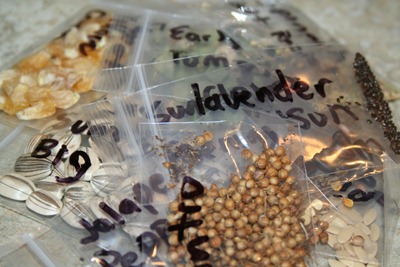
Ok there is a little catch, you have to plant the seeds and grow the produce yourself and have perfect weather and unlimited space to do it. Over the past season I have intentionally harvested more seeds than I needed just for the purpose of sharing them so here is your first chance to get some of CVG’s seed stash. This should be a good addition to your current selection of seeds or great for a person just starting out next year.
The harvest values were calculated using my most profitable vegetables in your garden post, so numbers are estimated but I tried to be as accurate as possible. Below are also links to my harvesting techniques of most of the “Self” seeds below (just realized I never wrote up cilantro and radish seed harvesting so expect to see these soon).
CVG’s Seed Stash (Variety Pack)
| Seed | Seed Type |
Seeds (Est.) | Harvest Value (Est.) |
| Jalapeno Pepper | Self Collected | 10 | $ 45.00 |
| Radish | Self Collected | 30 | $ 11.66 |
| Lavender | ? | 50 | $ 10.00 |
| Cilantro/Coriander | Self Collected | 100 | $ 525.00 |
| Bhut Jolokia pepper | Self Collected | 10 | $ 150.00 |
| Sunflower (Big) | Self Collected | 20 | $ 10.00 |
| Spinach | Self Collected | 25 | $ 11.25 |
| Carnation | ? | 30 | $ 5.00 |
| Onions (White) | Self Collected | 50 | $ 12.94 |
| Tomato (Early Girl) | Hybrid | 15 | $ 233.55 |
| Corn (Sweet Yellow) | Self Collected | 25 | $ 31.25 |
| Pumpkin | Self Collected | 15 | $ 150.00 |
| Carrots (Finger) | Hybrid | 70 | $ 15.58 |
| Sunflower (Evening Sun) | Hybrid | 10 | $ 10.00 |
| Cucumber | Heirloom | 30 | $ 116.10 |
| Peas | Self Collected | 30 | $ 12.50 |
| Mint (Spearmint) | Hybrid | 50 | $ 5.00 |
| Total | $ 1,354.83 |
As always just enter a comment and a winner will be randomly selected using my patented “CVG’s Contest Winner Pickorama” on Jan 1st, 2010. This contest is open to everyone inside/outside the United States pending any export/import of regulations of sending seeds, which I am still doing some research on.
Tags: cheap, cilantro, garden seeds, outdoor plants, pepper plants, tomato plants, vegetables
Hometown Seeds – variety pack give away
14.5 years ago giveaway, seed saving, seeds
Recently I was approached by Hometown seeds if I would be interested in receiving a variety pack of their top selling seeds, my first instinct was “woohoo free stuff.” Though instead I decided it would offer the seeds to my awesome readers. Well that and with all the seed saving I have been doing this year I have more seeds than I know what to do with.
Hometown Seeds loved the idea so much that they have graciously increased the offering to three sets of garden seeds variety pack, so in normal fashion enter a comment and after a week I will somehow randomly pick three winners and the seeds will be sent out to you.
The variety pack includes (1) packet of each of the following:
- Slow Bolt Cilantro
- Alaska Shasta Daisy
- Giant Tetra Snapdragon
- Elite Mix Wildflower
- Marvel of Peru Four O’clock
- Yellow Pear Tomato
- Purple Haze Carrot
- Waltham Broccoli
- Casaba Mellon
- Gourmet Mix Lettuce
The total value of this package is $19.80 so good luck everyone!
Winner will be chosen at Midnight 12/9/2009 (Pacific)
Tags: cheap, cilantro, garden seeds, tomato plants, vegetables
Free tomato seeds
14.5 years ago cheap, free, seeds, tomato
 If you head over to Campbell’s Help Grow Your Soup site you can get some free tomato seeds and while you are at it vote for a barn which Campbell’s will give $250,000 to restore. So free seeds for you and one dollar for a barn restoration.
Tags: cheap, garden seeds, tomato plants
Best DIY cheap soil moisture sensor
14.5 years ago cheap, electronics, moisture sensor, water
My first version of my cheap soil moisture sensor has worked great for me but it did have a couple flaws. The first issue was construction, though I had great luck on my first attempt though after trying to recreate additional sensors given the small amount of gypsum between the sensor and the probes were so thin it was extremely easy to crack the sensor and I normally have about a 25% success rate on later creations (must have had beginners luck on the first one.
The second issue was durability. Given we are playing with gypsum and as it is suspended in water it will eventually breakdown and there is very little we can do about it. Though with my latest changes to my automated grow box which includes automated watering based on moisture content I want to ensure my measurements stay accurate throughout the season. To help with this I have decided to increase the sensors size and also am using galvanized nails to prevent rusting. After a few attempts I have come up what I feel is a pretty foolproof method of creating a moisture sensor.
How it works:
There were many questions in the comments in the previous post so hopefully I can clear this up a little here.
Technically a gypsum block measures soil water tension. When the gypsum block is dry it is not possible for electricity to pass between the probes, essentially making the probe an insulator with infinite resistance.
As water is added to the problem more electrons can pass between the probes effectively reducing the amount of resistance between the problem to the point when it is fully saturated where the probe has virtually zero resistance. By using this range of values you can determine the amount of water than exists in your soil.
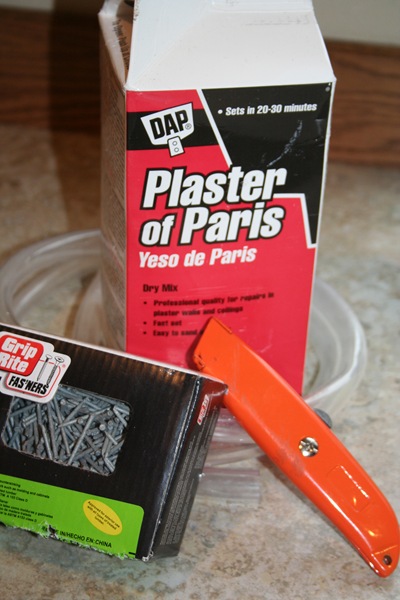
Parts for cheap soil moisture sensor:
- Plaster of Paris
- 2 Galvanized Finish Nails
- 1/2 inch plastic tubing
- utility knife
Construction:
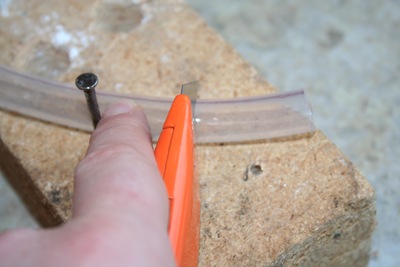
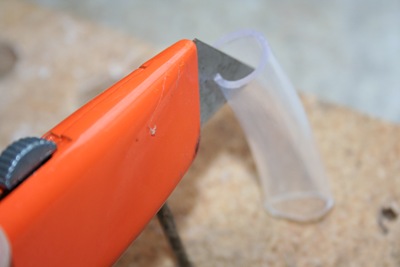
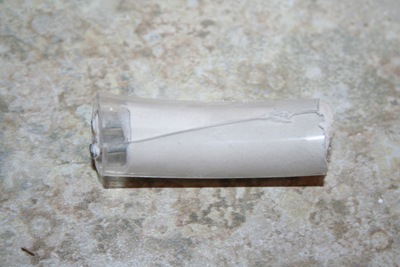
Take your utility knife and cut the tubing slightly longer than your galvanized finishing nails. Try to make the cut as straight as possible though it doesn’t have to be completely perfect.
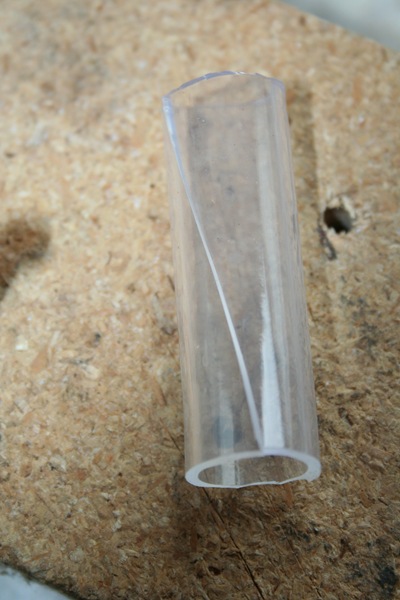
Use your utility knife to cut the smaller plastic tube lengthwise, this will allow easier removal of your soil sensor after the mold cures.
Optional: Make the cut diagonally to prevent a potential vertical fracture line.
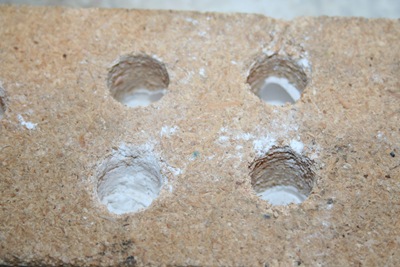
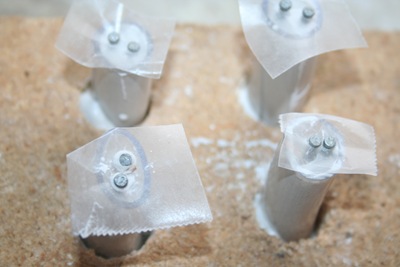
If you were very careful on you vertical cuts you can avoid this step, but to completely avoid spilling plaster onto my workbench I drilled four holes slightly larger than your tubing. I used these holes for support but also to catch any of the plaster in the gaps from you less than accurate vertical cuts.
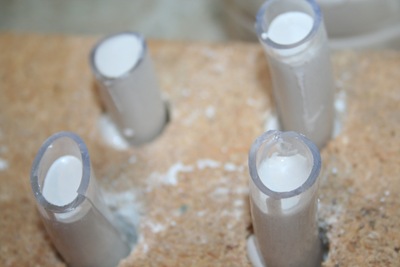
Being careful that the tubing fits together where you split the tubing vertically, insert the tubes into the holes (or carefully on a flat surface) Mix Plaster of Paris and carefully fill with to the top. The friction between the tubing should keep a water tight seal where you made the cut, though if the plaster is a little thin and it appears to be leaking through wait a couple minute for the plaster to setup some and try again, at that time it should not have the viscosity to seep through the very small gap that may be causing the leak.
Take your two galvanized nails and push them through a small piece of wax paper. You may also allow the plaster to setup for a few minutes and then float the nails in the the plaster. I like the first method since gravity will help ensure they fall straight down and parallel to each other. As for spacing, I have done some experimentation with the gaps between the probes and my conclusion was, it doesn’t make much difference. As long as there is a gap (they are not touching) you should get reliable results.
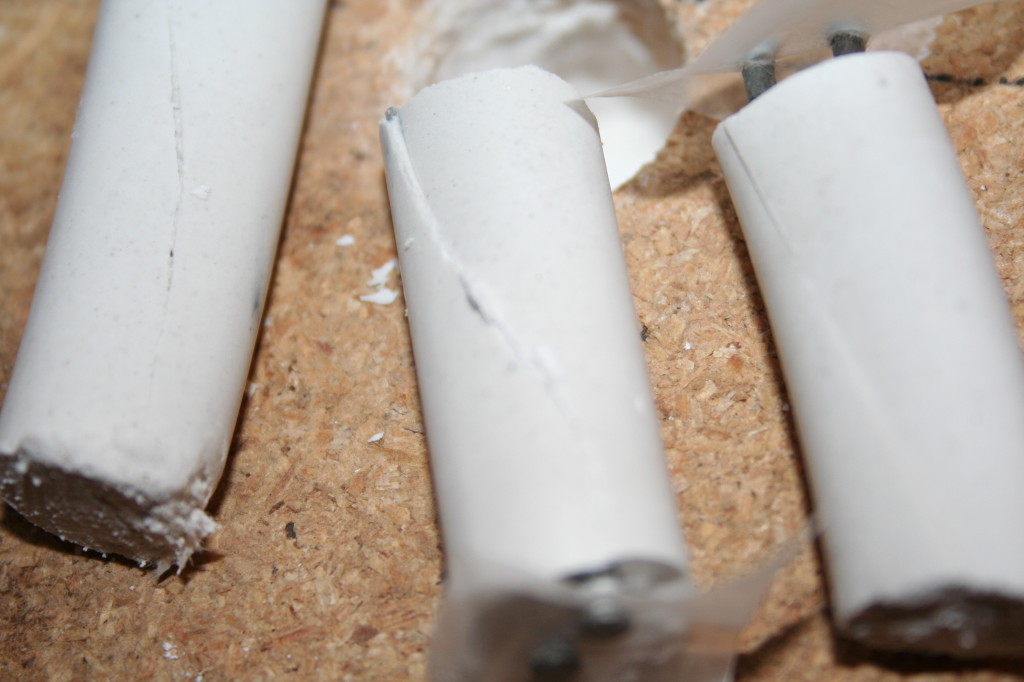
After allowing the sensor to cure for about and hour remove it from the holes you drilled in the wood.
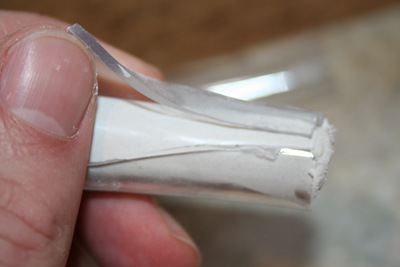
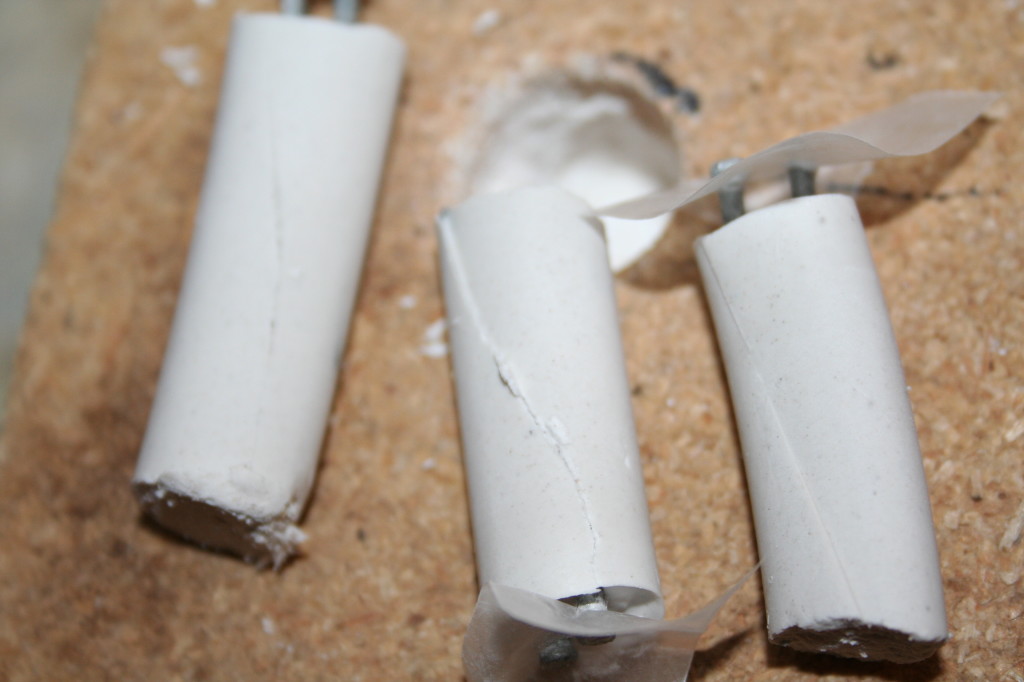
Gently pull back the plastic tubing and you have a nice clean soil sensor.
Lay them out to dry for 24 hours to cure completely and their construction is complete.
For attaching the wires there are a couple options. The best would be to solder them to the probes though to do this you need to heat up the nail hot enough to enable a strong solder connection. My little 15W soldering iron just can’t produce the heat for this so I am option for the wire wrap method. I take about an inch of wire and strip off about an inch of insulation and tightly wrap around the probe. Given copper will rust and could be a point of failure you will want to insulate this connection and the probes from the moisture. A few dabs of hot glue works pretty well. I am planning on trying liquid plastic, though I am currently out and when I have some on hand I will update with how it went.
How to use your cheap soil moisture sensor
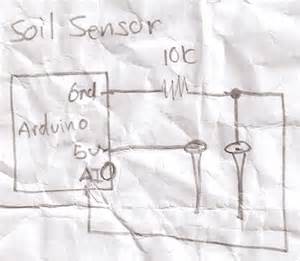
You can simply hook up a multi-meter and check the resistance though if you want to create anything automated you would need to use an integrated circuit (IC) or a electronics prototyping platform such as Arduino. By applying voltage to one side of the sensor and using a voltage splitting circuit connected to ground and an analog input you can then measure the voltage making it through the probe. The higher the voltage, the higher the moisture content of the soil.
Conclusion
The above should give you everything you need to know to create your own cheap soil moisture sensor and how to use it. This can be used as a moisture soil sensor for watering your indoor plants like I am using it. This same moisture sensor could be for monitoring your outside soil moisture content to trigger (or preempt your irrigation system) to save some money on your water bill and/or maintain consistent moisture levels in your plants which could drastically improve water sensitive crops such as tomatoes.
Tags: arduino, cheap, growbox, led, outdoor plants, tomato plants, vegetables
Do have have to follow the directions on the back of my seed packet?
14.7 years ago garden planning, seeds
Though the advice on the back of a seed packet gives some great information, they are recommendations and their advice may not exactly apply to your garden.
First is row spacing, many times you read something like “plant seeds 3 inches apart in rows 1 foot apart” This brings up some immediate logic of why can the plants be 3 inches apart one way but 12 inches in another. This sort of thinking the premise for intensive gardening techniques such as square foot gardening. This is where instead of growing your plants in rows you plant them in a grid pattern making best use of your growing space.
Now even these spacing requirements are actually optional. All plants compete for resources to survive. This can be sunlight (or even shade from sunlight), nutrients, water, airflow, etc. Depending on the quality of your soil and frequency of watering you can push the limits of your growing space. Assuming you add some fresh compost easy season and possibly do some side dressing with an organic fertilizer like fish emulsion or alfalfa pellets you can easily reduce this space and still have high yields. I did just that with my cherry tomato plants whose seed packet is above. I planted these about a foot apart and got great growth and yields.
One other factor is how you grow. If I was growing my tomatoes in cages my foot space probably wouldn’t even be technically possible but since I grew them on a netting this allowed for spread out much more naturally and provide adequate sunlight and airflow. Keep this in mind when growing sprawling plants such as cucumbers and squash using some vertical space can free up the valuable growing space on the ground.
The last factor depends on when you are going to pick them. If you are growing onions to simply pick as green onions you don’t have to give then the 3-4 inches needed for their bulbs to grow. You could easily plant an inch apart since you are going to pick them before they are competing for resources. A similar idea is growing for micro greens, plant picked when just a few inches tall.
Though I wouldn’t say to completely ignore the back of your seed packets, just make sure to use it as a guide not a requirement.
Tags: compost, garden seeds, organic vegetables, outdoor plants, tomato plants
Garden Salsa recipe
14.8 years ago cilantro, garlic bulbs, harvest, onions, recipe, tomato
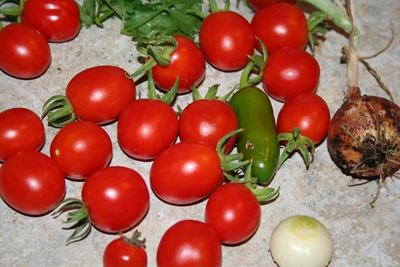
Big moment this week, I was able to make salsa entirely from ingredients. I normally don’t use cherry/grape tomatoes for salsa but my Early Girls are not that early this year and have not quite turned red.
CVG Garden Salsa Recipe
- 2-3 tomatoes (or 12-15 cherry/grape tomatoes)
- 2 cloves garlic
- 1 small onion
- green onion
- 5 sprigs of cilantro
- tablespoon vinegar
- 1 jalapeno pepper (seeded)
- sugar
Directions: Coarsely chop tomatoes (removing seeds, though if I few sneak in it is not a big deal), onion, and green onions and add to bowl. Finely chop garlic, cilantro, and seeded jalapeno pepper and add to mixture. Add vinegar to bowl and mix thoroughly. Let sit for 10 minutes and add sugar until salsa does not have a spicy aftertaste (normally 1-2 teaspoons) If you like the spice skip the sugar and include seeds from the jalapeno.
Tags: cilantro, garden seeds, garlic bulbs, pepper plants, salsa garden, tomato plants
