Broccoli in the winter garden
12.3 years ago Uncategorized
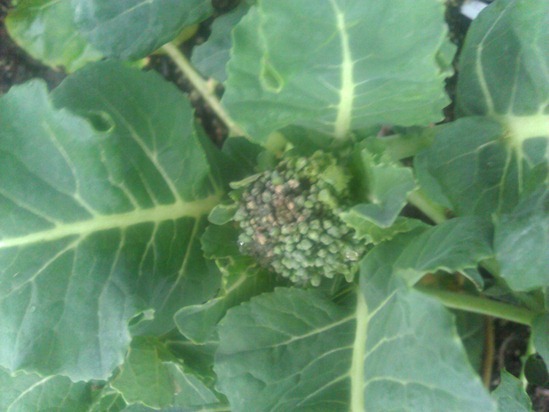
Not exactly time to harvest but nice to see a little life in my garden after our snow has melted away…
Frugal way to grow a garden with bird seed for temporary spaces
12.3 years ago birds, seed saving
Many people love bird watching. It is the favorite pastime of many gardeners too. For drawing the birds to the garden, you need to use the feeders. Instead of buying and storing the feeders every season, you can as well consider turning a special part of your garden exclusively for attracting birds. If the feeders are able to sprout, you can use them for growing the plants. Once the plants grow and mature, the birds can eat the seeds from the plants directly. Apart from that, you can pick the best seeds and store them away for the next season. If this interests you, here is how to grow bird seed.
1. Find a special spot
If you have a large garden, you can make use of the space effectively. Divide it into many parts. One special spot can be left for the birdseeds. The first thing to do is to find the best spot in your garden to attract the birds. The best thing is to consider an area away from your main garden. The birds will not disturb your garden and other useful items there.
2. Choose a good mixture of seeds
Choose a good mixture of seeds that can produce a wide variety of flowers. This can add a lot of color to the area and attract a lot of different types of birds. When the plants grow and produce different kinds of plants and flowers, various birds come to your garden automatically. In order to make the seeds grow well, you have to take the necessary steps.
3. Growing the plants
The soil should be well suited for growing the type of garden and plants you are looking for. First, begin with loosening the soil with a garden hoe. This will make it easy for planting the seeds. When the soil is ready, take a handful of seeds and scatter them on the loosened soil. Rake some topsoil over the scattered seeds. Sprinkle some water lightly over the topsoil to provide enough moisture for the sprouting.
4. Harvest the seeds
After the plants grow well, they start producing the seeds. Harvest these seeds at the end of the season. Store them properly in an airtight container. They can be used for feeding the birds during the winter season. Or, you can also leave them on the plants so that the birds eat them directly from the plants.
The best thing about these plants is that they will produce different kinds of colorful flowers before producing the seeds. So you will be able to enjoy different kinds of flowers and plants in your garden. At the same time, you can get a large amount of seeds for the next season. This is one of the best ways to produce healthy bird seeds in your own garden without spending money too often. Once you get used to the procedures, it will be easy to maintain the garden and follow the different procedures for taking care of the things. Choose an ideal location in your garden and spend some time with the birds daily. Children can also learn a lot of things from your garden.
About the author: Alia Haley is a blogger and writer. She loves writing on technology and luxury. Beside this she loves gardening in free time. She recently bought a book on Japanese Garden. These days she is busy in writing an article on patio umbrellas.
How to make your own sauerkraut
12.3 years ago cabbage, cheap, sauerkraut
Sauerkraut is not only a tasty condiment to add to a hot dog or various German dishes but also is loaded with tons of beneficial bacteria which can help enhance your gut flora to make you more regular but also aid in allowing your body to absorb more nutrients from the foods you eat leading to higher satiety. So in simple terms sauerkraut can actually help you lose weight.
Now before you head off to the grocery store to buy yourself a tub of sauerkraut, if it comes in a jar most likely it has been cooked killing all the beneficial bacteria…assuming it was actually fermented to begin with. Some sauerkraut is sold as basically cabbage soaked in vinegar, though it may taste similar it does not have the added health benefits. Though you probably can find some fresh sauerkraut at a specialty store in your area it is actually very easy to make with only two ingredients required.
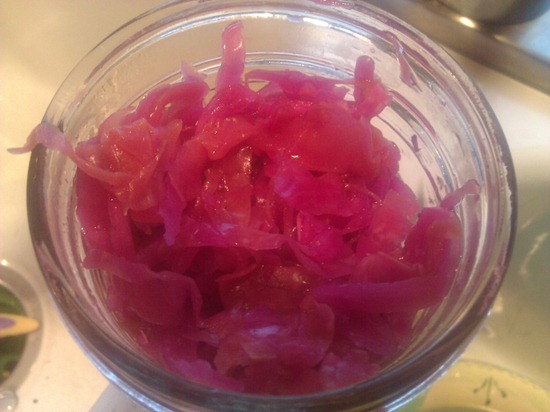
Step 1: Slice the cabbage. Start with with 2 heads of cabbage (for pink sauerkraut like mine above use equal amounts of red and green cabbage) and cut into each one into quarters. Remove the hearts (the non leafy part in the middle) and either discard or even better set aside to create some tasty pickled cabbage hearts. Use a nice big/sharp knife and slice the cabbage as thin as you can. If you have a cabbage shredder or mandoline slicer
go ahead and take advantage of these. If you find any pieces that seem a little large go ahead and give them an extra chop.
Step 2: Layer with salt. Portion out 3 tablespoons of non-iodized salt (kosher, pickling, or sea salt are great choices) this is because iodine many times is used to kill bacteria in water and in the case we want to keep those little buggers alive and kicking. Take a couple handfuls of sliced cabbaged and lay as a layer into a kraut pot, food grade plastic bucket
, or any other non-reactive container that will easily hold your pile of cabbage. Over each layer apply a sprinkling of salt and repeat until all of your cabbage and salt are in your container.
Step 3: Mash the cabbage. Now there are official tools for this job but any sort of blunt object will do. Some ideas (end of a baseball bat, mason jar, large piece of dowel, you get the idea) All you do is beat the crap out of the cabbage to help get the water to begin leaching out. At the end of the process you should have enough liquid to cover the cabbage. If you do not have enough let it sit for up to 24 hours and see if the salt draws some remaining water out of the cabbage. If you still do not have enough water to cover add some distilled water (tap water has chlorine and will kill our bacteria friends) along with 1 teaspoon of non-iodized salt for each cut of water.
Step 4: Drown the cabbage. Now it is time for some fermentation, this chemical process needs to be completed in an environment free from oxygen otherwise again out little friends will bite the bullet. Cabbage floats in water so we need to drown the stuff, this is pretty easy by taking an object approximately the diameter of your container and weight it down with container filled with water for example. Cover this with plastic grocery bag, secure with rubber bands or string in you have fruit fry problems in your area.
Step 5: Let the fermentation process do its thing. After about a week the liquid will change from smelling like the salty ocean to more like vinegar. At this point you can eat some, but for the full benefits and bolder taste give it 3-4 weeks to fully ferment.
Once your batch is done you can store in the refrigerator for up to 6 months, if you find yourself going through the stuff well before its 6 month time is up you can scale up your quantities or maybe even invest in an official German Sauerkraut Pot which is a little expensive for me, but would look better than the bucket sitting on my counter with a plastic grocery bag cover and comes with a ceramic weight that fits perfectly to the diameter of the kraut pot…
Cheap hoop house heating
12.3 years ago cold season crops, outdoor seed starting, winter garden
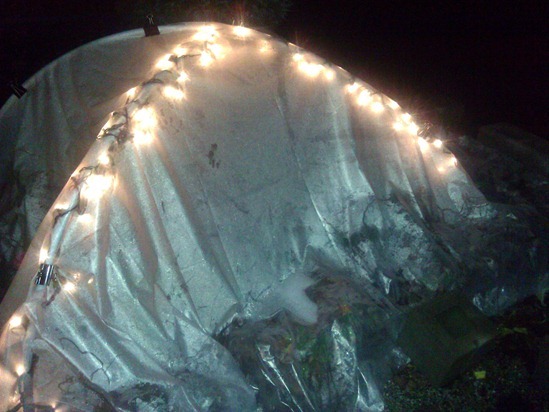
Before you put those Christmas lights away into storage you may want to keep a couple strings (non-LED) set aside to use for heating a hoop house. These little lights can help boost the temperature 5-10 degrees inside your enclosure, while this will not allow you to grow tomatoes and peppers during the wintertime. This may be enough to allow you to keep a winter garden for the whole winter and/or provide just enough warmth to bring out your spring seedlings a couple weeks earlier.
