Drying peppermint leaves
14 years ago dehydrator, herbs, peppermint

Excited to try out my new to me food dehydrator, I collected some peppermint leaves from my 2 year old peppermint plants which is fighting the confirms of the 1 gallon pot I have used to keep it from consuming my entire flowerbed, lawn, house, etc.
For the best potency, it is best to collect mint right before they start to flower and first thing in the morning when their oils are at their peak. Given it is a couple months before they will be flowering I picked them in the early afternoon.
If they were dirty you should wash them off and pat them dry with a paper towel and add directly to your dehydrator. In my case we had a rain the night before and they were very clean so I skipped the washing step.
Next I simply put them into the dehydrator at 100F degree and in a few hours later they were all crumbly and looked like what you see below.

To store the leaves I went with the poor man’s vacuum packing technique…Ziploc bag and sucking the air out with a straw which should keep the herbs fresh for a few months.

Lastly I tried out the product by taking a pinch of the leaves and quickly breaking them up with my fingers and added them to a tea strainer.

After a few minutes of steeping I had some good looking and tasting peppermint tea.

I would say my testing of my new dehydrator was a success…now off to see what else in the fridge I can dry out.
Tags: cheap, garden seeds, herb garden, outdoor plants, pepper plants, peppermint plant, vegetables
EcoSmart Garden Insect Control Review and Giveaway
14.4 years ago aphids, giveaway, peppermint
One of the major disadvantages to growing plants indoors is the lack of beneficial insects. In a larger environment like a greenhouse you could release some ladybugs to initiate an aphid slaughter though the thought of 1500+ ladybugs investing my garage where my grow box resides does not seem like a good idea. I am always open to trying out new products so when EcoSmart contacted me if I was interested in trying out their garden insect control products I jumped at the opportunity.
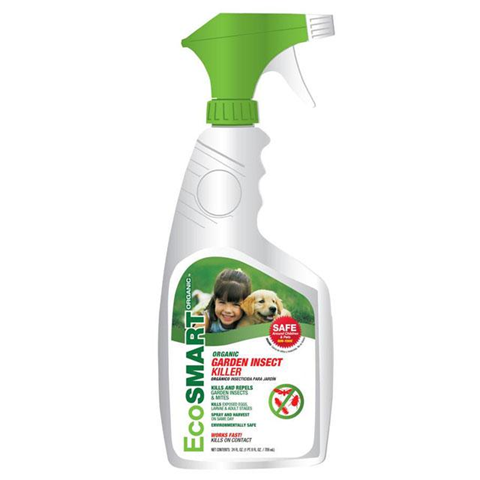 I explained the problems I have with pests in my indoor growing and they suggested “Garden Insect Killer” Their documentation states, “Kills and repels garden insects and mites. Kills exposed eggs, larvae and adult stages.” This seemed to be exactly what I was looking for so once the first onset of pests arrived I applied liberally to tops and bottoms of leaves and so far the results are great. Not only were this effective on the little buggers, given the selection of Rosemary, Peppermint, Thyme, Clove oils it actually makes the garage smell pretty nice as an added bonus.
Want to try this out for yourself the great people at EcoSmart have offered to give away a bottle of any of their products. So under normal rules, enter a comment and a winner will randomly be selected and sent a bottle of their choice. Comment must be submitted by Friday, December 18th 2009 at midnight (Pacific) to be considered for the drawing. Good luck.
Tags: growbox, outdoor plants, pepper plants, peppermint plant
How to freeze herbs
14.8 years ago cilantro, freezing, herbs, mint, peppermint
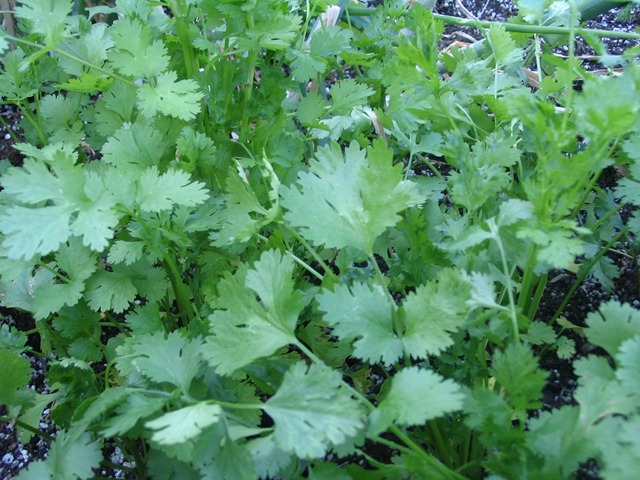
One of my goals in my garden is to make salsa entirely from ingredients from my own garden. In the past I have come close only requiring the purchase of a couple jalapeño peppers from the grocery store but this year with much effort and a strangely hot summer for the Pacific Northwest I have all the ingredients growing in my garden. Though unfortunately the ingredient cilantro could be my elusive ingredient since hot weather means great growth then subsequent bolting. My solution to this problem is successive planting and freezing herbs.
Now drying is also a viable option though I prefer freezing since many moist herbs can lead to mildew without the right equipment to dry efficiently. Frozen herbs also maintain the same potency for several months in the freezer as fresh so no guessing on measurements of your frozen herbs.
There are actually a few different methods for freezing herbs, each of which depends on how you plan on using them later.
The first method is great for keeping the herbs texture and flavor intact. The process is nearly identical to that of freezing berries.
Flash freezing herbs
- Pick the best freshest herbs you can find
- Wash and pat herbs dry
- Lay on layer of wax/parchment paper on cookie sheet
- Freeze overnight
- Place leaves in freezer bag(s), using a straw to suck out excess air
If you are planning on using your herbs in soups or stews, I would definitely recommend the ice cube method.
Ice cube tray method
- Pick the best freshest herbs you can find
- Wash and pat herbs dry
- Hand chop (or use food processor) leaves
- Put chopped pieces into ice cube trays and fill with water of stock
- Freeze overnight
- Place cubes in freezer bag(s), using a straw to suck out excess air. You may also put the trays right into the freezer bag sucking out the air if you wish.
Note: Also try mint with a little extra water to add to drinks during the summer (or winter)
Now if you are planning on using your herbs for dishes that require oil such as Pesto with your Basil. This is a great time to do a little up front preparation.
Ice cube tray method (with oil)
- Pick the best freshest herbs you can find
- Wash and pat herbs dry
- Add 1/3 cup of oil for each 2 cubs of herbs to food processor or blender
- Put chopped pieces into ice cube trays
- Freeze overnight
- Place cubes in freezer bag(s), using a straw to suck out excess air. You may also put the trays right into the freezer bag sucking out the air if you wish.
Now in a few months you can add some parmesan and have some previously frozen pesto in the middle of winter.
Tags: cilantro, herb garden, outdoor plants, pepper plants, salsa garden
Propagating peppermint and lemon verbena – UPDATE
15.4 years ago lemon verbena, peppermint


As you can see from the picture, my peppermint and lemon verbena propagation has come a long quite well. I did have a little aphid infestation on the peppermint plant which I attempted to take care of with manual pinching, but eventually I gave up and chopped off the top off the plant. I then followed up with a hefty dose of insecticidal soap to the soil and the remaining stem. I would have preferred an even more natural method such as ladybugs but sure my officemates would prefer I didn’t.
The lemon verbena did pretty well on its own with one exception I think I mistakenly broke or cut the top off the plant so there was no vertical growth and just crazy shoots horizontally so I cut most of these off and replanted to 3 new starts which have taken off as well as their parent.
Tags: cheap, outdoor plants, pepper plants, peppermint plant, vegetables
Propagating peppermint and lemon verbena
15.8 years ago lemon verbena, peppermint, strawberries

Starting next week I will have an office at work with a window so of course I have to start thinking about what sort of vegetation I can put on that ledge. The first thing that came to mind was peppermint and lemon verbena seemed like a good choice since they provide an excellent fragrance and I can eat/drink them if I have to stay late and get tired of free soda. They can also be neglected for a weekend or brief vacation without relying on someone else to take care of them.
Unless this is the first post of mine you have never read or didn’t look at the title of this blog, I am cheap. I could have easily just payed $4-5 for a couple plants but I wanted to do this for free. First I prepared two terracotta pots with a mixture of potting soil and perlite and got the mixture about as wet as possible and set them aside.
 &
&
For the peppermint, the process to propagate is pretty simple. The stuff is tough and most talented people can not successfully kill the stuff if they try, so dig around in your existing peppermint until you find a good bunch of roots. Now the tricky part pull/cut/tear/scream whatever it takes to separate that clump of peppermint from the rest. Very obvious why this stuff can take over a bed. Take that clump of roots with hopefully some of the peppermint plant still surviving the extraction ordeal and place in a pre-dug hole and cover up with potting mix.

The lemon verbena is a little calmer process, to propagate this you use a process of taking a softwood cutting, which includes simply cutting a stem in which shows some decent life (green) in it. You want to make sure that your cut does not crush the stem so a sharp knife my work better than shears/scissors but that depends completely on the quality and sharpness of your equipment. Cut off any leaves on the bottom one third of the plant and place in potting mix leafing the remaining two thirds above the soil line.
Both of these plants currently have a pretty fragile root system at the moment so keeping their roots (or soon to be generated roots) moist is very important. To help with this I have covered both plants with plastic, if all goes well I will not kill these things and will have a nice addition to my new office come Monday.

Tags: cheap, led, outdoor plants, pepper plants, peppermint plant
Planting mint in your garden
15.9 years ago mint, peppermint

If you happen to have a couple of brown thumbs and kill any plant you touch you may want to consider planting mint in your garden. These members of the mint family is so hardy that it can practically be planted anywhere and in many cases it can take over your garden without taking some precautions during your planting. Couple of low impact options is to grow it in a pot on your patio or even grow in a hanging basket and harvest the leaves as they grow over the side. If you wish to grow your mint at ground level you will need to create a root barrier to keep it from spreading over your whole garden. You start by digging a 12-18 inch hole and place your mint in a large plastic pot or lay down a plastic liner with drainage holes. One other option is to use an old 5 gallon bucket and give your mint a little more room to grow but you will need to dig a little deeper hole.
Now for picking your plant(s), if you want some peppermint for tea or that mojito in the middle of summer you will need to buy your plant from a nursery (unless you have a nice friend or neighbor to get a start from them) since peppermint is sterile so you will be unable to grow it from seed. Other mints such as spearmint can be started from seed but it will take a couple months until you can begin harvesting. I would definitely recommend buying as plants since they are usually inexpensive and a modest plant can become pretty established in just a few weeks. The one exception is if you want a species you may not be able to find in your area nursery, so seeds might be your only option.
So why grow mint in the first place. It has a great fragrance and many uses including refreshing your breath, deterring pests (mosquitoes, slugs, wasps, and ants), garnishes or major ingredient to your cold drinks. For me the primary reason was peppermint tea.
If you don’t think you like peppermint tea make sure you try the fresh version before you sign it off. Tea leaves are dried so they last longer if you want the best flavor best to use it fresh. There is no part of peppermint that can harm you so can break off a piece of mint (stem and all) and let it seep for 5 to 10 minutes. Not only is it a refreshing beverage that leaves your mouth with a nice clean taste but also can help with any stomach discomfort. If you want something with a little more flavor try this recipe:
Straight from the garden peppermint tea recipe
Ingredients:
- 3 peppermint leaves
- 3 spearmint leaves
- 3 lemon balm leaves
Directions:
Add leaves to one cup of boiling hot water. Let leaves seep for 10 minutes. Add honey or sugar if desired.

Tags: cheap, garden seeds, outdoor plants, pepper plants, peppermint plant, vegetables


