How to grow onions and not onion flowers
14.8 years ago growing challenge, onions
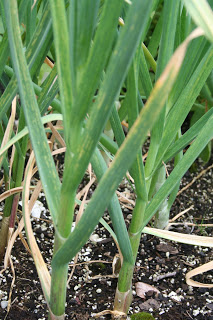
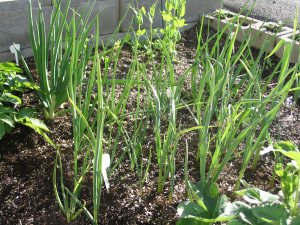
Last year, I grew a lot of onion seeds but unfortunately not many large onions I could use in the kitchen. I have learned a few things since then which hopefully can help you not have the same problem.
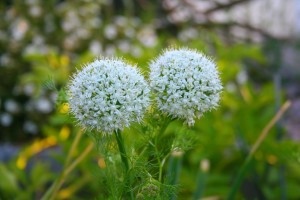
Use small onion sets: Last year I selected all of the largest onion sets in the 100 count bag which from some of my experimentation this year proves why almost all of my onions bolted to seed. Smaller onion sets were much less likely to bolt to seed during normal temperature fluctuations. Now what should you do with those large onion sets? Why not think of them as flower bulbs since that is what they will end up eventually. Given you know the onions will grow pretty small so you can plant a 1-2 inches apart and they do make a quite attractive flower and as an extra bonus you can collect the onion seeds for next year.
Grow from seeds: Well if you are like me with all of your plants bolting to seed on the positive side that gave you a considerable number of onion seeds. Now you have a couple choices here, you can plant some seeds at the end of the summer which will create basically small onion sets which will go dormant over the winter and pop back up during spring. The other option is to plant seeds indoors 9-10 weeks before last spring frost and plant seedlings the size of a pencil or smaller into your garden.
Try a different onion variety: The ultimate reason flowers bolt is temperature fluctuations which tricks the onion that it has completed its biennial (2 year) growing pattern which results into the onion jumping into its last stage of its life, flowering. Now unless you are growing in a heated greenhouse or grow box, unfortunately you don’t have too many options in controlling the weather. Fortunately you can select onion varieties that are more tolerant to temperature fluctuations.
Hopefully with these tips you can grow a few less onions flowers and a few extra onions. Though if you still get a few onion flowers you do have a couple choices. Pull it up and user the smaller onion in your kitchen or simply embrace the flower and the bees it will attract and get plenty of onion seeds for next year.
Tags: cheap, garden seeds, growbox, outdoor plants, vegetables
Garden teriyaki sauce recipe
15.8 years ago garlic bulbs, growing challenge

This is the first year I have grown garlic inspired by the Growing Challenge so now I want to find some good uses for this new addition. For Independence Day we are having a typical BBQ (teriyaki chicken burgers) and we ran out of teriyaki sauce seemed like a logical thing to attempt. Must say the improvised recipe was really easy and tasted much better than the stuff we got from the store (much less salty) I have kids so I only used a small pinch of red pepper flakes but with those with a taste for extra spice recommend adding at least a half a teaspoon.
Garden teriyaki sauce recipe
- 1 tsp olive oil
- 1 tsp of chopped or pressed garlic
- 1 tsp of fresh grated ginger (1/2 tsp powdered ginger)
- 1/2 cup soy sauce
- 1/2 cup brown sugar
- 1/4 cup honey
- 1 cup water
- red pepper flakes (to taste)
Directions: Warm oil is sauce pan at medium heat and add garlic and ginger to oil. Stir for 2 minutes and add remaining ingredients. Reduce heat and stir until sugar dissolves. Make 12 ounces of teriyaki sauce.
Tags: garlic bulbs, pepper plants
How to grow garlic in your garden
16.1 years ago garlic bulbs, growing challenge

My experiment of planting organic garlic which I bought from my local produce section of my grocery store seems to be working well. If you want to try this yourself here are some hopefully easy to follow steps:
- Buy some good looking garlic at your grocery store (I chose organic since I made an assumption there was a decreased chance that it was treated to prevent growth)
- When you are ready to plant, carefully break open the garlic and separate the tear shaped cloves.
- Take the largest cloves and plant in well cultivated soil 2 inches deep and 4 inches apart with pointed end up, these will be for your full garlic bulbs.
- Take the smaller cloves and either use in some spaghetti sauce or plant them in your garden 1-2 inches apart to harvest as baby garlic (think green onions, but strong garlic flavor)
- Fertilize with a balanced fertilizer (or bone meal) during planting but avoid fertilizing after that point since you don’t want to encourage too much foliage growth by having an abundance of nitrogen in the soil and allow the plant to use its energy to grow a big bulb.
- When the foliage on the “scapes” began to completely uncurl you can cut them off and use them on salads, scrambled eggs, or even garlic scape pesto. I would recommend leaving a couple of your garlic plants with scape attached since it also works a natural indicator of when your garlic is ready to harvest. When the lower third of the scape is light brown (the color your expect for garlic) it is ready to dig out.
- Take any cracked bulbs and use them immediately, take the remaining bulbs and wash off any dirt and let them dry for 2-3 weeks depending on how dry your climate is.
- Once cured hang in a mesh bag or braid the garlic and given proper airflow and temperature (50-70 degrees) your garlic should last for 6 months (if not eaten by then)
As you can see growing garlic is pretty low maintenance and I am definitely looking forward to using it to my salsa this fall.
Tags: cheap, garden seeds, garlic bulbs, led, organic vegetables, outdoor plants, salsa garden, vegetables
Growing Challenge: Planting the seeds
16.2 years ago growing challenge, seed storing

I have decided to participate in The Growing Challenge hosted by the people at Elements in Time. The short version is to try growing at least one thing from seed that you have not tried before.
My daughters and I have decided to grow some tomatoes (Sweetie, San Marzano, Siletz) which I normally pick from the limited choice of seedlings that are available at my garden store. While picking seeds my 3 year old insisted on getting corn, don’t think we have the space for it to be productive, guess in the end we might have some nice Halloween decorations. We also noticed that some of our potatoes had started to sprout so we have decided to add them to our list.
Stay tuned for updates on our growing challenge.
Tags: garden seeds, outdoor plants, tomato plants
Harvesting seeds from the grocery store – Update
16.2 years ago garlic bulbs, growing challenge, potatoes


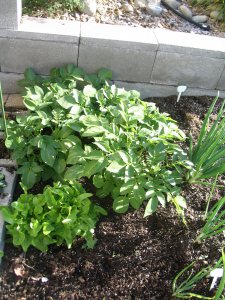
I definitely can’t complain about the current results of the garlic and potatoes I planted from my original post Harvesting seeds from the grocery store Every clove of garlic I planted has come up and seems to compliment the onions well and is supposed to keep the slugs away which I can always use help on. The potatoes have finished developing above ground just hope my soil is not too nitrogen rich and they keep growing foliage and forget to complete work below ground making some actual potatoes.
Tags: cheap, garden seeds, garlic bulbs, outdoor plants, vegetables


