Saving money by saving seeds
16.2 years ago seed saving, seed storing
Many people do not know that given the right care you can save a package of seeds for 3 years and depending on the variety possibly even longer. When you want seeds to germinate you provide heat, moisture, and light. To prevent them from germinating you want to do the opposite by storing them in a cool, dry, and dark environment.
I happen to live in the humid Pacific Northwest so finding a dry location can be difficult, but I happen to have the perfect environment in my kitchen in my refrigerator. Just thoroughly clean and dry a glass jar and drop in your seed packets and close the lid. If you happen to one or two of those silica packets lying around (those things you find in the toe when you put on new pair of sneakers) drop that in the bottom it will help soak up any moisture that may exist in the jar. If moisture seems to appear inside your jar simply open the top and the dry environment will suck all the moisture out.
| Empty glass jar | $ 0.00 |
| Silica packet | $ 0.00 |
| Packets of seeds | $ 15.00 |
|
|
|
| Total | $ 15.00 |
|
|
|
| Savings over 3 years | $ 30.00 |
Tags: garden seeds
Vegetable gardening may not be financially profitable during your first season
16.3 years ago kids
I was thinking back to my first vegetable gardening experience in suburbia a few years ago. After many trips to the local home and garden store I accumulated the following:
| Soil amendments (compost/peat moss/perlite) | $ 33.00 |
| Garden tools (rake/fork) | $ 16.00 |
| Organic fertilizer | $ 3.00 |
| Seeds and seed starter kit | $ 24.00 |
| Kid garden tools (shovel/watering can) | $ 5.00 |
| Miscellaneous | $ 10.00 |
|
|
|
| Total | $ 91.00 |
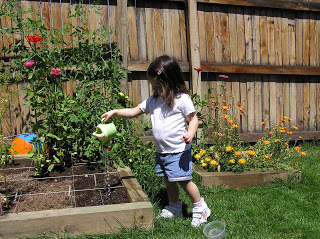
In the end of the season we probably grew about $5 worth of tomatoes and fresh flowers but doesn’t even compare to the quality time spent with my daughter watering and as she would say “picking food” which made that season especially profitable.
Tags: compost, garden seeds, organic vegetables, tomato plants, vegetables
Starting my first seeds of the season
16.3 years ago germination, indoor seed starting
My two daughters and I could not take it anymore and had to get our hands dirty and start some seeds indoors. Cute to hear my 3 year old say in the dead of winter “Can we garden now?” when it is 20 degrees outside and 4 inches of snow.
Given that our last frost date is March 15th and I don’t have a good southern facing window I might regret the early start but I always have my grow box if the steps start to get leggy. I was also thinking that my grow box would be a decent way to start hardening off young seedlings with wind and temperature a little more in my control.
I normally start my seeds with netted peat pellets, but this year for environment concerns and because I am cheap I went with coconut coir. I must say I love this stuff it retains water very well, which is great for those little seedlings. The kids also got a kick out of watching the little brick expand to half fill my 5 gallon bucket after adding the 5 quarts of water. Now one lesson learned is to cut that block up into small pieces especially if you are not doing all of your planting at once.
I was planning on starting some cucumbers, lettuce, and tomatoes but apparently I didn’t save any tomato seeds from last year so looks like I am stuck with the local seed selection this year. I didn’t have any small pots around so grabbed some of my kids’ water cups and cut a hole in the bottom and filled them full of damp coconut coir and let the excess water drain and put them in a strawberry container which may work as a nice little greenhouse. If you look close enough you can see some little sprouts already starting from the lettuce in just one day. I also cut the top off a 2 liter bottle to top off one of my terra cotta pots which I planted lavender.


Tags: cheap, garden seeds, growbox, led, outdoor plants, strawberry plants, tomato plants, vegetables
Cheap PC grow box for less than $20
16.3 years ago indoor growbox

I enjoy when I can be rewarded by overcoming mother nature, so when my 6 year old mentioned she wanted to figure out why strawberries will not grow in the winter for her science project I couldn’t have been prouder. Once she determined the reason was because it was colder and the sun wasn’t up as much, she suggested using lights to help them get more light and warmth.
The next obvious step was to create a grow box, now if this wasn’t cheap vegetable gardener I would just buy a commercial grow box, but by now you should know better than that…
Looking through my garage I found my first victim, an old PC case. After a few screws and a few drilled out rivets I had a good structure for the grow box. Next I added some Styrofoam insulation which I got at Home Depot on all 4 sides (this step is optional if your PC grow box will be inside) Also at Home Depot I picked up a cheap extension cord, lamp timer, and a socket plug adapters that allowed me to plug right into the extension cord. Followed by a small hole in the top and about 45 minutes my work is done.
In January we had a strange couple weeks of 20 degree days so I also added an incandescent build for some extra light but more importantly little extra heat. Which I made from a old lamp taking up space in the garage. With all the sides up the box is able to maintain a 70-75 degree temperature even with the chilly conditions in the garage.

After a little over a week we seemed to be getting some good results with our first blossom on the strawberry plant my daughter chose under snow in our garden.

Costs for Cheap PC Grow Box
| Old PC Case | $ 0.00 |
| Extension Cord | $ 1.25 |
| 2 – Socket adapters | $ 5.00 |
| Lamp timer | $ 4.00 |
| 2 – compact fluorescent bulbs | $ 7.00 |
| Small sheet of insulated Styrofoam | $ 2.50 |
|
|
|
| Total | $ 19.75 |
Some of our other grow boxes
Fully automated computerized grow box (Project Everbearing) Beta 1
Cheap LED Light and Grow Box
Tags: cheap, grow lights, growbox, led, outdoor plants, strawberry plants, vegetables


