Tips for Getting Started with Year-Round Gardening
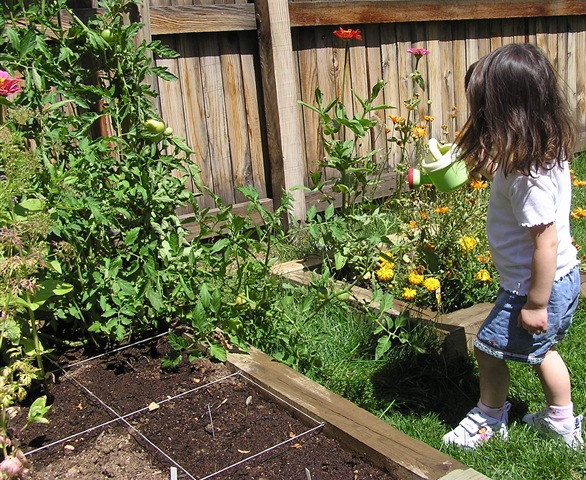
10.6 years ago raised garden, winter garden

As many of us grow more environmentally conscious and feel an increased concern about exposure to chemicals and toxins, one appealing option for wrestling back control over what goes into our systems is to grow our own fruits and vegetables. However, the steps involved in planting, maintaining, and harvesting a successful crop can feel daunting, especially to those of us who have had trouble keeping household plants alive in the past.
The key to overcoming this anxiety is simple: by employing a few simple techniques, planning ahead and creating a manageable chart of necessary activities, it will be easy to keep your garden blooming year-round.
Step One: Decide What to Plant and When
Because you’re going to be a year-round gardener, any time is a good time to figure out which plants to grow in the coming season. Which ones you choose will be dependent to a large extent on where you live. Different vegetables thrive at different times of year and in different climates. Consult your local gardening organization or gardening center for advice concerning which crops are most advisable for your particular location.
Certain hardy crops can be planted as early as February, while warm season crops should generally go into the ground after the last average frost date. By late summer, you can plant crops for your fall garden – these should go in at least two months before you expect the earliest fall frost. Certain crops like garlic and onions can be planted as late as October! The key is to keep planting throughout the year, so that you can also harvest vegetables year-round.
Step Two: Create a Gardening Chart
Create a gardening calendar with sections for each month of the year. Here is an example of a basic planting guide that was prepared for gardeners in Central Arkansas: http://www.uaex.edu/Other_Areas/publications/PDF/FSA-6062.pdf. Another example focuses less on which vegetables to plant in which month and much more on the activities that are needed to maintain a garden: http://www.humeseeds.com/projndx.htm.
A different option is to create a chart with rows for each month and columns for different types of things to do in the garden. For example, you could have a column for planting, another for maintenance activities, and one for harvesting. This means that for April, you could look at column one to see which plants to put in the ground, column two to see how often to water or fertilize them, and column three to check on which plants should be ready to be harvested.
Step Three: Use Techniques That Enable You to Extend the Growing Season
There are many methods of extending the growing season of your garden. Three basic ones that will be discussed here are:
- Raised bed gardening
- Planting seeds indoors
- Plastic-covered tunnels
Other options you might wish to explore include cloches, cold frames, underground greenhouses, and solar-charged hot water bottles.
To begin with, raised bed gardening offers several advantages. In particular, raised beds allow you to extend the gardening season because the soil will warm up earlier, meaning you can start growing crops sooner. Additionally, because the beds are raised off the ground, it is not as difficult to work on the garden in rainy weather. This type of garden also typically offers higher yields and better soil.
Raised bed gardens even require less water and generally contain fewer weeds. You can purchase or build raised beds, or even create them by shaping rectangular mounds of soil a few inches above the ground level so that they are wide enough to reach across. However, make sure to use sufficient mulch to keep the soil in place if it rains heavily.
Next, planting seeds indoors allows you to multiply the number of planting seasons available to you. Instead of winter, spring, summer, and fall, you will have early spring, mid-spring, late spring, summer, early fall, late fall, and winter. By starting the plants inside and only moving them to the garden when other plants are harvested, you can make use of more limited space. The key is having a firm plan for garden layout and crop rotation.
Finally, this technique can be supplemented by using plastic-covered tunnels for mini-greenhouses. Not only will this allow you to plant earlier in the spring, it also provides a place to harden the tender seedlings you have been growing indoors while you are waiting for space to open up in the garden. You can use fence wire to support the tunnels; another option is to use hoops cut from wood, wire, or pipe. In addition, cover the tunnels with blankets or tablecloths when it is especially cold and cut V-shaped vents in the sides in order to improve ventilation.
What vegetables would you like to grow in your garden? Have you had success with year-round gardening in the past?
Since 2000, Chris Long has been a store associate at a Home Depot in Illinois. He also contributes to the Home Depot blog, and provides raised bed garden advice as well as tips on other home landscaping topics.
How to build a raised vegetable garden
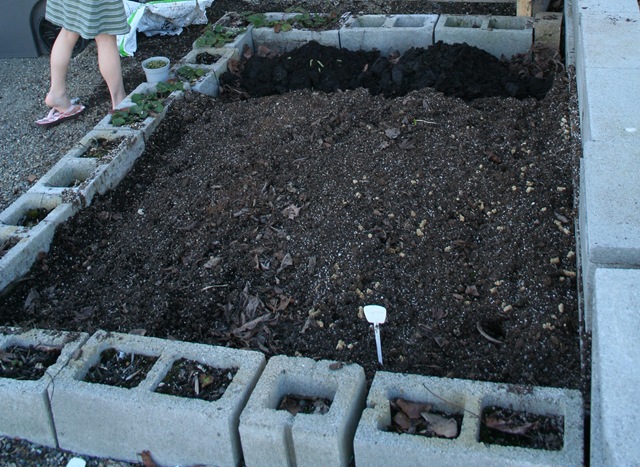
14.9 years ago garden planning, raised garden
Building a raised vegetable garden is a very easy and with the right planning can also be very inexpensive. First you need to answer a few important questions before you get started.
The first you have to pick a location. There are a few things to keep in mind when choosing the location; sun, water, convenience, and competition for nutrients.
SUN – You want to pick a location where the plants will get adequate sun for success. If this is an area where you will be growing summer vegetable a southern facing location should be used. For other cooler crops East/West facing should suffice.
WATER – You want a place that is convenient to water your plants. If you have to unravel/coil up 200 feet of hose every time you water you most likely will begin to have under watered plants during the summer months. If a hose is not really even an option the method of filling a couple five gallon buckets and bringing them to your garden is great exercise.
CONVENIENCE — The more often you walk by your garden the more likely you will not forget about (or neglect it) If it happens to pass it on your trip from my car to your back door you most likely will notice suffering plants or potential additions for tonight’s dinner to harvest.
COMPETITION FOR NUTRIENTS — Make sure your garden is not too close to other planting such as established plants or trees. This will force both sets of plants roots to compete for water and nutrients where both may end up coming up short.
Now you know where to build your garden next is to determine the best materials to build you garden out of. Personally I like cinder blocks since they never have to be replaced, relatively inexpensive, have ability to hold solar energy and as an added bonus have great little holes to grow strawberries in. Now on the negative side I will be the first to admit they are not the prettiest thing to look at and don’t really make the most comfortable bench to sit on.
Below I have included some of the pro and cons of various building materials.
| Building Material | Cost per linear foot | Tools required | Pros | Cons |
| Cinder Blocks | $0.97 | None (other big muscles) | Extra plating area in holes | Hard to sit on, not as aesthetically pleasing |
| Chiseled Wall blocks (2 high) |
$5.96 | None (other big muscles) | Most aesthetically pleasing | Expensive |
| Bricks (3 high) |
$1.36 | None (if dry stacked) | More aesthetically pleasing than cinder blocks | Expensive, and mortar may be required depending on height |
| Wood — Cedar (.75” X 8”) |
$1.60 | Drill (screws) | Looks good, natural appearance | Wood is organic so eventually will decompose. Some assembly required |
Third step is actual construction of your raised garden bed. I agree with Mel Bartholomew’s recommendation (from Square Foot Gardening fame)where he suggests limiting the width of the garden bed to no greater that 4 feet. This allows for easy watering, weeding, and harvesting of your vegetables without any serious reaching. This also works out good since lumber normally comes in 8 or 12 foot increments so very limited waste.
For all methods I recommend digging about 2 inches around your perimeter of your planned raised garden bed. This first will give you a visual idea of your new space but also give the blocks/bricks/wood a good foundation to prevent slipping. Speaking of foundation the weight of block/bricks is enough to keep the dirt in place, though with wood I would recommend creating a 4 foot 1X1 as a cross support every 4 feet to help spread out some of the load as you add soil.
Finally it is time to fill your your garden bed with some great soil. If you happen to be luck enough to have this in your backyard go ahead and fill it up. For the rest of us this is a great time to start your garden off to a good start. I recommend a recipe of three main parts (compost, filler, and “fluff”) of equal quantities. Compost should be self explanatory, great organic material thriving with life. For filler I recommend materials like coconut coir, peat moss, or even some good topsoil. For “fluff” add a material such as perlite or vermiculite to add some moisture retention and some great aeration for your plants roots.
Now all my recommendations above all mention a height of less than 12 inches. There are some good reasons for this given there are not too many vegetables you can’t grow in less than six inches of good quality soil. Assuming you are lucky like me and have an abundance of clay in your backyard this means significantly less soil to purchase when filling. Now this is harder on the back bending over so for someone with limited mobility you can bring up the garden bed to a more comfortable height though there really is no reason to fill the garden bed with 2-3 feet of soil. This is an area to be creative, maybe some free fill dirt for the first couple feet, aluminum cans, anything that can take up space and not use your precious garden soil.
Now if your selection of tools are limited or you just want to get some beds up quickly to start growing some vegetables, there are a many commercial raised garden kits out there.
Tags: compost, led, organic vegetables, outdoor plants, raised garden, strawberry plants, vegetables


