Volunteer potatoes
14.8 years ago garlic bulbs, onions, potatoes
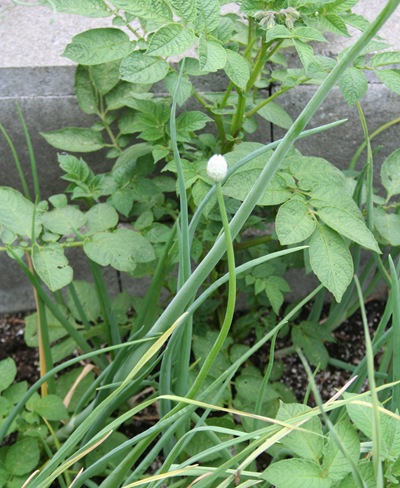
Well I wasn’t planning on growing potatoes this year but looks like I have a couple of volunteers from last year. This could turn out to be a fortunately accident since they are currently growing under my onions and garlic. If they happen to stay low enough might actually get two decent crops in the same square footage.
Any predictions?
Tags: garlic bulbs
How to grow onions and not onion flowers
14.8 years ago growing challenge, onions

Last year, I grew a lot of onion seeds but unfortunately not many large onions I could use in the kitchen. I have learned a few things since then which hopefully can help you not have the same problem.
Use small onion sets: Last year I selected all of the largest onion sets in the 100 count bag which from some of my experimentation this year proves why almost all of my onions bolted to seed. Smaller onion sets were much less likely to bolt to seed during normal temperature fluctuations. Now what should you do with those large onion sets? Why not think of them as flower bulbs since that is what they will end up eventually. Given you know the onions will grow pretty small so you can plant a 1-2 inches apart and they do make a quite attractive flower and as an extra bonus you can collect the onion seeds for next year.
Grow from seeds: Well if you are like me with all of your plants bolting to seed on the positive side that gave you a considerable number of onion seeds. Now you have a couple choices here, you can plant some seeds at the end of the summer which will create basically small onion sets which will go dormant over the winter and pop back up during spring. The other option is to plant seeds indoors 9-10 weeks before last spring frost and plant seedlings the size of a pencil or smaller into your garden.
Try a different onion variety: The ultimate reason flowers bolt is temperature fluctuations which tricks the onion that it has completed its biennial (2 year) growing pattern which results into the onion jumping into its last stage of its life, flowering. Now unless you are growing in a heated greenhouse or grow box, unfortunately you don’t have too many options in controlling the weather. Fortunately you can select onion varieties that are more tolerant to temperature fluctuations.
Hopefully with these tips you can grow a few less onions flowers and a few extra onions. Though if you still get a few onion flowers you do have a couple choices. Pull it up and user the smaller onion in your kitchen or simply embrace the flower and the bees it will attract and get plenty of onion seeds for next year.
Tags: cheap, garden seeds, growbox, outdoor plants, vegetables
And then there was a beautiful butterfly…err moth
14.8 years ago butterfly, caterpillar
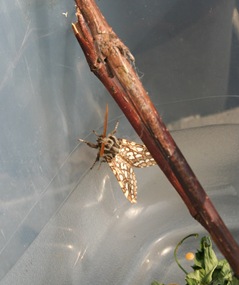
Well one of our caterpillar finally emerged from its cocoon. Looks like my identification was wrong (not surprising) since it turned into a beautiful brown moth.

As promised my youngest daughter dressed up in her butterfly costume to teach the baby moth how to fly.

After a few minutes of doing jumping jacks to demonstrate the moth figured things out and fly away to freedom.
Tags: butterfly garden
Picking strawberries in the garden
14.9 years ago kids, strawberries

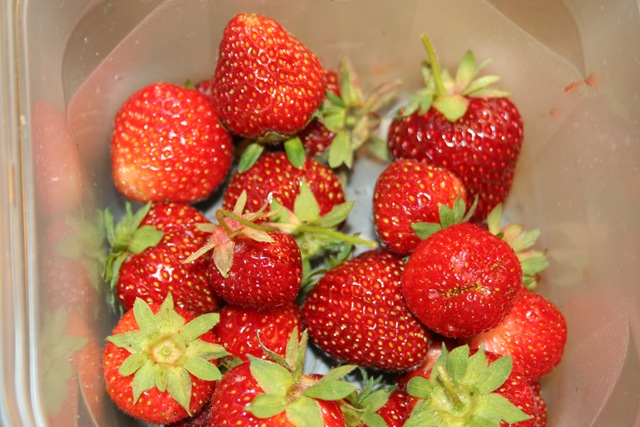
In the past couple years we have grown strawberries the story has been my oldest daughter salivating over the strawberries asking, “Is it red enough yet?”
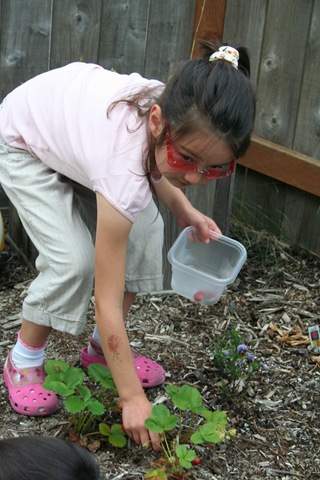
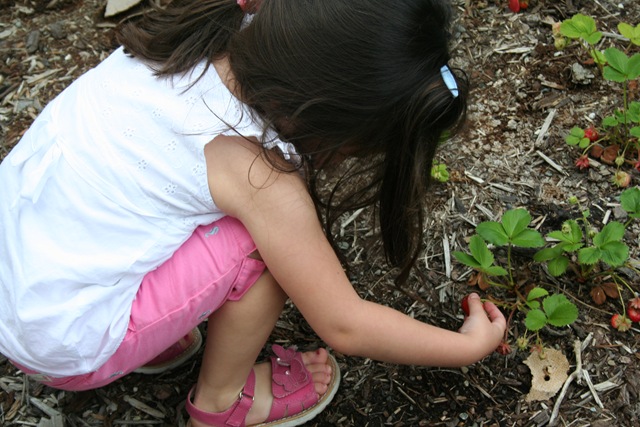
This year her desire for strawberries is just as great though with the plant maturing as well as the additional plant we propagated last year she has been easily getting her fill with plenty more ripe strawberries on the plants. Not wanted to be wasteful, we went out and picked all of the ripe strawberries.
Not having enough to make something like jam or even some strawberry shortcake for the family we opted to make a strawberry milkshake.
Strawberry milkshake recipe
- handful of strawberries
- 2 scoops of ice cream
- milk
Directions: Add strawberries and ice cream to blender. Blend adding milk until it has the consistency of…well…a milkshake.
Tags: cheap, outdoor plants, strawberry plants, vegetables
Getting rid of aphids on pepper plants
14.9 years ago aphids, brown spots, ladybugs, peppers

It can be difficult getting rid of aphids on plants in your garden. Fortunately you can get rid of those aphids with materials you have in your kitchen.
First of all I am a little embarrassed that I let the infestation get this bad before noticing. I unfortunately set the grow box to have the sunrise at 1:00am and the lights always were off by the time I got home. Though the cause is not as important as how to get rid of them.
If this plant was outside my local lady bug population would have kept these buggers in check though they seemed to thrive without the vicious predators. For an outdoor plant a quick high pressure spray of water on the the leaves (as well as underside of leaves) would take care of the problem. Though this does not kill the aphids, they will starve to death before they make it anywhere to do any more damage.
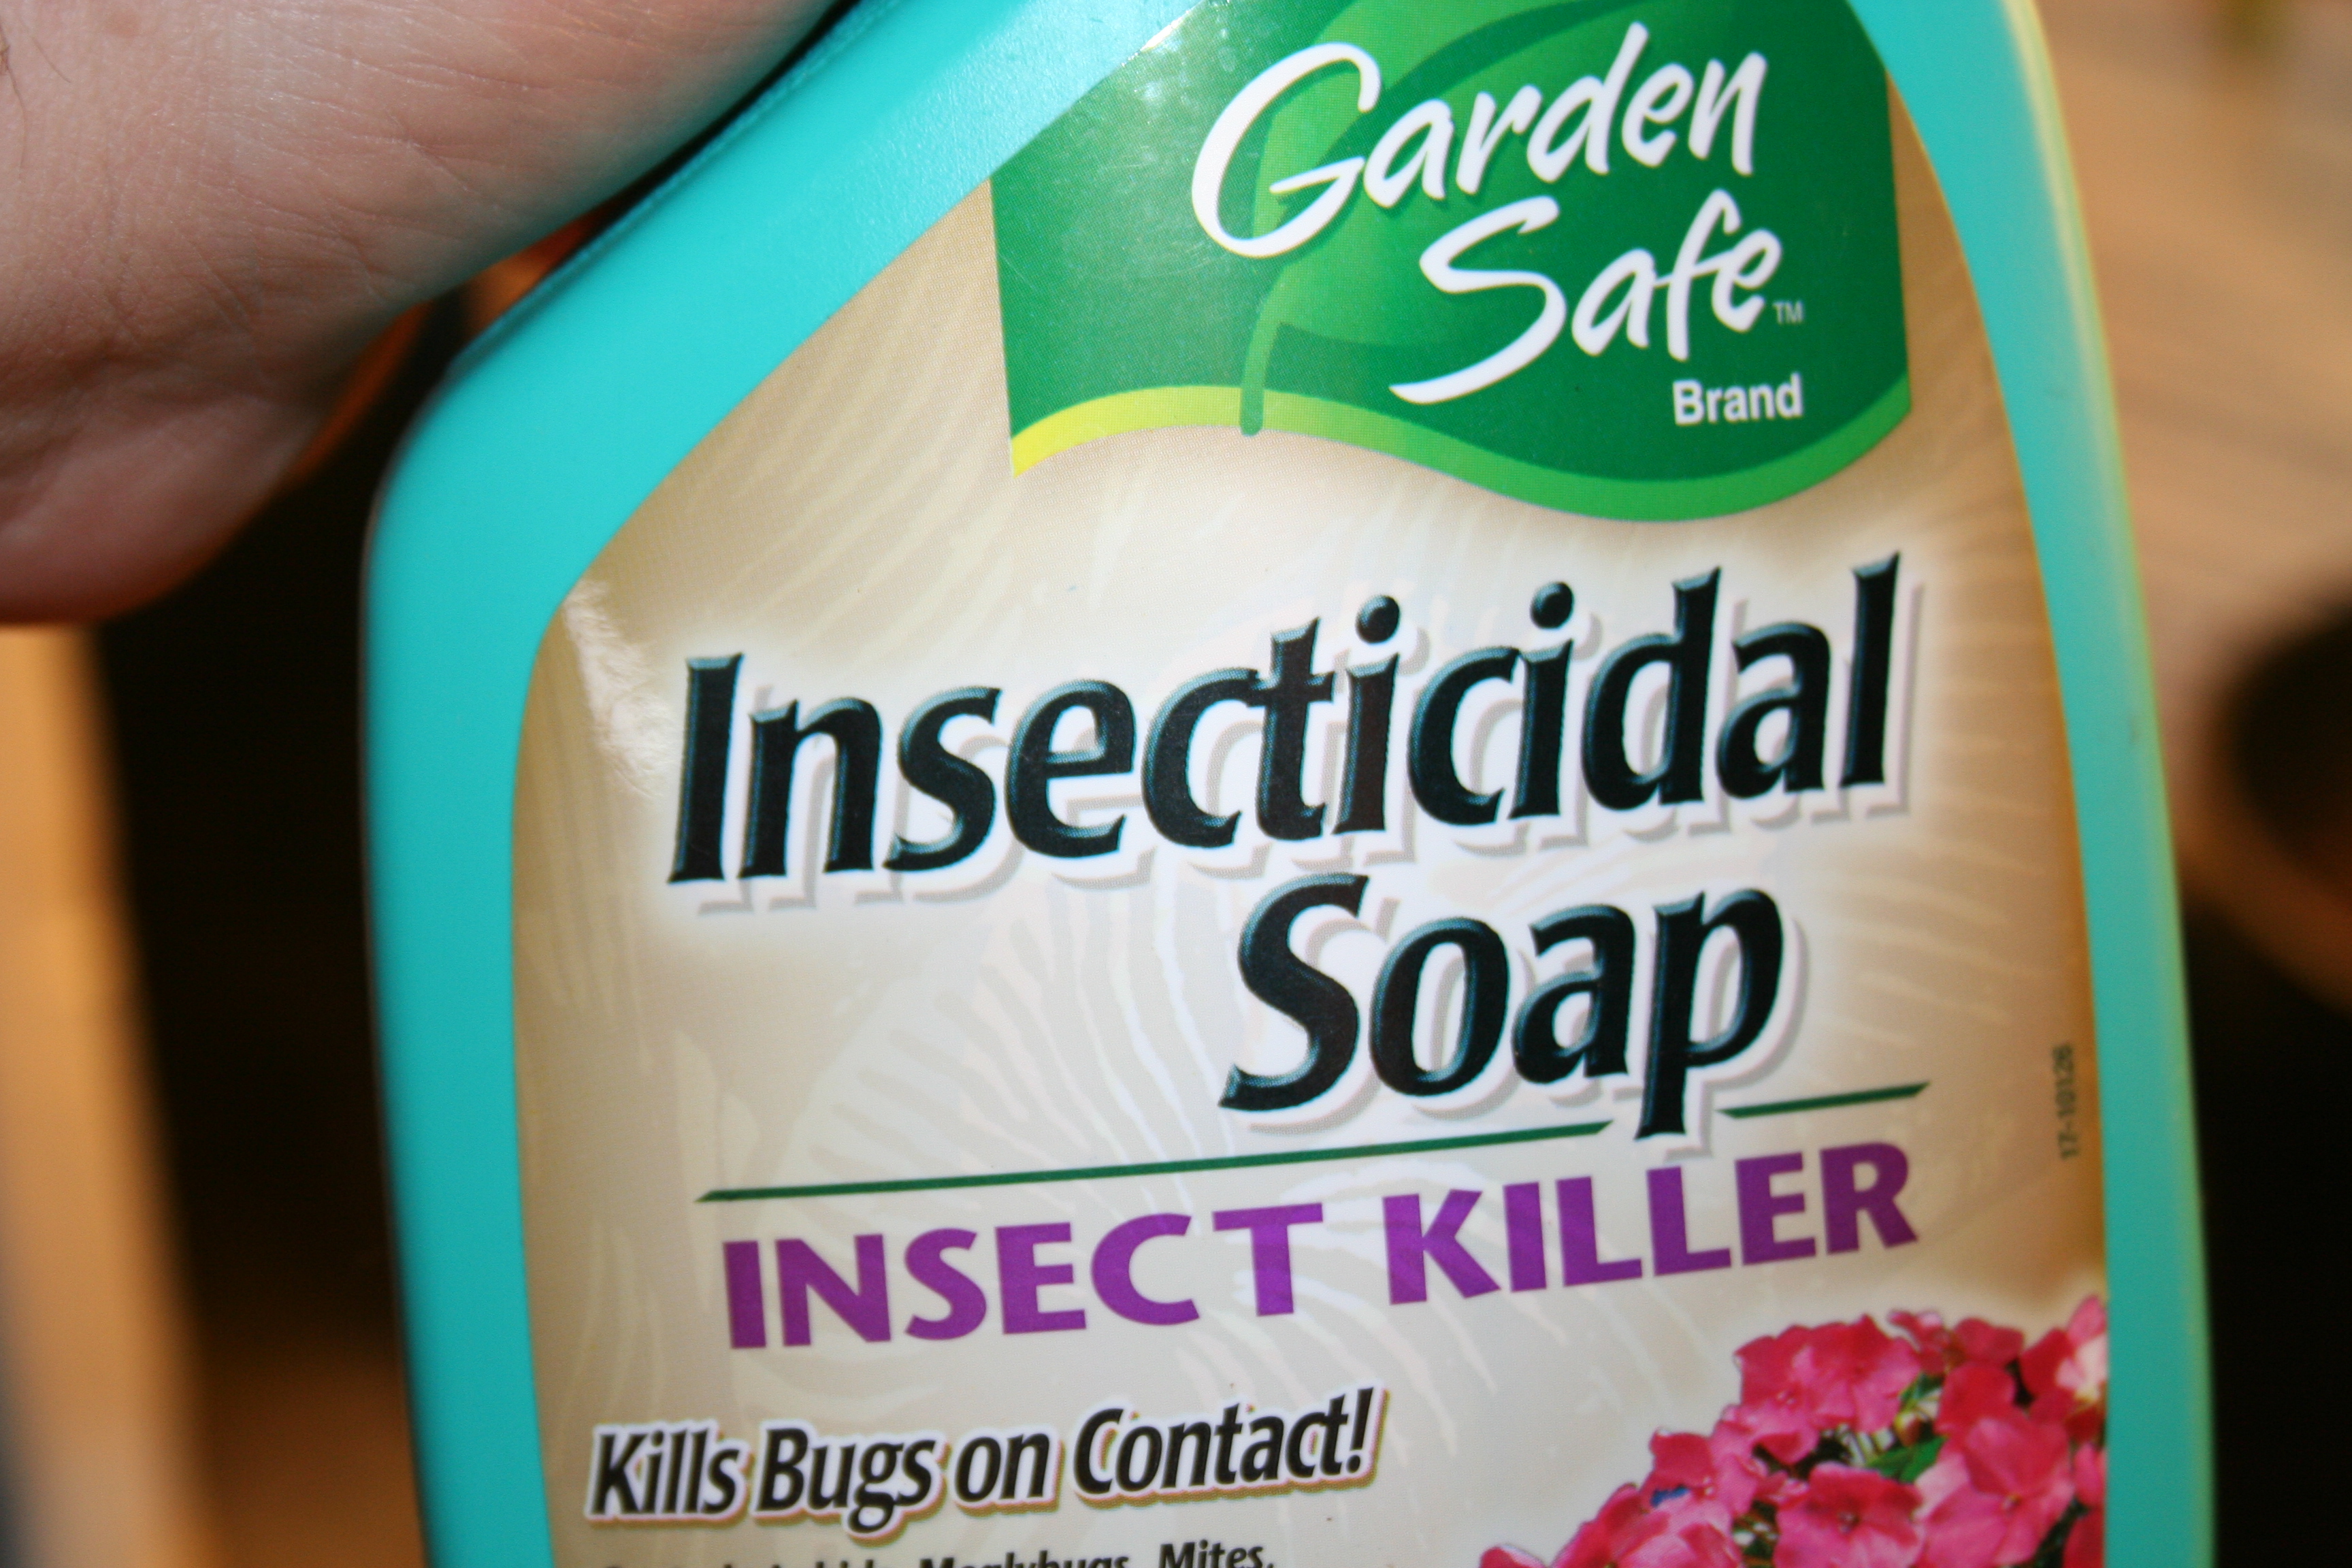
This has not been my first battle with aphids, so fortunately I had some insecticidal soap on hand. I sprayed the entire plant from the top and bottom. I removed the major yellowing leaves and did another quick spray. Now if you don’t have any insecticidal soap, or just want to save $5 on buying a bottle here are a couple of proven recipes:
Simple Aphid Killer Spray
- 1 tsp dishwashing soap
- Fill 32 oz spray bottle with water
Directions:
Shake and spray liberally on tops and bottom of leaves ensuring aphids are covered completely.
Complex Aphid Killer Spray
- 1.5 tablespoon baking soda
- 1 tablespoon Murphy’s Oil Soap
- 1 tablespoon Vegetable Oil
- 1 tablespoon Vinegar
- 1 gallon water
Directions:
Pour into spray bottle and spray liberally on tops and bottom of leaves ensuring aphids are covered completely.
Extra Spicy Aphid Killer Spray
- 3 hot peppers chopped finely
- 1 quart of water
Directions:
Mix peppers with water and let seep overnight. Strain and pour into spray bottle and spray liberally on tops and bottom of leaves ensuring aphids are covered completely. WARNING: You care not to get this spray in your eyes.
US Department of Agriculture Mix
- 2 tsp dishwashing soap
- 1 cup of vegetable oil
- Fill 32 oz spray bottle with water
Directions:
Shake and spray liberally on tops and bottom of leaves every 9-10 days, ensuring aphids are covered completely.
If none of these solutions work, squish those buggers with your fingers being sure to include a sinister laugh while doing it. Which even if you are squeamish, this is what you will see if you let them have their way.

Tags: grow lights, growbox, outdoor plants, pepper plants, vegetables
How to build a raised vegetable garden
14.9 years ago garden planning, raised garden
Building a raised vegetable garden is a very easy and with the right planning can also be very inexpensive. First you need to answer a few important questions before you get started.
The first you have to pick a location. There are a few things to keep in mind when choosing the location; sun, water, convenience, and competition for nutrients.
SUN – You want to pick a location where the plants will get adequate sun for success. If this is an area where you will be growing summer vegetable a southern facing location should be used. For other cooler crops East/West facing should suffice.
WATER – You want a place that is convenient to water your plants. If you have to unravel/coil up 200 feet of hose every time you water you most likely will begin to have under watered plants during the summer months. If a hose is not really even an option the method of filling a couple five gallon buckets and bringing them to your garden is great exercise.
CONVENIENCE — The more often you walk by your garden the more likely you will not forget about (or neglect it) If it happens to pass it on your trip from my car to your back door you most likely will notice suffering plants or potential additions for tonight’s dinner to harvest.
COMPETITION FOR NUTRIENTS — Make sure your garden is not too close to other planting such as established plants or trees. This will force both sets of plants roots to compete for water and nutrients where both may end up coming up short.
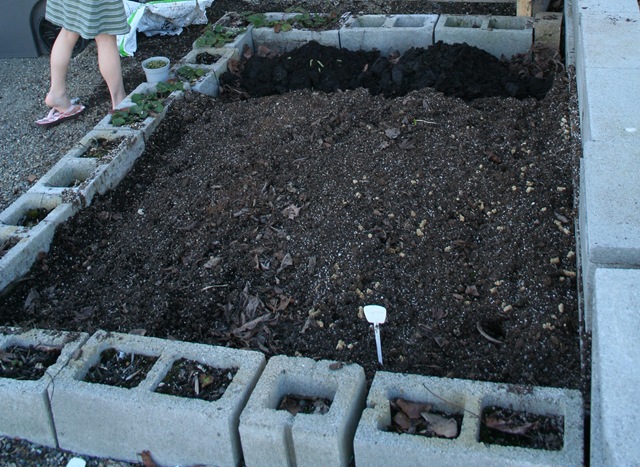
Now you know where to build your garden next is to determine the best materials to build you garden out of. Personally I like cinder blocks since they never have to be replaced, relatively inexpensive, have ability to hold solar energy and as an added bonus have great little holes to grow strawberries in. Now on the negative side I will be the first to admit they are not the prettiest thing to look at and don’t really make the most comfortable bench to sit on.
Below I have included some of the pro and cons of various building materials.
| Building Material | Cost per linear foot | Tools required | Pros | Cons |
| Cinder Blocks | $0.97 | None (other big muscles) | Extra plating area in holes | Hard to sit on, not as aesthetically pleasing |
| Chiseled Wall blocks (2 high) |
$5.96 | None (other big muscles) | Most aesthetically pleasing | Expensive |
| Bricks (3 high) |
$1.36 | None (if dry stacked) | More aesthetically pleasing than cinder blocks | Expensive, and mortar may be required depending on height |
| Wood — Cedar (.75” X 8”) |
$1.60 | Drill (screws) | Looks good, natural appearance | Wood is organic so eventually will decompose. Some assembly required |
Third step is actual construction of your raised garden bed. I agree with Mel Bartholomew’s recommendation (from Square Foot Gardening fame)where he suggests limiting the width of the garden bed to no greater that 4 feet. This allows for easy watering, weeding, and harvesting of your vegetables without any serious reaching. This also works out good since lumber normally comes in 8 or 12 foot increments so very limited waste.
For all methods I recommend digging about 2 inches around your perimeter of your planned raised garden bed. This first will give you a visual idea of your new space but also give the blocks/bricks/wood a good foundation to prevent slipping. Speaking of foundation the weight of block/bricks is enough to keep the dirt in place, though with wood I would recommend creating a 4 foot 1X1 as a cross support every 4 feet to help spread out some of the load as you add soil.
Finally it is time to fill your your garden bed with some great soil. If you happen to be luck enough to have this in your backyard go ahead and fill it up. For the rest of us this is a great time to start your garden off to a good start. I recommend a recipe of three main parts (compost, filler, and “fluff”) of equal quantities. Compost should be self explanatory, great organic material thriving with life. For filler I recommend materials like coconut coir, peat moss, or even some good topsoil. For “fluff” add a material such as perlite or vermiculite to add some moisture retention and some great aeration for your plants roots.
Now all my recommendations above all mention a height of less than 12 inches. There are some good reasons for this given there are not too many vegetables you can’t grow in less than six inches of good quality soil. Assuming you are lucky like me and have an abundance of clay in your backyard this means significantly less soil to purchase when filling. Now this is harder on the back bending over so for someone with limited mobility you can bring up the garden bed to a more comfortable height though there really is no reason to fill the garden bed with 2-3 feet of soil. This is an area to be creative, maybe some free fill dirt for the first couple feet, aluminum cans, anything that can take up space and not use your precious garden soil.
Now if your selection of tools are limited or you just want to get some beds up quickly to start growing some vegetables, there are a many commercial raised garden kits out there.
Tags: compost, led, organic vegetables, outdoor plants, raised garden, strawberry plants, vegetables


