How to make a pea trellis tower
11.1 years ago cheap, peas, planter, tomato, trellis

Long time readers know this is not the my first attempt at making a sturdy pea trellis I have had posts and posts about this in the past. Though those creations were a bit cheaper than my current version this one will not be falling down no matter how big those plants get.
First I started with a 4 foot by 8 foot cattle panel which ran me about $6 at Home Depot.

Given the panel had sharp edges and my largest vehicle is a pretty new minivan with leather seats I planned ahead and started the construction in the Home Depot parking lot. Taking a piece of scrap lumber I placed it on the 5th cross section on one side and bent it up until it was perpendicular to the ground then repeated with the other side.

The I carefully placed the bent panel into my minivan and brought it home for the remaining construction which pretty much was adding a zip tie in the middle to make a isosceles triangle and then tucked both ends to interweave with the other open side of the tower.

Next I used some pliers to not have as many sharp pointy parts for my kids…probably more likely me to poke myself with and also filed down any ends that seemed overly sharp.

So I had a bit of a strategy for planting the peas, to know where to plant I placed my tower in the desired spot and wiggles it around to make and outline to plant my peas. I removed it as you can see below and planted two rows of peas inside the perimeter. Then in a few weeks I will plant peas on the outside of the tower. The idea is the peas will grow and climb up the tower and have sunlight and adequate airflow to thrive. Then the second crop will start to grow but by the time it starts to disturb the inside crop they will already be harvested.

I also planted peas on the outside of the tower now on the northern facing side of the tower since it wouldn’t get much sunlight after the interior had a head start.

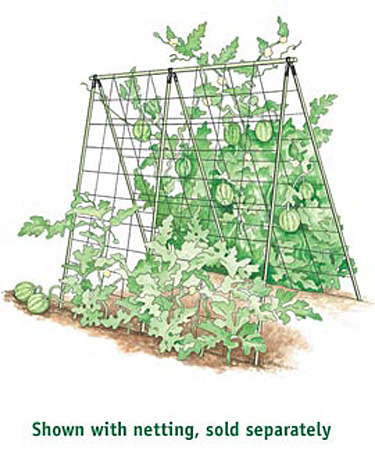
I know a few of you are probably thinking, “Wow this is awesome for peas, but I bet this would make an real sturdy tomato tower and way better than the ones I can buy in the garden center.” Which I would have to agree with you on that one large enough to provide good airflow and sturdy enough to support and fairly large tomato plant.

Making the Most Out of a Small Space
12.2 years ago cucumbers, peas, trellis

There is a common misconception that you need to have a huge sprawling garden to be able to grow vegetables, but that is simply not true. Even the smallest of gardens can grow sumptuous vegetables. By utilizing the space you have available you can grow a wide variety of climbing vegetables. Whether you have a gazebo, a trellis or just an outside wall you can plant some truly succulent vegetables, which will produce not only food, but also some amazing flowers too.
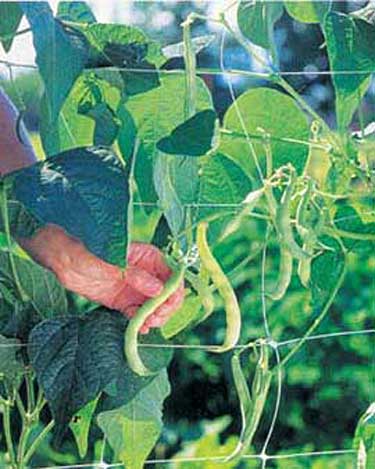
Runner beans are a great plant to start with; all they need is sunshine and fertile soil. They also produce flowers, which are certainly a welcome addition to any garden. For runner beans you need to either make a wigwam, lashed together with string at the top, or create a parallel row of canes, which are firmly secured to a horizontal cane running along the top. The best time to plant Runner Beans is a week before the last frost; these plants are originally from South America so die out every year after the frost. Runner beans need to be watered particularly heavily, but twice a week in dry weather.
Japanese cucumbers, which will reach several feet, are a more demanding vegetable, and require different types of fertilizer at different times of the development, although all the hard work is certainly worth it, especially when you get to taste your produce. Although not widely known, several of the smaller pumpkin species, including trailing pumpkins, can be grown vertically. These are easy to grow and even easier to cook and enjoy! Marrows will also clamber over fences, or up trellises. All you need to do is prepare the soil well, with lots of fertilizer.
There are hundreds of things that you can grow up a trellis over a wall and even up a gazebo, so this spring make the most out of the space you have!
How to store your Fruits and vegetables
13.3 years ago corn, herbs, peas, peppers, spinach, storing, tomato, vegetables

Whether it is to preserve your harvest from your garden or to help extend the life of the expensive produce you purchased from your local grocery store or farmers market, a little knowledge can help keep your veggies tasty and even stretch out a couple of extra days before becoming compost.
The basic idea is pretty simple, think about where your produce is stored in the grocery store and then do the same thing at home. For example they store carrots in a refrigerated display case…so you should store yours in your refrigerator. They store their onions at room temperature so you would think it would be best to do the same…reality is they are best to be stored between 55-65 degrees. During the winter time my room temperature is probably in the top part of that range but majority time my indoor temperatures will be much higher. Depending on the age of your house, you may have a root cellar which helps to create these ideal conditions for that pesky produce that is too cold in the refrigerator but too warm in a heated house. For the rest of us find a nice cool location in your house such as garage or spot next to a window (at least during the wintertime) otherwise you may be reducing the quality and viability of your produce.
Below is a list of the recommended storing temperatures for fruits and vegetables:
Vegetables
| Refrigerator (32-36°F) |
Root Cellar (55-65°F) |
Room Temp (55-70°) |
|
| Artichokes | |||
| Arugula | |||
| Asparagus — submerged in water | |||
| Beets | |||
| Bok Choy | |||
| Broccoli | |||
| Brussel Sprouts | |||
| Cabbage | |||
| Carrots | |||
| Cauliflower | |||
| Celery | |||
| Corn | |||
| Cucumbers | |||
| Eggplant | |||
| Fava beans | |||
| Fennel | |||
| Garlic | |||
| Greens (Kale, Chard, Collard Greens) | |||
| Green Beans | |||
| Green Onions (sealed bag) | |||
| Herbs (submerge in glass of water) | |||
| Leeks | |||
| Lettuce | |||
| Mushrooms (I know, not a vegetable) | |||
| Onions | |||
| Parsnips | |||
| Peppers | |||
| Potatoes | |||
| Radishes | |||
| Rutabaga | |||
| Snap Peas | |||
| Spinach | |||
| Summer Squash | |||
| Sweet Potatoes | |||
| Tomatoes | |||
| Turnips | |||
| Winter Squash |
FRUIT
| Refrigerator (32-36°F) |
Cool Place (45-50°F) |
Room Temp (55-70°) |
|
| Apples | |||
| Avocadoes | |||
| Bananas | |||
| Cranberries | |||
| Figs | |||
| Grapefruit | |||
| Grapes | |||
| Kiwis | |||
| Lemons | |||
| Limes | |||
| Mangos | |||
| Melons | |||
| Nectarines | |||
| Oranges/Mandarins | |||
| Peaches | |||
| Pears | |||
| Plums | |||
| Pomegranates | |||
| Rhubarb | |||
| Strawberries |
Little green bugs on pea plants
13.9 years ago aphids, ladybugs, organic, peas

It is fairly uncommon for me to see these little green bugs on my peas. In case you didn’t guess these are pea aphids, which suck juices from the plant leaves ad spread disease between plants. This is a rare occurrence because normally it is warmer and drier this time of year and we would have our annual ladybug release to take care of these little pests. If the weather holds up we should have good enough weather to do the ladybug release next weekend.
In the meantime I have resorted to to using some organic pesticide solution to deter these pests until the weather gets better. This will not stop the aphids, but hopefully slow the down a little, though when it comes to organic solutions you can not compete with ladybugs which each one can eat up to 5000 aphids/mites in their lifetime. Come next weekend there will be an aphid massacre in the garden. [evil laugh]
Tags: aphids, little green bugs
Building a Pea Garden Trellis
13.9 years ago cheap, fall crops, peas
When building a pea trellis it is actually pretty hard to do it wrong. All that is needed is a little stability and once the plants grab hold they will make the structure even more stable. My typical strategy when making a pea trellis is to use whatever I happen to find closest to me. Here are a few examples from past and current years of building
 |
Bamboo Pole Structure Pea TrellisHere is a classic structure made from a couple pieces of bamboo poles scavenged from a couple of rotting scarecrows purchased a few years back at a craft store. I used a stick I am pretty sure one of my daughters picked up on a nature hike across the top bound with a few inches of twine. Lastly I attached a line of twine at 1 foot and 2 feet above the ground which gives the plant plenty of leverage to climb up the structure. Click on the picture to the left or below for a larger view.
|
 |
Branches Pea TrellisHere is probably the simplest technique out there. If you have some old branches left over from pruning? Just stick them in the ground and let the peas grow up the branch. This gives a nice natural look but also a variety of paths for the peas to naturally sprawl while given each plant plenty of personal space. |
 |
Vertical Stick or Pole Pea TrellisAnother simple option is just by simply driving a few straight sticks or bamboo or metal poles in the ground with a little assistance the peas will climb their way up the trellis |
 |
Hybrid A-Frame Pole Structure and Branch Pea TrellisDo you like more than one technique? Feel free to combine them like this where I used bamboo poles as additional support for branch pea trellis (though in the end the branches proved to do just fine by themselves, I sometimes over engineer things…) |

As you can see when it comes to making your own pea trellis it is very difficult to do it wrong. So do a quick scan around your yard and you should find exactly the materials you need. Though if you want something a little more professional looking there is always the commercial options (click images below for more info) which I would definitely recommend as well.
Tags: cheap, garden trellis
Successive Pea Planting
14.1 years ago outdoor seed starting, peas, spring

Last year by 5 year old learned she likes to pick and eat fresh pea pods and was very diligent on harvesting new peas as she found them. Unfortunately this meant less peas for me. This year I am using successive planting to ensure I get my fill this year but also do not get overwhelmed with one big harvest all at once.
I started the process about a month ago by soaking my sugar snap peas in water overnight…then forgetting about them and ended up planting them by flashlight in the rain the following day. I couple weeks later I did the same for my snow peas in a separate part of my garden.
If everything goes as planned I should get some early snap peas and followed by some snow peas 2-3 weeks later. Even if my plants do not cooperate and I get overwhelmed with too many peas I can always leave a few on the plants and harvest the pea seeds for next year.
Tags: cheap, garden seeds, outdoor plants, vegetables


