Building Your Own Pond
10.9 years ago fish poop, guest post, water
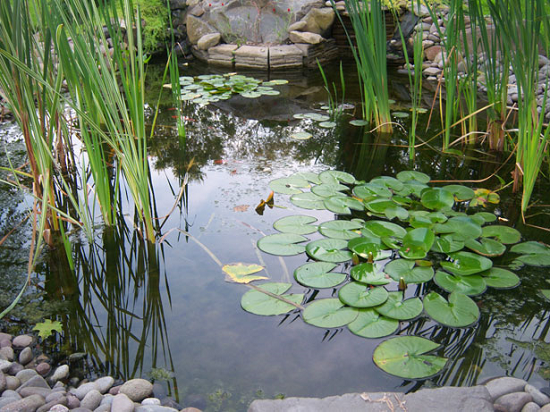
So you want to build a pond in your garden? There is a right way and a wrong way to go about it. First, you have to pick the area in your yard that will be a good fit. In order to do that, you have to know where all of the underground utility pipes are located. Whether it is water, electrical or cable, you don’t want to hit any of them when you start digging. You utility companies will be happy to come out and mark the locations to prevent any mishaps.
Next, you want to decide how large you want the pond and make sure it is not near a lot of trees. The leaves will clog it up and make a lot of extra work for you. An average pond is two to three feet deep. Unless you plan to put Koi in it, it will need to be three to four feet deep. Even if you decide against the Koi, it is always best to make sure you have running water to keep the mosquito population down. A simple pond pump will help ensure that the water is always moving.
You can easily find reading on how moving water makes a pond environment much healthier for plants and fish. To find ways to keep your water in motion see more info on pond pumps and water systems.
Now comes the time to go get your supplies. You can buy either a preformed or flexible liner for your pond. A flexible one allows you to determine the shape and size and are relatively easy to work with. You can build your pond with common garden tools; there is really no need to have heavy machinery, unless it is going to be a very large pond. You will also need sand to spread around before you put down your liner. This prevents tears from happening due to rocks and roots. Just spread it evenly and as thick as you can to be safe.
Make sure you get the rocks you need to line around the outside and to build a waterfall should you decide you want one. Most hardware stores will deliver them, so you shouldn’t need a truck. Don’t forget your water plants and decorative plants for around the pond either.
Not everyone has a yard or the space to build a pond. However, do not be discouraged, because you can still have a water garden by using a sealed decorative container. Just put rocks on the bottom and choose what water plants you would like to have. Once again, you will have to do something to prevent mosquitoes, even if it is only a small water garden. They will breed in any standing water. Either the water has to move, or you need goldfish to kill the larvae.
A pond can bring a lot of joy to you and your family. They are very calming and soothing to sit next to after a hard day at work. Especially those with the gentle sounds of water flowing over rocks. You’ll be surprised at how good it is for relaxation and even meditation.
Things to Know before Installing a Sprinkler System
11.3 years ago DIY, sprinker system, water
Sandy soil, clay soil, grass types, it can be a lot to take in. And knowing exactly how to water your lawn to keep it green and healthy can be a task. However, automatic sprinkler systems can help ease your burden. But a sprinkler system isn’t a one-and-done type of project. It takes planning, preparation, and time to achieve your goal of installing an automatic sprinkler system. Here are a few things you’ll need to do prior to installing your new system.
Need a Permit?
One of the most commonly overlooked tasks when homeowners install sprinkler systems is checking with your locality to see if you are required to obtain a building permit to install your system. Now, you may be scratching your head and asking, “Why would I need a building permit? I’m installing something underground on my property.”
Well, when it comes to sprinkler systems, you aren’t simply laying piping down in the ground and connecting a hose to it. There is a good deal of wiring that goes into it, and your city or county may have requirements you must meet prior to installing your system. While most contractors will take care of all your permit needs, if you are planning on installing yourself, you will need to do your due diligence and contact the proper locality to determine what permits you may need.
Check for Underground Utilities
Prior to planting your shovel into the ground, you need to check for any underground utilities that may be in your yard. This is not just a safety concern, it is required by law that you check for utilities prior to digging on your property. Some utilities are not far beneath the surface, and even a relatively shallow dig can get you in a world of trouble.
Digging without knowing where your underground utilities are located puts you in harm’s way. Knowing where your utility lines are buried will help protect you from injury and prevent damages to your utilities, service disruptions, and potential fines and repair costs. Even if you’ve called before for a similar digging project, call again. Every job requires a call to your utility providers to ensure your safety and your neighborhood’s utility service.
Local Watering Ordinances
Lastly, you’ll want to check all of your local watering ordinances to see if you must adhere to certain watering restrictions. Many municipalities have responded to water shortages and droughts by implementing laws that restrict how many times per week you can water your lawn, for how long, and in some cases, have implemented laws dictating when you can water your lawn. To verify any watering ordinances for your area, you can search online for your city and county water restrictions to see which restrictions, if any, apply to your location.
Finding the Right Sprinkler for Your Garden
With the right watering habits and right system for your garden, you can enjoy a healthy lawn and garden each and every year. However, it’s important to know which type of sprinkler system is best for your needs.
There are several factors to consider when choosing your new sprinkler system. You may even be best suited to utilize more than one type of sprinkler to ensure your yard and garden are covered. Here are some questions to ask yourself as you shop for the right sprinkler system for your garden.
- > How large is the area that needs to be watered?
- > How frequently should you water?
- > What is the climate like in your region?
- > How can you most effectively water those hard-to-reach areas in your garden?
Types of Sprinkler Nozzles
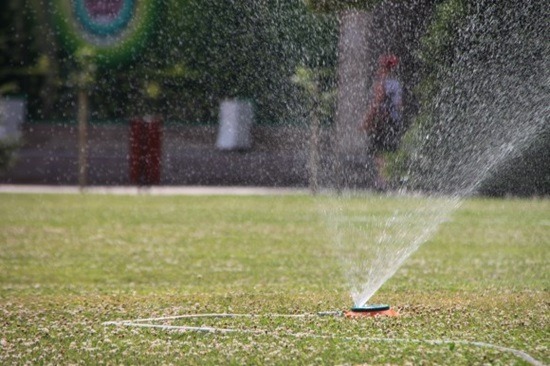
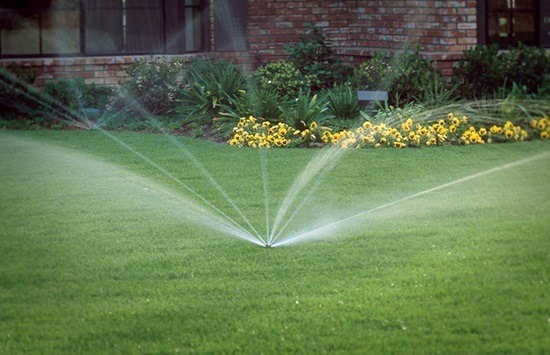
When you’re in need of a sprinkler system, knowing the differences between the different types of sprinklers will help you choose the best fit for your lawn. Fixed sprinklers feature several different designs that cast water in a single pattern over a fixed area. They offer fast and precise watering, and can water those hard-to-reach areas and are ideal for small areas, gardens and landscaping, fixed sprinklers.
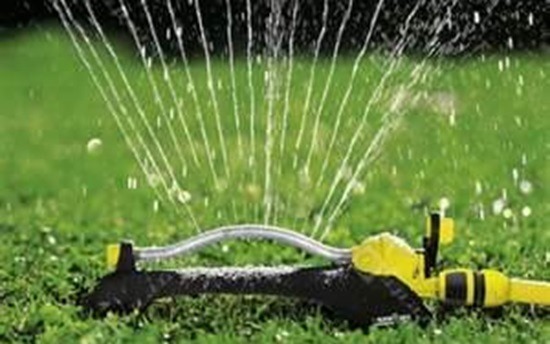
Oscillating sprinklers have a long tube with numerous openings and move back and forth, creating a fan-shaped waterfall. Best for medium- and large-sized areas and areas that are newly seeded, oscillating sprinklers provide you with gentle watering, even coverage, and are best for covering a rectangular or square pattern.
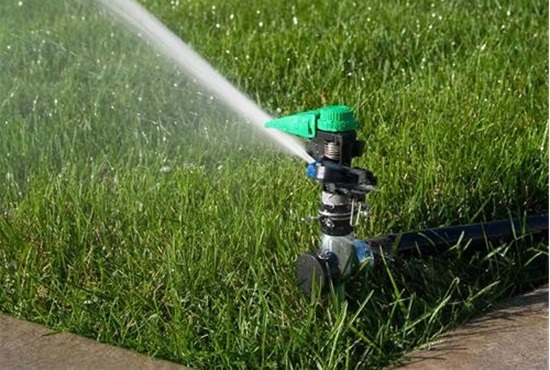
Impact sprinklers, also known as impulse sprinklers, are those which rotate in a circle and shoot a single jet of water and make a distinctive clicking sound when in use. Best for large areas, impact sprinklers are very wind-resistant, are less likely to clog, offer an adjustable pattern, and provide you with lower water pressure and flow rate.
Rotating sprinklers, best for gardens and medium-sized areas, have two or more arms and spin to disperse water in a circular pattern. The benefits of a rotating sprinkler include even water distribution, they often feature adjustable jets and bases, and they work quickly.
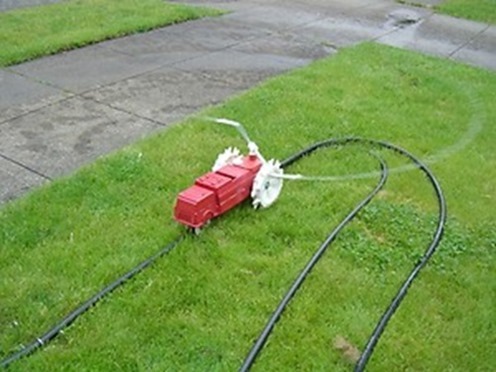
Traveling sprinklers, which resemble little tractors, move through your yard in a preset pattern. These mini-tractors drag the hose behind them as they water your yard. These are great for using in a wide area, and can save you time watering your yard and garden. Traveling sprinklers are best for areas that are uneven, and yards that are oddly shaped.
Drip Irrigation
Drip irrigation, a combination of several low-pressure, low-volume water delivery systems, is also known as a micro-irrigation system. Each system is distinguished by a different style of water emitter. Originating with commercial growers and farmers, drip irrigation systems are now a popular option for home gardeners who desire to conserve water.
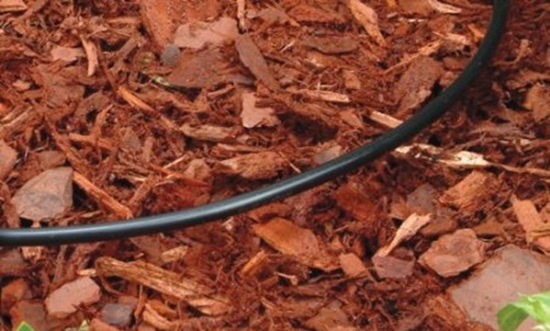
These systems are the best way of getting the most from your plants while maximizing your water resources. Drip irrigation systems tend to use less water than conventional watering techniques and systems, as they aim to keep the plant’s roots moist without saturating. Drip systems are often installed in the subsoil, where they can be hidden beneath a layer of mulch.
Great for long strips of lawn, oddly shaped gardens, and raised beds, drip irrigation systems offer a low flow rate, easy installation, and allow you to target the exact area where you want to water, and allows you to deliver it exactly when you want when used with a timer. Other benefits of drip irrigation systems include their ability to deliver water without creating an overly moist environment, helping keep fungal diseases from your garden, and they improve the water-holding capacity in sandier soils.
Rachael Jones is a Staff Writer for DIYMother
How to setup cheap rain barrels
11.6 years ago cheap, rain barrels, water
Living in the rainy Pacific Northwest I have considered setting up some rain barrels to save a little on my water bill, but to also provide a water outlet to an area in my garden where one is not available.
The biggest inhibiting factor of doing this sooner was cost, typically rain barrel kits cost at least $100 and though as you can see below might be a little more aesthetically pleasing this is quite a bit of money to spend for something I am going to hide behind my garage anyway I went for a much cheaper option with a little do-it-yourself.
Materials Needed
- 55 gallon food grade plastic barrels X 2
- 3/4 in. Slip x MHT PVC Fitting
- 3/4 in. Male Terminal Adapter
- 3/4“ PVC Tee connector X 2
- 3/4” PVC elbow connector
- 3/4” PVC end cap
- Hose Barb Adapter (5/8” Barb X 3/4” MIP)
- 5/8” plastic tubing
- 3/4” PVC ball valve (get a second one if you want to be able to add more barrels without draining out all the water)
- 1.5” length of 3/4” PVC pipe X 2
- 2” length of 3/4” PVC pipe X 2
- Vinyl plumbers tape
- PVC primer/cement
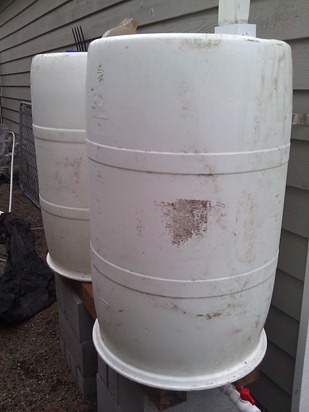
- Cinder Blocks (at least 2 for each water barrel…I went with 6 for each barrel for additional water pressure)
- 4”X4” Lumber (8 foot)
Construction
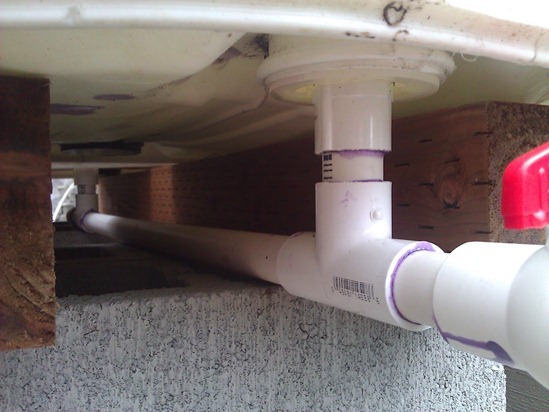
Knowing Pascal’s principle I wanted to take advantage of all the height I could safely get. I chose to elevate my rain barrels by taking cinder blocks 2 wide and 3 high. I then place two 4”X4” lumber cut at 4 foot lengths to provide a few additional inches bust also provide some room for my connections which I will explain below.
Now I have a firm foundation not it is time to get these barrels hooked together so I can get maximum water pressure and access to the water in all of the barrels.
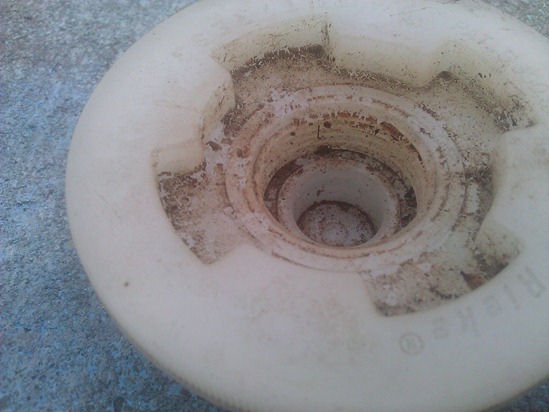
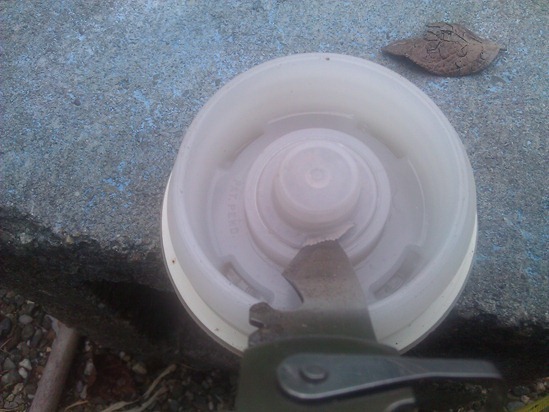
The caps on the barrels (pretty common) I picked up had a nice feature of including some nice threads on the inside of them. This provides me a nice 1 inch thread I can get a nice tight seal. The only problem these are sealed.
Not having a drill bit just under one inch in diameter I used a pocket knife to carefully cut the inner cap off being careful to not harm the threads.
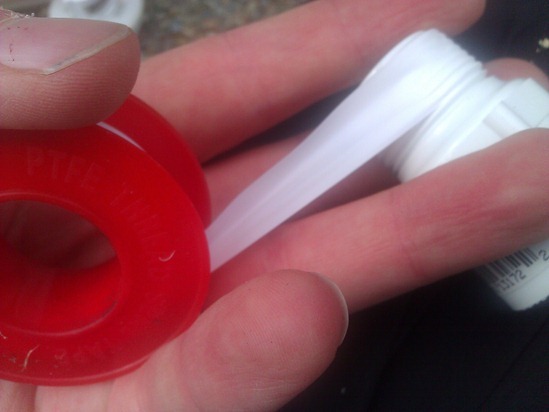
Next I applied some silicon tape to the 3/4 in. Male Terminal Adapter and screw these into the lids and then attached the lid back into the water barrel. Repeat this step for each of the barrels.
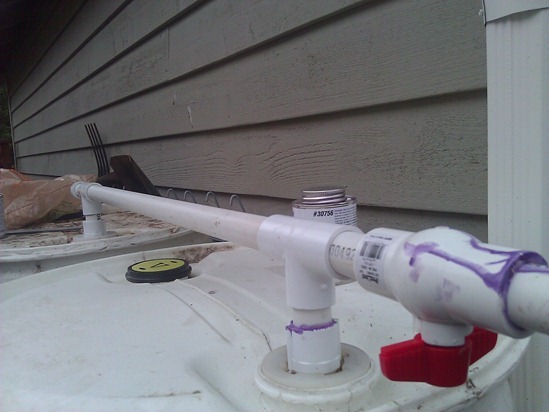
Next cut two 1.5 inch lengths of 3/4 PVC pipe and place between the 3/4 in. Male Terminal Adapter and the 3/4“ PVC T connector.
Now cut two 2 inch lengths of 3/4” PVC pipe and place at either end of the T connector on both barrels.
Next attach your 3/4” PVC ball valve to both ends (or 3/4” PVC end cap if you are not planning on adding any more barrels to your system.)
Finally measure the length between the remaining span of your water barrels and cut that to length.
Once you have everything fit as you like it use PVC primer/cement to make everything permanent except the connections between the T-connector and the threaded connector attached to the barrel.
Now (with PVC assembly removed) flip the barrels over to their final resting place and prime/cement last connections giving barrels a slight twist to make sure you have a good seal in the PVC cement.
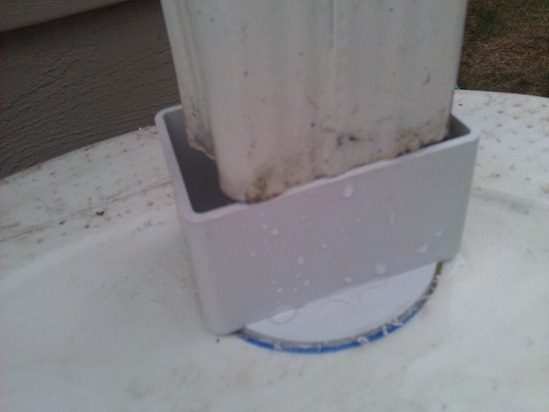
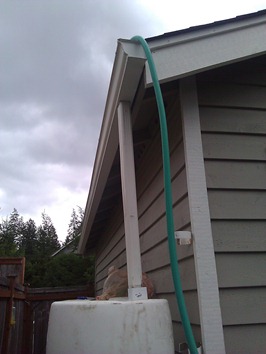
Next cut a hole in the top of one barrel and be sure to place a screen between the rainspout and the opening of the barrel to keep mosquitos from making a home in your barrel.
In each of the other barrels you will need to add a hole for venting. I will I completely forgot this step and woke up confused why only one barrel contained 90% of the water after our first rain. Once I drilled a 1/4” hole into my second barrel I got a good blast of air in my face and the barrels equalized.
Lastly you need to add an overflow preventer, for this I drilled a one inch hole and then added a Hose Barb Adapter (5/8” Barb X 3/4” MIP) and a small length of 5/8” plastic tubing returning to the drain (with screen attached to keep bugs from coming up the tube.
To make sure you do not have any leaks (and being so excited to see your hard work in action) you can throw your onto your roof and let the water run for a few minutes to make sure you do not have any obvious issues such as leaks at any of your connections.
 |
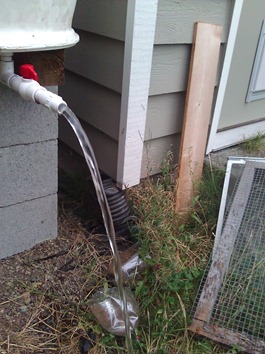 |
I also added a 3/4 in. Slip x MHT PVC Fitting which allows me to directly connect a garden hose or automated drip irrigation system (see upcoming post..)
So now I have the ability to capture up to 110 gallons of water, since I am only capturing one half of the water from the roof of my garage which equates to 196 square feet. Given for every inch that falls on a square square foot of surface area equals 0.6234 gallons so this means with just a single inch of rain these barrels will be over flowing providing weeks of water for a small vegetable garden.
Irrigating with Plastic Bottles
13 years ago cheap, guest post, recycle, water
When standing with the hose in hand watering the garden this growing season here’s something to contemplate:
The point of watering is feeding roots but in most cases excess water is wasted falling between and around plants. A watering can is better suited for the task but still lacks precision.
One way to ensure water reaches its target is through a delivery mechanism that takes into consideration low water usage. True, in the realm of eco-friendly gardening there are many types of specialized irrigations systems that direct water but most aren’t feasible devices for the general homeowner.
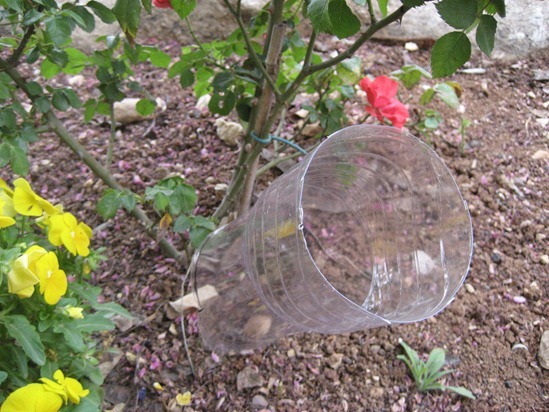
However, one that could be made at home with little cost involves reusing plastic bottles from water, soda, and other drinks. Any size will work but the 1.5 liter or 1 liter is the easiest to experiment with. All that’s needed besides the bottles are two to three foot thin but sturdy sticks that can fit through the spouts.
Now, there are different ways of setting up the watering system but the basic idea remains the same and can be adapted to fit any situation.
For example, a simple approach may go something like this:
Simple Method
1. Cut off the bottom of the bottle about an inch up.
2. Making sure not to disturb the plant itself place and the bottle near the base of the plant with the spout down almost completely vertical. Then push the stick through the bottle into the ground so it’s holding the bottle upward. If it leans a bit that’s ok.
3. Pour water into the top (the cut off bottom) and see if it reaches the base of the plant. Adjust if necessary.
Advanced Method
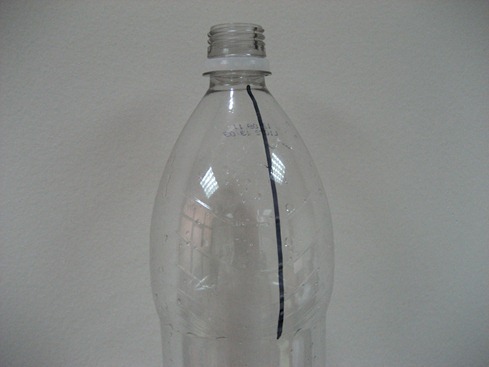
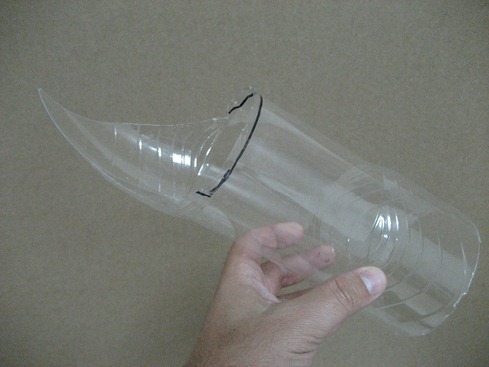
1. From the spout use a marker to draw two lines 5 or 6 inches down each side (at a 180 degree angle) essentially dividing the bottle if you continued all the way around.
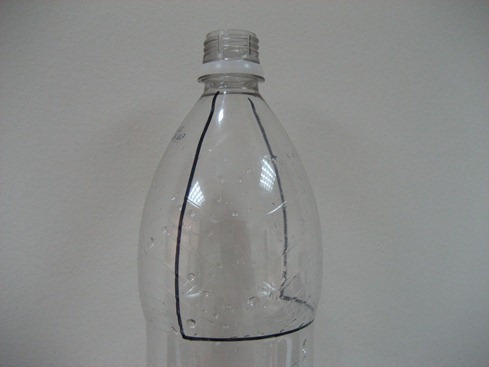
2. Connect the ends of the lines by circling around the bottle’s width creating two halves.
3. Carefully cut out one of the halves and remove the spout so you end up with a scoop-like shape.
4. If necessary spend some time trimming it so it has a pointy or shovel-like tip capable of sliding into the ground and resting in place.
5. Cut off the end (the bottom) of the bottle about an inch up.
6. Place the scoop side in the ground.
7. Test with some water and adjust the placement if necessary.
Either way you choose regulate water usage to less than a cup for each plant when possible and in the end this contraption will save on next month’s water bill.
Finally remember the bottles along with any scraps should be recycled when no longer in use or at the end of the season. They’ll probably be worn from the elements so don’t hesitate to toss them out and use new ones the following year.
Jakob Barry writes for Networx.com, a growing community of homeowners and contractors sharing and monitoring home improvement projects together. He covers various home improvement topics including lawn irrigations tips and grounds maintenance
The Plant Whisperer
13.2 years ago electronics, planter, water
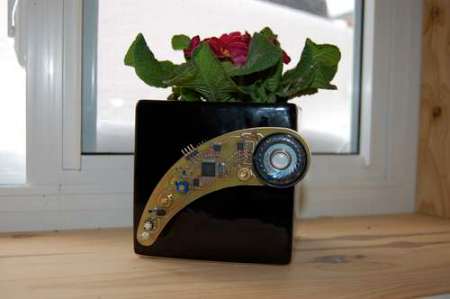
The author had a problems keeping his plants alive and provided the plants could not call out for help, he fixed this with a little bit of electronics. It will call out when it is dry and needs watering by saying phrases such as, “I’M THIRSTY! WATER ME!”
It is also detects the ambient light level and makes comments on that as well. This was put together with a little knowhow and about $30 worth of parts.
Wet Circuits water resistant power strip review
13.3 years ago electronics, power strip, product review, water, waterproof, wet circuits
One problem with growing plants indoors is the requirement for indoor lighting, combined with the need to pour water on plants around such lighting causes a potential electrical disaster. When I heard about Wet Circuits water/tamper resistant power strip I simply had to try it out. Not having the $70 to buy one myself, the nice people at WetCircuits sent me a sample to try out these claims for myself.
After reviewing their very informative infomercial style demonstration (see below) I felt I would not be doing my job unless I reproduced at least some of these demonstrations for myself.
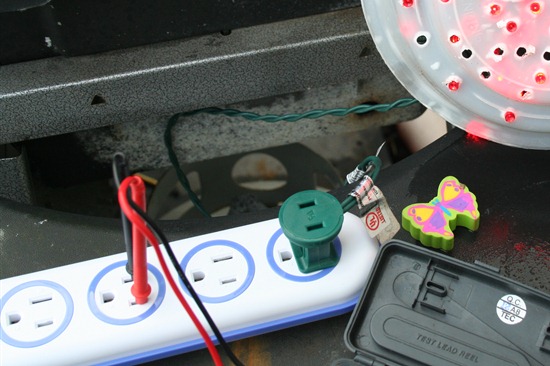
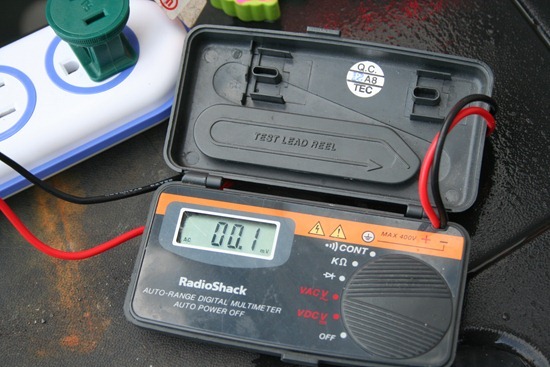
Being cautious I started with sticking in my voltmeter while having my homemade supplemental LED light plugged in.
Test #1 one passes with flying colors
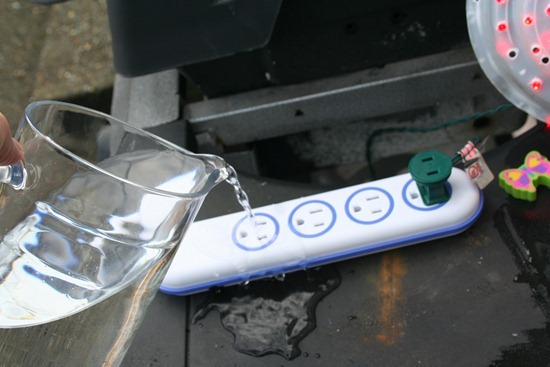
Next it was time to pour water on the live outlet…now using a normal socket this would result in a nice spark if you were lucky. As you can see from the video below, this also passed without any problems.
I decided to skip the tweezers test provided that the voltmeter answered the expected result and well it is just plain scary to try even when I know it won’t shock me.
Now if you have shelves of grow lights or your own grow box for $70 this is a decent investment though it does buy you some piece of mind.
