Simple pumpkin cheescake recipe
9.4 years ago pumpkin, puree, recipe
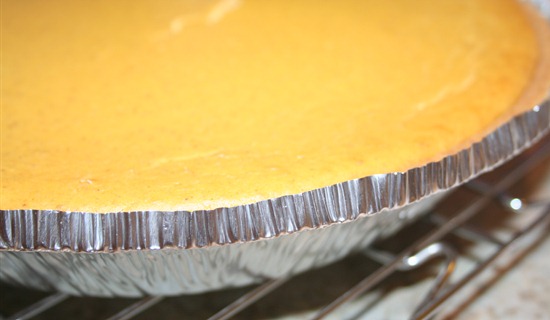
I made my first pumpkin cheesecake a few years back and has been a recurring addition to our Thanksgiving dinner ever since then…though baking cheesecakes can be/sound a bit intimidating with a few techniques mentioned below it can be pretty easy to have success on your first attempt. In addition this is also a great way to get rid of my masses of pumpkin puree in my freezer saved from this years pumpkins
Pumpkin cheesecake recipe
Ingredients
- 1 graham cracker crust (homemade or store bought)
- 16 oz. of crème cheese (2 – 8 oz. packages)
- ⅔ cup brown sugar
- 1.5 cup of pumpkin puree (or one can of store bought pumpkin)
- 1 teaspoon vanilla
- ¾ teaspoon cinnamon
- ¼ teaspoon nutmeg
- ¼ teaspoon ginger
- 2 eggs
Instructions
- Preheat oven at 350 degrees
- Beat cream cheese until it appears fluffy
- Add sugar, pumpkin, vanilla, cinnamon, nutmeg, and ginger and and beat until well combined
- Add eggs one at a time and beat until creamy
- Place empty graham cracker crust to a cookie sheet and place in oven with rack pulled out. Fill with mixture until full and carefully push rack (and cheesecake) into the oven. You can attempt this pour and move away from the oven but unless your day job is working on a bomb squad most likely this will lead to some filling on the floor and yourself.
- Bake for 50-60 minutes keeping a careful eye on the edges if you start to see some browning your cheesecake is done cooking.
- At this time I turn off the oven and crack open the door a few inches to let things cool down gradually, optionally you can pull it out and place the cheesecake on a cooling rack for 1-2 hours. Though if you are in a hurry you can speed up the cooling by placing your cheesecake in the refrigerator after 10-15 minutes though you significantly increase the chance of causing a ugly split down the middle of your nice cheesecake.
- After cooling for 1-2 hours cool or overnight(if you can wait that long)
Tags: recipes
Pumpkin pancakes with pumpkin spice whipping cream
10.5 years ago pumpkin, puree, recipe, Uncategorized

My seed collection from my Winter Luxury Pie pumpkin I purchased a few years back finally paid off and I was able to produce a couple of decent sized pumpkins which should provide me enough pumpkin goo (canned pumpkin) to make plenty of baked goods this fall. For those who have not made their own pumpkin goo the process is very easy…even easier this year with my new food processor (no need to add bit of water to help my struggling magic bullet I have used in the past)

So with about a gallon of pumpkin puree on hand I froze about 3/4 of it by spooning some into silicon muffin cups, freezing for a couple hours, adding to freezer bag and repeat.
With what I had left seemed like a good idea would be pumpkin pancakes which I made this morning with the following recipe.

Pumpkin pancakes with pumpkin spice whipping cream
Recipe type: Breakfast
Prep time:
Cook time:
Total time:
Serves: 6
Ingredients
- 1.5 cups milk
- 1 cup pumpkin puree
- 1 egg
- 2 tablespoons vegetable oil
- 2 tablespoons vinegar
- 2 cup all purpose flour
- 2 tablespoons brown sugar
- 1 teaspoon white sugar
- 2 teaspoons baking powder
- 1 teaspoon baking soda
- 2.5 teaspoons pumpkin spice (1 tsp allspice, 1 tsp cinnamon, ½ teaspoon ginger)
- ½ teaspoon salt
Instructions
- Mix milk, pumpkin, egg, oil and vinegar in bowl.
- In separate bowl combine flour, sugars, baking powder, baking soda, spices, and salt and stir until well combined.
- Stir flour mixture into pumpkin mixture and mix just enough to combine (over mixing can lead to chewy pancakes)
- Heat a griddle or frying/cast iron pan on medium-high heat and pour ¼-1/3 cup of batter into pan and flip when brown and serve.
Notes
For whipping cream simply add ¼ teaspoon of pumpkin pie spice to purchased whipping cream. Or make it yourself with 2 cups of heavy cream, 1 teaspoon powdered sugar, and ½ teaspoon of pumpkin pie spice and whip until you have medium peaks.
How to make strawberries last longer
10.9 years ago perserve, puree, recipe, strawberries

My youngest (2 years old) decided to venture out and too a little strawberry picking this weekend. It took her a little while (probably a solid pound of berries) to figure out we were supposed to be picking berries and putting them into our flat and not her mouth. Thirty minutes later and $11.50 paid I left with my full flat (11.5 pounds of berries)
The great about thing picking fresh strawberries is they are ripe and delicious, but the bad thing is you only have a few days before they start to go bad. Knowing that my little strawberry monster (and her older sister) would not even be able to get through over 11 pounds of berries in 3-4 days so had to start considering preservation methods.
Prevent the strawberries from molding

Here is an easy technique to extend the life of your berries by a few days to even a week. Prepare a solution of 1 part vinegar to 10 parts water (example for pint of berries I prepared above I did 1/8 cup of vinegar and 1.25 cups of water) Add your strawberries and given them a quick spin. Next you can optionally rinse them (solution is pretty weak so I do not taste any vinegar taste if I don’t rinse) and then place on an open air container.
This technique also works for other berries that may have molding problems and can enable your berries to last about a week or even up to 2 weeks depending on the actual ripeness when they were picked.
Sugar coat them

Though fresh organic strawberries are sweet enough all by themselves but adding about a teaspoon of sugar to a pint of cut strawberries will generate some strawberry syrups which can easily give you a week in the fridge. This can be a great topping to ice cream, pound cake, angel food cake, or even by themselves topped with a little whipping cream.
Strawberry Jam

This was the first obvious method of saving some of these delicious berries for next year. I picked up some new 1/2 cup jars since we typically do not make it through a full cup jar once the 3 week timer starts after cracking the seal. Also great size for sharing with the neighbors.
The recipe for any type of jam can be found in your box of pectin but I will repeat it here since I personalized some techniques to speed up the process.
Ingredients
- 5 cups of strawberries (4 cups crushed)
- 7 cups white sugar
- 1 package of pectin (I personally prefer the liquid form)
Directions
- Wash and cut tops off berries and crush them. I personally add them to my food processor and given them a little pulse to chop them up. Be sure not to over do this you want some chunks in there not a smooth puree.
- Add berries to large pot or saucepan and heat at medium high and add sugar.
- Let berries and sugar come to a rolling boil (when you still bubbles continue)
- Add pectin and wait until rolling boil returns and let boil for 1 minute while constantly stirring
- Remove from heat and fill cleaned a boiled jars/lids with 1/8 inch gap at the top being careful to remove any jam on the top of the jar.
- Once all jars are filled add to large pot filled with water on rolling boil (be sure to account for the displacement that will occur when you add your jars) The directions say you should have 2-3 inches of water over your jars. My tallest pot doesn’t allow this even for these 1/2 cup jars but have gotten good seals with 1/2-1 inch of water above in the past.
- Let boil for 10 minutes (more if higher altitude but see directions on pectin) and let sit at room temperature. Check the button on the top to see if you have a good seal. If one doesn’t stay down, no worries just through it in the refrigerator and that will be the first jar you consume. Let the remaining sit a room temperature for 24 hours, checking the seal again.
Your jam should be good for up to a year with a solid seal and up to three week refrigerated after opening.
Freezing Strawberries

Freezing strawberries is a very easy option for preserving your produce. What I do is wash the berries and remove the tops and split any berries that are significantly larger than the others. Place on a cookie sheet and freeze for 8-12 hours and transfer to freezer bags and remove air with a straw (poor mans vacuum sealer) or use real vacuum sealer like I did below. With this technique the berries should not stick together and all ready to make some shortcake next winter.

How to make pumpkin puree
11.6 years ago cheap, pumpkin, puree

It is that time of year again to stock up on some pumpkin puree from some fresh pumpkins. Not sure if it is the 3rd daughter or just getting older but this year I have come up with an ever faster way to convert pumpkins into puree. Not only does this give you a better tasting pie, but given a organic pumpkin cost $6 a can you also save quite a bit of money with just a little additional work.

Step 1: Clean the pumpkin. Use a little water and scouring pad to remove loose dirt

Step 2: Remove stem and cut pumpkin in half. This will take a little muscle to get through but using a serrated blade should make quick work of this little pumpkin.

Step 3: Scoop out seeds and innards. Using an ice cream scoop. scrape out the seeds and the stringy innards, you don’t have to get this completely clean as you can see below. I also decided to save a few seeds with hopes to grow my own sugar pumpkins next year using the seed saving techniques I have wrote about last year.

Step 4: Cook the pumpkin. Places halved pumpkins on a cookie sheet. Place in a preheated oven at 350F and cook the pumpkin for 1.5-2 hours. The pumpkin is done cooking when you can slice through the pumpkin flesh with an edge of a fork with almost no effort.

Step 5: Scape out cooked pumpkin. When the pumpkins are cool enough to handle simply take a large spoon and scrape out the cooked pumpkin and scoop into a large bowl being careful to not scrape too hard and accidentally get some pumpkin skin in the mix.


Step 6: Blend. Use a large metal spoon to scape the pumpkin away from the skin and place into a blender and blend until smooth. Typically this can be as much as 1/3 water to 2/3 cooked pumpkin to get a good vortex going like above.

That is it. With my 5 pound pumpkin I purchased for $5 I got 6 cups of pumpkin puree, which is enough to make 3 pumpkin pie or 6 loafs of pumpkin bread and if my math is right about $30 compared to buying the canned variety. After making a pie and a loaf of pumpkin bread this left me with 3 cups of pumpkin goo, which I put in 6 half-cup containers which I froze to make some more pie for Thanksgiving.


