Win a Free one year Subscription GrowVeg.com
13.3 years ago computer, free, garden planning, giveaway

GrowVeg.com has graciously offered us a free one year subscription to their site ($25 value) to give away.
If you haven’t heard of GrowVeg it is an online program that allows you to plan you season of gardening and provides you reminders when you should start seeds and move transplants outside. You can check out my first review and my more recent review for some more specific details of this years new feature enhancements..
There are multiple ways to enter:
- 1. Add a comment to this post
- 2. Like CheapVegetableGardener on Facebook (add an additional comment to the post)
- 3. Mention this giveaway on your site/Twitter (add an additional comment to the post)
We will pick a winner on 02/12/11 but if you can’t wait to get started planning your garden go ahead and sign up for the free 30 day trial and if you are lucky you can continue using it for free. Good luck.
Gift ideas for gardeners on your Christmas list
13.4 years ago garden planning, gardener, gifts
Maybe you are looking for something to add to your Christmas list or a fellow gardener you still need to buy for here are a few items on my list…let me know if anyone needs my address (smile).
 |
Have some on your list just starting out with gardening (or has been very unsuccessful in the past) how about the PlantSmart Digital Plant Care Sensor? You simply turn the device on and place it in your problem area for 24 hours and plug it into your computer and it will provide important info on temperature, humidity, and light intensity. Too see a full review of the EasyBloom (same product different name) here. |
 |
The Japanese Hori Hori Digging Tool is probably the most versatile tool you can get for your garden. It has a curved blade great for planting and weeding. The serrated blade can easily cut through small branches or break off a piece of twine two tie up some tomatoes or to take on some vengeance on pesky garden pests…but wait there is more flip it over and it even measure the depths of your planting holes to make sure you planted those bulbs deep enough. This is definitely a welcome addition to any gardeners stocking. |
 |
The AeroGarden with Gourmet Herb Seed Kit is a nice system to get your gardening loved one a way to use their cold green thumb during the wintertime. Using a special CFL bulbs and automatic timed watering using aeroponics you can have delicious herbs growing on your kitchen counter for easy use in your cooking. |
 |
Now the Felco F-2 Classic Manual Hand Pruner is a little more expensive than the ones you normally would find in your local home improvements store, but for a tool a gardener will use for many hours every season a quality tool like this can easily last a lifetime with minimal care. |
 |
Finally there is a little something for the little ones. The Kid’s Size 3 Piece Gardening Hand Tools |
Tags: garden, gifts, herb garden
Planning garden using GrowVeg (Year #2)
14.3 years ago garden planning, spring, sprouting
Though GrowVeg worked great for planning my garden last year, this year it became even more useful. By creating a garden plan using my template from my previous year not only did it save time but also showed where I should not plant certain vegetables because I planted the same family of plants in that area last year. Here is my plan for my larger plot:

I am growing much of the same as I have in past years with the addition of broccoli and Swiss chard.
For my longer fence plot here is what I am going with the following:

New in this area I am going to plan on growing some dry beans for storage as well as some green beans along with our regular cucumbers, tomatoes, and sunflowers.
I also have an area I am planning on growing herbs, though for that I am just going to wing it.
In the end it took me about 3-4 minutes to create this plan thanks to GrowVeg which I can print out and keep by the garden so I don’t have to wonder, “Now where did I plant that spinach again.”
They do have a free 30 day trial if you want to try it out this year.
Tags: cheap, herb garden, outdoor plants, tomato plants, vegetables
Do have have to follow the directions on the back of my seed packet?
14.7 years ago garden planning, seeds

Though the advice on the back of a seed packet gives some great information, they are recommendations and their advice may not exactly apply to your garden.
First is row spacing, many times you read something like “plant seeds 3 inches apart in rows 1 foot apart” This brings up some immediate logic of why can the plants be 3 inches apart one way but 12 inches in another. This sort of thinking the premise for intensive gardening techniques such as square foot gardening. This is where instead of growing your plants in rows you plant them in a grid pattern making best use of your growing space.
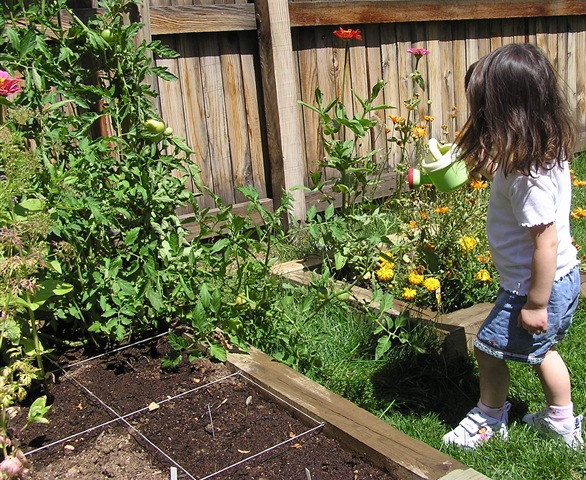
Now even these spacing requirements are actually optional. All plants compete for resources to survive. This can be sunlight (or even shade from sunlight), nutrients, water, airflow, etc. Depending on the quality of your soil and frequency of watering you can push the limits of your growing space. Assuming you add some fresh compost easy season and possibly do some side dressing with an organic fertilizer like fish emulsion or alfalfa pellets you can easily reduce this space and still have high yields. I did just that with my cherry tomato plants whose seed packet is above. I planted these about a foot apart and got great growth and yields.
One other factor is how you grow. If I was growing my tomatoes in cages my foot space probably wouldn’t even be technically possible but since I grew them on a netting this allowed for spread out much more naturally and provide adequate sunlight and airflow. Keep this in mind when growing sprawling plants such as cucumbers and squash using some vertical space can free up the valuable growing space on the ground.
The last factor depends on when you are going to pick them. If you are growing onions to simply pick as green onions you don’t have to give then the 3-4 inches needed for their bulbs to grow. You could easily plant an inch apart since you are going to pick them before they are competing for resources. A similar idea is growing for micro greens, plant picked when just a few inches tall.
Though I wouldn’t say to completely ignore the back of your seed packets, just make sure to use it as a guide not a requirement.
Tags: compost, garden seeds, organic vegetables, outdoor plants, tomato plants
Doing recon at the local farmers market
14.8 years ago corn, farmers market, garden planning, garlic bulbs

Your mission, should you decide to accept it is to infiltrate a local farmers market to gain intelligence to help aid your personal garden.
Sure, the farmers market is a great place to find some fresh food you can’t or didn’t have time/space to grow in your garden. It is also a great place to get seeds/starts for your garden. It is also a great resource to figure out how various fruits/vegetables grow in your area.
Even if you are growing everything you want/need in your own garden a quick stop at your farmers market can help you check out your competition and see for example in my case, “hey their garlic grew just as bad as mine this year.”
This is also a good time to try out new fruits and vegetables you are thinking of growing next year. There is nothing worse than growing a bed full of arugula and figure out at that point you hate the stuff. If you are lucky enough you might even get a meal and some seeds to plant with next year depending on you seed saving ability.
Now as always you don’t want to blow your cover while doing surveillance, so make sure you have a good cover store. In my case I used a few people known as “my wife and daughters” to appear less conspicuous. You can even use techniques of taking a picture of your “daughter” to get some recon picture of their products for further analysis.

In the end it looks like my little spy helpers had a good time and we even contributed a little to the local farmers economy and got the secret ingredient to CVG Black Bean and Corn Salsa Recipe (ok, it was corn).

This post will self destruct in 10 seconds (sorry had to say it)
Tags: cheap, garden seeds, garlic bulbs, outdoor plants, salsa garden, vegetables
How to build a raised vegetable garden
14.9 years ago garden planning, raised garden
Building a raised vegetable garden is a very easy and with the right planning can also be very inexpensive. First you need to answer a few important questions before you get started.
The first you have to pick a location. There are a few things to keep in mind when choosing the location; sun, water, convenience, and competition for nutrients.
SUN – You want to pick a location where the plants will get adequate sun for success. If this is an area where you will be growing summer vegetable a southern facing location should be used. For other cooler crops East/West facing should suffice.
WATER – You want a place that is convenient to water your plants. If you have to unravel/coil up 200 feet of hose every time you water you most likely will begin to have under watered plants during the summer months. If a hose is not really even an option the method of filling a couple five gallon buckets and bringing them to your garden is great exercise.
CONVENIENCE — The more often you walk by your garden the more likely you will not forget about (or neglect it) If it happens to pass it on your trip from my car to your back door you most likely will notice suffering plants or potential additions for tonight’s dinner to harvest.
COMPETITION FOR NUTRIENTS — Make sure your garden is not too close to other planting such as established plants or trees. This will force both sets of plants roots to compete for water and nutrients where both may end up coming up short.
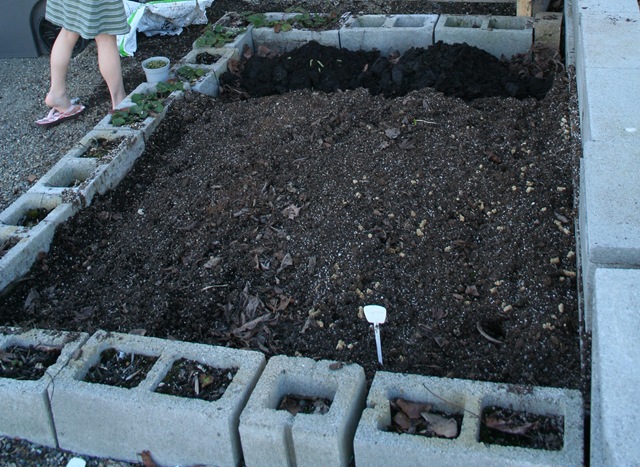
Now you know where to build your garden next is to determine the best materials to build you garden out of. Personally I like cinder blocks since they never have to be replaced, relatively inexpensive, have ability to hold solar energy and as an added bonus have great little holes to grow strawberries in. Now on the negative side I will be the first to admit they are not the prettiest thing to look at and don’t really make the most comfortable bench to sit on.
Below I have included some of the pro and cons of various building materials.
| Building Material | Cost per linear foot | Tools required | Pros | Cons |
| Cinder Blocks | $0.97 | None (other big muscles) | Extra plating area in holes | Hard to sit on, not as aesthetically pleasing |
| Chiseled Wall blocks (2 high) |
$5.96 | None (other big muscles) | Most aesthetically pleasing | Expensive |
| Bricks (3 high) |
$1.36 | None (if dry stacked) | More aesthetically pleasing than cinder blocks | Expensive, and mortar may be required depending on height |
| Wood — Cedar (.75” X 8”) |
$1.60 | Drill (screws) | Looks good, natural appearance | Wood is organic so eventually will decompose. Some assembly required |
Third step is actual construction of your raised garden bed. I agree with Mel Bartholomew’s recommendation (from Square Foot Gardening fame)where he suggests limiting the width of the garden bed to no greater that 4 feet. This allows for easy watering, weeding, and harvesting of your vegetables without any serious reaching. This also works out good since lumber normally comes in 8 or 12 foot increments so very limited waste.
For all methods I recommend digging about 2 inches around your perimeter of your planned raised garden bed. This first will give you a visual idea of your new space but also give the blocks/bricks/wood a good foundation to prevent slipping. Speaking of foundation the weight of block/bricks is enough to keep the dirt in place, though with wood I would recommend creating a 4 foot 1X1 as a cross support every 4 feet to help spread out some of the load as you add soil.
Finally it is time to fill your your garden bed with some great soil. If you happen to be luck enough to have this in your backyard go ahead and fill it up. For the rest of us this is a great time to start your garden off to a good start. I recommend a recipe of three main parts (compost, filler, and “fluff”) of equal quantities. Compost should be self explanatory, great organic material thriving with life. For filler I recommend materials like coconut coir, peat moss, or even some good topsoil. For “fluff” add a material such as perlite or vermiculite to add some moisture retention and some great aeration for your plants roots.
Now all my recommendations above all mention a height of less than 12 inches. There are some good reasons for this given there are not too many vegetables you can’t grow in less than six inches of good quality soil. Assuming you are lucky like me and have an abundance of clay in your backyard this means significantly less soil to purchase when filling. Now this is harder on the back bending over so for someone with limited mobility you can bring up the garden bed to a more comfortable height though there really is no reason to fill the garden bed with 2-3 feet of soil. This is an area to be creative, maybe some free fill dirt for the first couple feet, aluminum cans, anything that can take up space and not use your precious garden soil.
Now if your selection of tools are limited or you just want to get some beds up quickly to start growing some vegetables, there are a many commercial raised garden kits out there.
Tags: compost, led, organic vegetables, outdoor plants, raised garden, strawberry plants, vegetables


