Search Results

Using leaf mulch in your garden for weed prevention

009

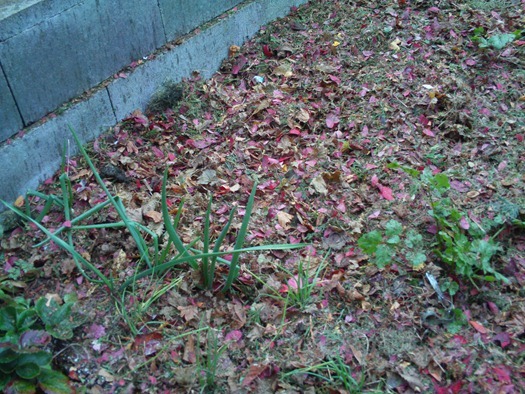
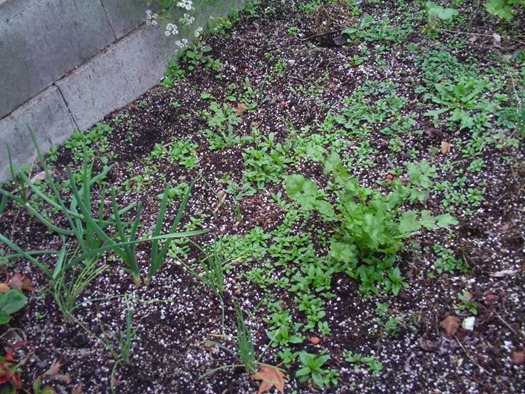
Above is unfortunately what my vegetable garden looks like, still have some cilantro, bunching onions, bulb onions, garlic, broccoli, and spinach growing but obviously I have a blanket of tiny weeds emerging with large amount of rain we have been getting.  This gives me a few options:

  • A. Painfully pull every weed from the garden bed…repeat
  • B. Give up on my plants and just lay down some black plastic or cardboard to smother the weeds
  • C. None of the above

I am going to opt for “C” on this one and go with an alternate method of applying a mulch that I am sure many of you have an abundance of at the moment…leaves.

Now you don’t want to gather your leaves and dump them on your garden bed, you need to shred the leaves.  There are a couple of reasons for doing this.  First it reduces surface area which allows for faster composting when you eventually work this layer into your soil next spring but also reduces the drag on the leaves to keep most of the leaves actually in your garden bed.  Second this will restrict weeds from emerging, but allows leaves from emerging garlic and onions to make their way through.

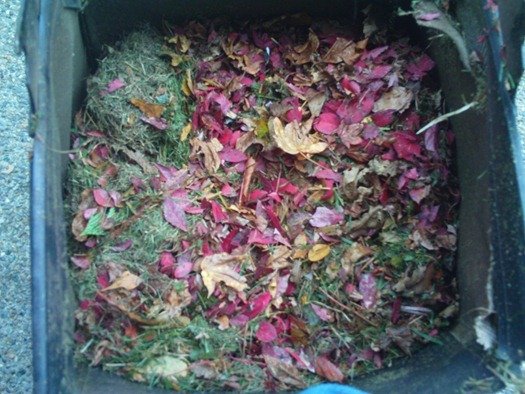
Now you know why you want to shred them, now this is how you do it.  Spread out your leaves on your lawn and use your lawnmower (with bagger attachment) and run over them with half of the width of your mower at a time.  Now you should a nice bag of shredded leaves.  You want to keep grass clippings to this mix at a minimum but a small percentage will not hurt anything.

010

Now take handfuls of your freshly shredded leaves and spread as a 1/3 – 3/4 inch layer over your vegetable garden.  You can help out some of your less established plants by brushing off any leaves directly on top of the plants.  Finish by giving the leaves a nice watering to help with the matting down process to keep the leaves in your bed and not blown all around your vegetable bed by the wind.  It was raining while I was mowing my leaves and applying them so I skipped this particular step.

015

Using this technique you should be able to start you gardening next spring with minimal weeding, some great partially composted organic matter to work into your garden, and as an added bonus some protective mulch for your winter veggies all with materials most of use send off in our yard waste bins.
5 Easy Money-saving Gardening Tips

image

Starting and keeping a garden is a great way to spend your time for those of you with a green thumb. I just recently took up the hobby, and was shocked at just how expensive it was to start a relatively large garden in my back yard. Undeterred by the cost, I opened my wallet, pulled out the no fee credit cards and began buying seeds, mulch, and the tools I needed to keep my garden looking great.

Make you own compost. There are two big benefits to composting.  First, those scraps from the vegetables and other foods you spent your hard-earned money on don’t go to waste, allowing you to make the most of your purchases. More importantly, however, compost is free nutrient rich soil for your garden.  It’s easy, too.

A very simple way to create a compost area is to choose an area of your yard that’s away from everything else and section it off with chicken wire.  Once you’ve built your bin, simply toss your scraps, veggie peelings, egg shells, and more into the bin and let it decompose. Compost soil takes about a year to be ready for gardening, but once it’s ready, you’ll have some of the freshest free soil around.

Cut back on mulch. Have you laid mulch and then had pesky weeds pop up anyway? If you answered “yes,” there’s a good chance that you also purchased more mulch to lay over the invading weeds. There’s a simpler solution, however.

Next time you go to lay mulch, take some of those old newspapers out of your recycling bin and lay them flat over the area where you’re going to lay the mulch.  With this biodegradable layer between the weeds and the mulch, you’ll see fewer of their little heads popping through the wood chips, and you’ll save money since you’ll have to reapply your mulch less often.

Buy self-seeding plants. Another really great way to save money on your garden going forwards is by not having to by new plants every year. Many plants – like Foxgloves, Oriental Poppies, etc. – are self-seeders.  This means that as they deteriorate in the colder months, they will release seeds that will germinate when the weather gets warm again.

This is a great way to save money on your garden because it removes some of the monetary burden of purchasing all-new flowers at the start of each warm season.

Start small. One way to facilitate the lushness of your garden is to buy larger, adult plants instead of growing from seeds. Many gardening stores sell larger plants because they are more expensive to the buyer, however.  To save some money this year, but smaller, starter plants or grow your garden from seeds. Seeds and smaller plants cost less because they’ve cost the growers and distributors less to grow and maintain.

For some, growing a garden can be challenging, but if you’re willing to try, going this route will save you money upfront and could very well produce just as beautiful a garden as larger plants.

Become a plant food chef. Another expense that can be very important to your garden (and its health) is purchasing plant food.  Plants, like all other organisms, need certain things to thrive—water, light, nutrients, and more. And one of the ways we give plants nutrients is with expensive plant foods.

You can, however, save money on plant food by making your own. Here’s how: take compost and place it into a large container of water for a week.  When the week’s up, the water should be murky and brown. That means it’s ready. Now, use this mixture to water your plants—it will work as well as store-bought foods, but will lack the chemicals found in them.

The biggest tip I can give you is to keep it small and simple until you get the hang of it. Gardening is supposed to be relaxing, not complicated. If you want complicated, try understanding section 529 college savings plans.  That’s complicated.  Gardening should be the opposite of that, and once you get the hang of it, it is.

Getting the garden ready for winter

The leaves are changing and falling the days are getting colder and I am personally coming to the end of my vegetable growing season. I do have a few post season activities before I completely call it a year.

Remove plants: Now my plants have lived a good life but now need to be removed. I mulch my lawn so I am always lacking greens for my compost bin so this is a good time to get some new materials. Most of my remaining plants are tomato, pumpkin, and cucumber plants which have some tough skins so I will chop them up with my lawnmower prior to add them to my modest bin. While you have your mower running this is a good time to let it keep running until it runs out of gas to avoid gumming up the engine when you fire it up next spring. This is also a good time to inspect and sharpen or replace the blade since if you are like me you will completely forget about this when you finally get around to mowing next spring.

Fertilize: If you only can fertilize one time throughout the year now is the time because turf grasses have the ability to store food during the winter months to allow a very quick rebound after the winter months. My primary concern is for my lawn which I am applying alfalfa pellets, since we have had some intense rains these past weeks they should break down quickly and not have the appearance of goose poo for too long. While applying I also allowed some to fall into by beds to help microbial activity and give my empty beds a head start for next spring. Be sure to avoid beds with and vegetation since you want to avoid any new growth with first hard freeze coming up.

Turning the soil: This can be a controversial activity since messing with the soil can inhibit microbial activity though turning the soil now can give you a head start next spring. My motivation is more on the lines if killing baby slugs (I know I am cruel) The slug activity in my garden was pretty minimal but I have concerns the few visitors may have decided to raise a family in my bed for next year. If I simply turn the first few inches of the soil I can expose the tiny slug eggs which birds will eat as a snack and any remaining will be destroyed during our first good frost. As an added benefit this will be a good time to catch up on my slacking in weeding during the last few weeks.

Taking care of your tools: Now is a good time to find those missing tools that may be hiding in your yard and garden. I have no idea why manufacturers choose to make these things green; almost like they want us to lose them to buy more  If you find any of your tools it is a good idea to put a light coating of oil on metal parts of your tools. You can also apply some Linseed oil to the wood portion of your tools.

Frosting on the top: At this point my garden is looking pretty good….even tempted to start planting though I will resist the urge. I have a plan to hold me over this winter but that will require its own post. After I have had a couple good frosts to kill off any slug eggs I will break open a couple of my bags of leaves and spread on a solid layer on top of my beds. Not only will this provide some food and temperature protection for the worms in my garden but whatever remains will be a great addition of organic matter for my garden.

Now with all this work I should be ready to start gardening way earlier than I should next spring…will I ever learn.

Gard’n Gro Garden Filter review and giveaway

001

As I have mentioned on my post on watering, I like to dechlorinate my water by filling 5 gallon buckets with water and letting them sit overnight.  Though this year I always seemed to not have enough time (or foresight) to be diligent about this and ended up just dragging the hose out and watering the plants chlorine at all.

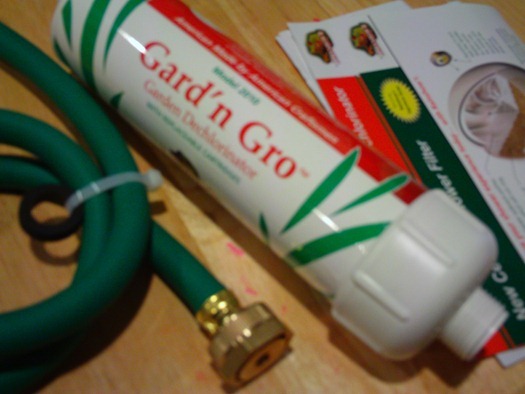
Fortunately our friends at AllFilters have a solution to this problem with the Gard’n Grow Garden Filter, by simply adding this small inline filter it can remove at least 85% of the chlorine in your water without needing to prefill or carry around heavy buckets.

After opening the package the installation process was a piece of cake.  You simply attach one end of the hose to your outdoor faucet and the other end to the filter.  Attach your garden hose to the other end of the filter and turn on the water.

004

Now to test this thing out, unfortunately I don’t have any equipment to test for chlorine, but given I am under city water I can smell the chlorine pretty easily.  So for my first test I went with the very scientific smell test and confirmed a huge difference between using the Gard’n Grow Garden Filter.

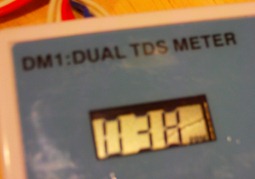
To try to redeem myself a little more, given I had two cups of water I was sniffing anyway, I put my TDS meter (which for non hydroponic readers measures the total dissolved solids in the water) and though this does not measure chlorine specifically it does pick up various salts in the water.  Actually to my surprise there was a significant difference between the filtered water and the water straight out of the tap, given this benefit was not mentioned in the Gard’n Grow’s literature.  With the tap water the reading was 38ppm and the filtered water 33ppm.

Tap Water                                                        Filtered Water

008005

Last the instructions mentioned that you may have a slight reduction in pressure after installing the filter.  Now this is definitely expected, but I needed to confirm how “slight” we are talking here.  For this I did the 5 gallon fill test.  For the unfiltered test I was able to fill the bucket in 71.6 seconds or 4.18 GPM and the filtered test finished in 79.9 seconds or 3.76 GPM.  Though this is a reduction of volume of about 10%, given my small garden I don’t think I would notice the extra 8.3 seconds I would spend watering.

Overall I was very impressed with this filter and am looking forward to using it to fill my reservoirs for my hydroponic experiments this winter and my garden next spring/summer.

AllFilters has graciously offered to sponsor a giveaway for one of these filters, so as in our other giveaways just leave a comment and a winner will be picked at random on 9/20/2010 Midnight Pacific Time.  If you haven’t already became a fan of CheapVegetableGardener.com on Facebook add us and you can enter an additional comment for a second chance to win.

Smart Garden Tools Need Smart Storage

image

There’s nothing more gratifying on a sunny winter’s morning than going to the basement or garage and stepping on a rake.  Yes, the joy of watching that well-worn hickory handle swing up and catch you right in the coffee cup (and then the nose) is an experience underappreciated by those who don’t garden.  But what really makes the experience is dumping that hot coffee onto one of your expensive circuit boards.

There’s nothing more gratifying on a sunny winter’s morning than going to the basement or garage and stepping on a rake.  Yes, the joy of watching that well-worn hickory handle swing up and catch you right in the coffee cup (and then the nose) is an experience underappreciated by those who don’t garden.  But what really makes the experience is dumping that hot coffee onto one of your expensive circuit boards.

Of course, that’s all purely facetious.  Unfortunately, it can be all too real for some of us who lack good storage space for our off-season garden needs – many residents in warmer, seasonal cities like Cincinnati struggle with effective organization and protection for their garden equipment.  For most of us, the only climate controlled storage we have is where we store ourselves–the ol’ hacienda. 

Shovels, cultivators, chemicals, and our own array of homemade tools accumulate quickly and have to go somewhere.  Plus, most people don’t want all those items underfoot for several months a year. So in general, we find a rain-resistant place to store everything outside, and maybe do a little rehab work come spring.

However, the smart gardener today uses the thinker as much as the tiller.  Greater technology in irrigation management, temperature monitoring, and humidity observations means that, at season’s end, we now have some very expensive and fragile equipment that needs someplace to go until the first light of spring. 

Scientific instruments like these can tolerate significant meteorological swings.  Store-bought ones will include advice on acceptable temperature and humidity ranges.  Those you’ve made at home will provide that information on the individual components you’ve bought.  And even within their accepted ranges, they all have issues with calibration.

Your hand tools shouldn’t be, well, left out in the cold either.  You may have hundreds of dollars’ worth of them, shivering in the December chill like Washington’s troops crossing the Delaware.  Keeping them in a warm place preserves your investment for the long haul. 

Your power equipment needs good care as well.  As smart as we garden now, we do still use the internal combustion engine quite a bit.  These aren’t as sensitive to cold and moisture as electronics, of course, but the guts of your tiller do not fare well if your 2012 gasoline is still in there in 2013. 

The best thing to do?  You can buy gas stabilizer and pour it in the tank, or simply run the machine during its last use of the season until it is out of gas.  You can till something, or just stand there and let it run. The same goes for string trimmers, mowers, pressure washers, and all gas-powered machinery.

Good climate controlled storage can also allow you to grow produce year-round, if you take a few steps to plan for it.  Apart from the delicious outcomes, you will also find yourself in a horticultural state of mind all year.  That makes you a more curious and creative gardener.

So take those cool fall days as the last vines are drying and organize some available space in your home to preserve your tools, nurture your plants, and protect your feet.

Caring for your pet caterpillar – UPDATE

IMG_2020

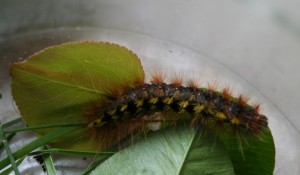
I would like to introduce you to the newest member of our family, named by the kids as “Emily”

Now normally these are some critters you want to keep out of your garden but with my kids asking for the “Live Butterfly Garden,” bringing in a caterpillar from inside and putting it into a jar seemed like a much more cost effective option.

Growing up I have caught caterpillars with the great hopes that I would be able to witness its metamorphosis into a butterfly.  Unfortunately, the lack of the internet or a nearby library I never got the knowledge of the particular “butterfly” I caught wouldn’t eat just any leaves I threw in it .  Caterpillars are very picky eaters and each specie only will consume particular types of leaves.

If you found your caterpillar munching on a plant you are in luck and you can just pick a couple leaves a day for your caterpillar.  They will not eat old or dry leaves and must be replaced daily.  In our case our caterpillar was found on a plastic play set, which sort of limited out options.  My girls did pick some leaves of various plants in our yard, and if we are lucky we may find one our caterpillar enjoys.

To improve the odds I was able to identify this caterpillar as a Painted Lady, which enjoys nettles and thistle.  Both of which grow great in my area, though none is growing in my yard (which normally would be a good thing)

This led to a nice walk in the woods to attempt to find some leaves for the caterpillars distinguished palate, unfortunately we did not find any nettles or thistles though came back with a good variety of leaves.

That Butterfly Garden is looking like a bargain at the moment.

UPDATE — May 31, 2008

IMG_2285

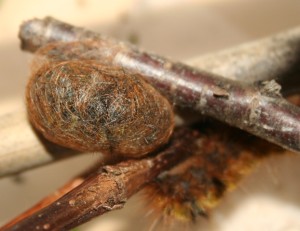
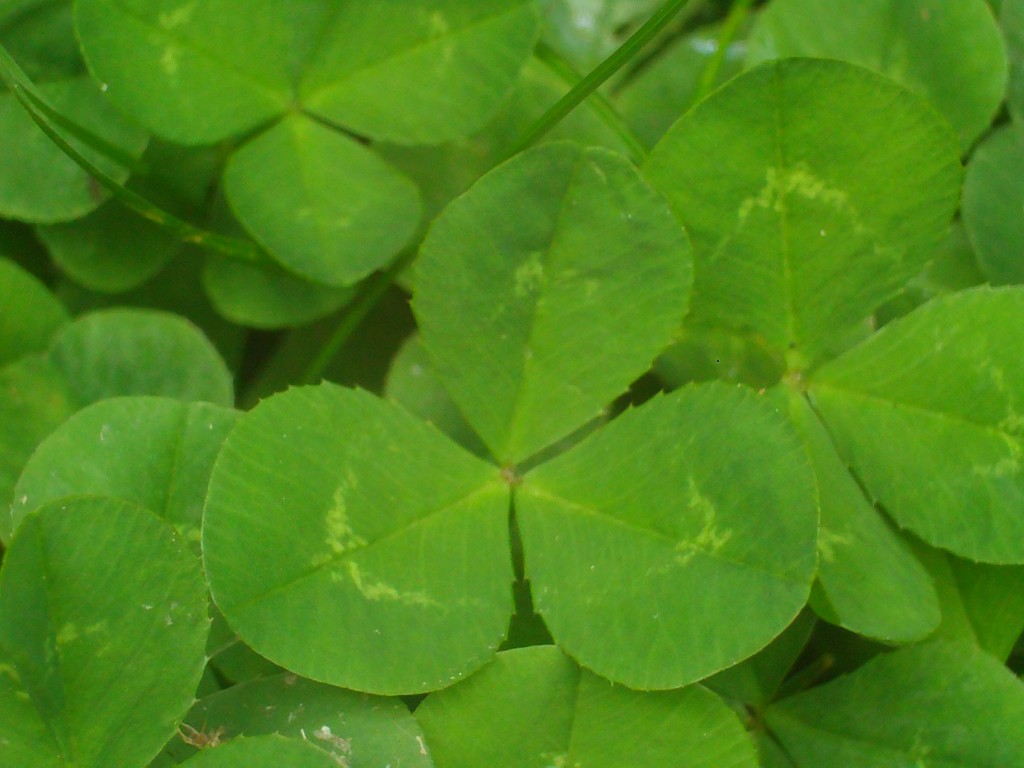
We are happy to announce that “Emily” has started has started her transformation into becoming a beautiful butterfly (or moth if my amateur identification is incorrect).  We were successful in finding their favorite food which happened to be the little clovers growing in our back yard.  Definitely a case of good reason to not kill all weeds with pesticides in your yard, by the way the rabbits love the stuff more than my lettuce so added bonus.

As you can see in the background “Emily” has some friends with her (3 total)  though currently unnamed, though I am sure by the time my daughter reads this post she will fix that.

Stay tuned in 7-10 days hopefully we will have a butterfly/moth release.

UPDATE — 06/26/2009

IMG_2734

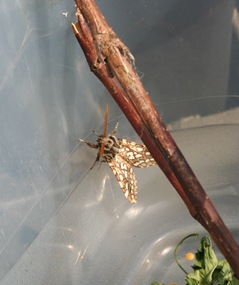
Well 7-10 days turned into more like 26 days, just when we were thinking the worse, Emily emerged as a beautiful brown moth.

For info on the flight lessons and release, check out this post.

IKE