Search Results

Tips for Getting Started with Year-Round Gardening

image

As many of us grow more environmentally conscious and feel an increased concern about exposure to chemicals and toxins, one appealing option for wrestling back control over what goes into our systems is to grow our own fruits and vegetables. However, the steps involved in planting, maintaining, and harvesting a successful crop can feel daunting, especially to those of us who have had trouble keeping household plants alive in the past.

The key to overcoming this anxiety is simple: by employing a few simple techniques, planning ahead and creating a manageable chart of necessary activities, it will be easy to keep your garden blooming year-round.

Step One: Decide What to Plant and When

Because you’re going to be a year-round gardener, any time is a good time to figure out which plants to grow in the coming season. Which ones you choose will be dependent to a large extent on where you live.  Different vegetables thrive at different times of year and in different climates.  Consult your local gardening organization or gardening center for advice concerning which crops are most advisable for your particular location.

Certain hardy crops can be planted as early as February, while warm season crops should generally go into the ground after the last average frost date. By late summer, you can plant crops for your fall garden – these should go in at least two months before you expect the earliest fall frost. Certain crops like garlic and onions can be planted as late as October!  The key is to keep planting throughout the year, so that you can also harvest vegetables year-round.

Step Two: Create a Gardening Chart

Create a gardening calendar with sections for each month of the year. Here is an example of a basic planting guide that was prepared for gardeners in Central Arkansas: http://www.uaex.edu/Other_Areas/publications/PDF/FSA-6062.pdf. Another example focuses less on which vegetables to plant in which month and much more on the activities that are needed to maintain a garden: http://www.humeseeds.com/projndx.htm.

A different option is to create a chart with rows for each month and columns for different types of things to do in the garden. For example, you could have a column for planting, another for maintenance activities, and one for harvesting. This means that for April, you could look at column one to see which plants to put in the ground, column two to see how often to water or fertilize them, and column three to check on which plants should be ready to be harvested.

Step Three: Use Techniques That Enable You to Extend the Growing Season

There are many methods of extending the growing season of your garden. Three basic ones that will be discussed here are:

  • Raised bed gardening
  • Planting seeds indoors
  • Plastic-covered tunnels

Other options you might wish to explore include cloches, cold frames, underground greenhouses, and solar-charged hot water bottles.

To begin with, raised bed gardening offers several advantages. In particular, raised beds allow you to extend the gardening season because the soil will warm up earlier, meaning you can start growing crops sooner. Additionally, because the beds are raised off the ground, it is not as difficult to work on the garden in rainy weather. This type of garden also typically offers higher yields and better soil.

Raised bed gardens even require less water and generally contain fewer weeds. You can purchase or build raised beds, or even create them by shaping rectangular mounds of soil a few inches above the ground level so that they are wide enough to reach across. However, make sure to use sufficient mulch to keep the soil in place if it rains heavily.

Next, planting seeds indoors allows you to multiply the number of planting seasons available to you. Instead of winter, spring, summer, and fall, you will have early spring, mid-spring, late spring, summer, early fall, late fall, and winter. By starting the plants inside and only moving them to the garden when other plants are harvested, you can make use of more limited space. The key is having a firm plan for garden layout and crop rotation.

Finally, this technique can be supplemented by using plastic-covered tunnels for mini-greenhouses. Not only will this allow you to plant earlier in the spring, it also provides a place to harden the tender seedlings you have been growing indoors while you are waiting for space to open up in the garden. You can use fence wire to support the tunnels; another option is to use hoops cut from wood, wire, or pipe. In addition, cover the tunnels with blankets or tablecloths when it is especially cold and cut V-shaped vents in the sides in order to improve ventilation.

What vegetables would you like to grow in your garden? Have you had success with year-round gardening in the past?

Since 2000, Chris Long has been a store associate at a Home Depot in Illinois. He also contributes to the Home Depot blog, and provides raised bed garden advice as well as tips on other home landscaping topics.

How good are the latest gardening tools? Let’s talk

Gardening-Tools

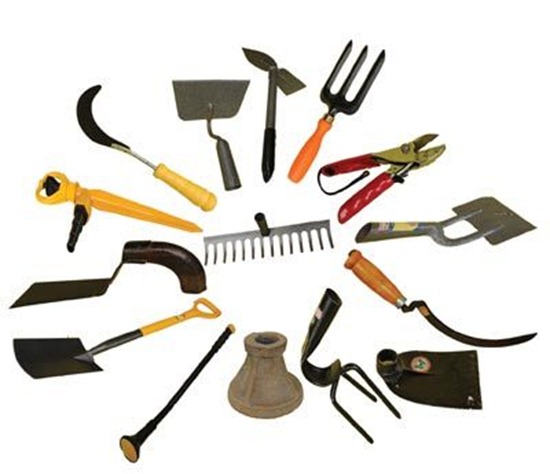
For true garden lovers, taking care of their yard is more than just an everyday task. Hard-working garden owners take pride in their yards, and with the necessary tools in their garage, they find it easier to make their yard look fantastic. Here is a list of the latest gardening tools that help to keep your yard in tiptop shape.

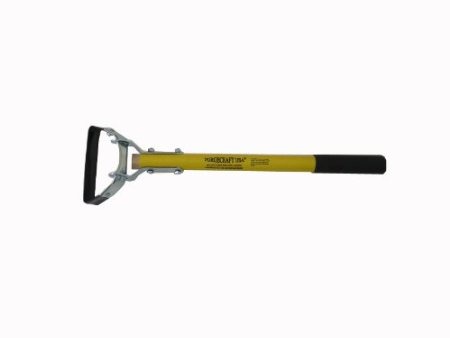
hulahoe

Hula Hoe

Hoes help you to make rows, dig furrows, loosen the soil and kill weeds. This tool is also known as stirrup hoe that makes weeding an easy job. The stirrup hoe is a long-handled tool that makes you work easily without too much bending. Its blade oscillates to and fro like the hips of a hula dancer. This oscillating blade also helps to slice weed roots below the soil surface. Since the blade swivels to and fro it cuts on both pull and push stroke, making it easy to handle in closed spaces between plants and along the edge of flower beds. When the blade starts losing its sharpness you have to replace it with a new one.

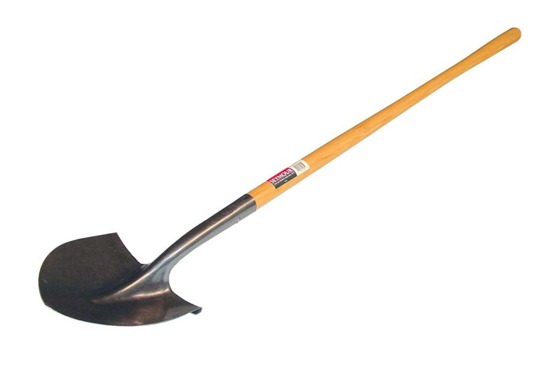
shovel

Shovels

A good long-handled shovel is used for mixing large quantities of dirt, compost, soil and other related materials. The long handles of the shovel minimize strain on your back and shoulders. The handle is slightly tilted so that your hand remains in a natural position thereby reducing the pressure on hand and wrist. You can also use the shovel for planting trees and shrubs.

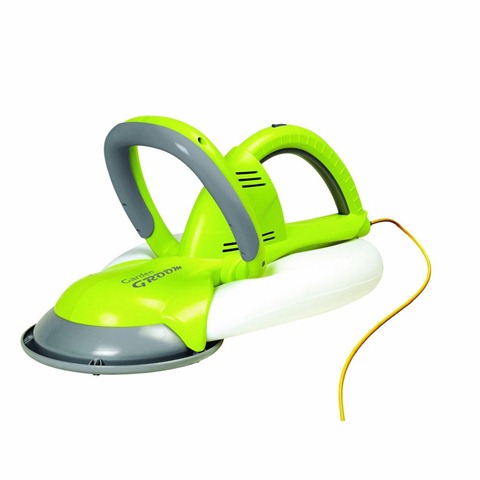
gardenGroom

Electric Garden Groom

You no longer need to waste time cleaning up hedge trimmings than trimming them. Garden groom is a wonderful invention that is ergonomically designed to trim your hedge. The groom uses its big rotary blade for trimming and collects all the cuttings in its built-in-cavity bag to keep your yard free from debris. Thus the tool makes disposal easy without requiring you to sweep up afterwards which is the most labor intensive part.

Gas powered three-in-one Push Lawn Mower

Ideal for smaller garden, the compact design is easy to handle in closed spaces and features three-in-one cutting system that includes side discharge option, mulching and a rear bag collection. Simply fold the handle and keep it aside when not in use. Its mulching option returns the essential nutrients back into the soil resulting in a healthier and greener lawn. You can adjust the height of the handle for more comfortable pushing. Overall the Lawn mower is designed to be an user-friendly tool.

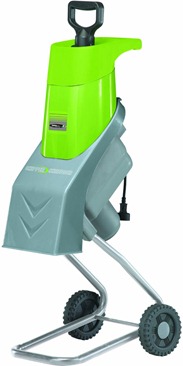
electric_chipper_shredder

Electric chipper or shredder

This machine powered with electricity makes quick work out of leaves, pruned branches and plant debris. Converts your garden’s rubbish into beautiful munch or compost material thus saving your job of reduce, reuse and recycle. Its lightweight design makes you comfortable in moving it around the yard. The machine is also provided with a safety hopper lock that stops the motor from operating when opened. So there are no more smoky fumes in your garden.

hand_Trowel

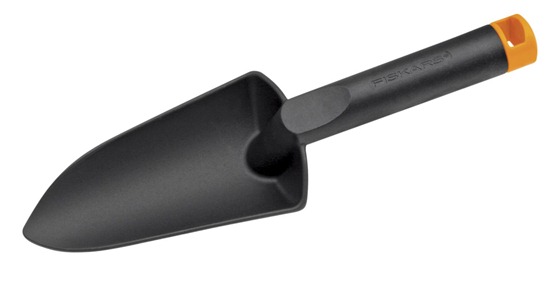
Hand Trowel

Trowels are ideal for digging holes in garden beds; planting small annuals, herbs and vegetables; planting container gardens and mixing soil with compost, fertilizer and other potting mixes. Look for the latest one piece design where the handle will always stay firmly with the head as you take it deep into tough soil. The latest versions have an easy-to-grasp handle. Overall it offers a hassle free performance.

Hand Pruners

Hand pruners are of two types: the anvil type with a deep sap groove and the bypass type which functions like scissors. Anvil pruners do not require much of hand pressure and is easy to cut. Bypass pruners functions well in tighter spaces. Both the models can be used to cut branches up to 1 inch in diameter. The sap groove prevents the blade from sticking when used to cut sappy wood. Hand pruners reduce pressure and impact on wrists. If you take proper care then these pruners will last longer.

Bulb Planters

This tool can be used to make a perfect hole for planting bulbs and other bedding plants. Its long handle saves your back and makes planting easy. For easy operation, simply moisten the soil before planting. Take the planter to the position where the bulb has to be placed and twist the tool to dig hole to the desired depth, then take out the tool from the hole. Now all you need to do is simply drop in seeds or bulbs without straining your back.

garden cart

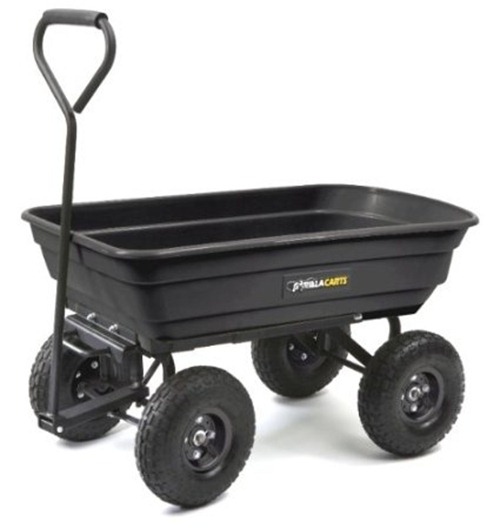
Wheel barrow/ Garden cart

These carts are not only used to transport heavy and bulky materials such as soil, garden debris, plants and compost but also to carry concrete mixing containers. Its light weight makes lifting and managing extremely easy. The latest carts have cushioned loop handle for comfort and powder coated steel frame for extra durability.

poly leaf scoop

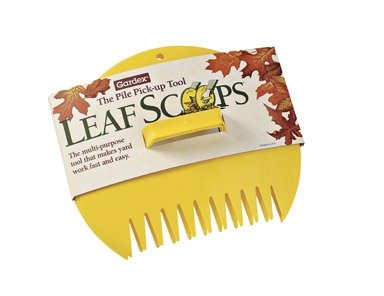
Poly Leaf Scoops

Poly leaf scoops can be used to pick up leaves, thorny or poisonous plant trimmings, pine needles, weeds and gum balls without harming your hands. It is also used for bedding mulch and peat moss. Poly leaf scoops are ideal for all seasons.

electric cultivator

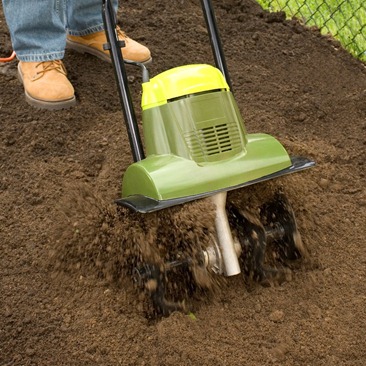
Electric Garden Cultivator/Tiller

Cultivators are generally used to open up and aerate the soil. The tines of this tool help in mixing of materials and loosening weed roots. If you have smaller rocks on your garden soil, no worry, the tiller kicks them out of the soil and to the top where they can be easily removed. Because of its light weight it digs very well without requiring much of man handling or intense arm and back workouts. The only thing you have to do is remove the tines after each use and clean them, which is quite an easy job.

Visit your favorite store and grab these latest tools to make gardening even more enjoyable.

About The Author: Alia is a writer blogger. She loves writing, travelling and reading books. She contributes to Joshia Pastore

Create your own organic kitchen garden in 2013

With a continued focus on healthy eating this year and the recommendation to eat healthy, organic foods where possible, what better way to incorporate the two by creating your very own organic kitchen garden in 2013. With a little planning and imagination you’ll soon experience the joys of planting and growing your own food that will see you kitchen stocked with fresh produce all year round. Celebrate the seasons and get in touch with the foods that should be cooked with and consumed throughout the different cycles of the year and you’ll be sure to be taking in maximum vitamins with every bite without any of the pesticides.

So how do you get started? The first thing you need to consider is the available space you have within your garden to dedicate to growing food. You’ll need a bright sunny spot that is relatively sheltered from the winds and ideally as flat as possible to allow for even water distribution across your plot. Make sure you have easy access to the plot, ideally locating it as close to your kitchen door as possible to ensure you can reap the benefits of popping out into the garden whilst cooking to pick your herbs and vegetables for your meal.

organic kitchen garden

To achieve the best results, start off simple and choose vegetables that are known to be easy growers such as lettuces, Swiss chard and chives. Add to this some tasty beetroots and radishes and you’ll soon see just how much fun growing your own food can be. To achieve success with your vegetable growing you need to ensure that your plants have access to as much sun as possible – ideally at least 6 hours each and every day.

If your garden tends to fall into the shade halfway through the day you might want to consider planting directly into containers rather than the ground to allow you to move your plants into the sunny areas with relative ease. As the seasons change and the position of the sun moves around your garden you might find this one of the most valuable tips to consider.

Container growing also opens up the opportunity for those people without gardens to participate in growing their own food and can do very well on even the smallest sunny balcony or patio. All you need to do is ensure that your pots are large enough to take the full growth of the plant, add plenty of drainage holes and water on a daily basis. For best results add a liquid fertilizer once every fortnight and you’ll soon start to see results.

Tomatoes on a patio

If you have a sunny window in your kitchen this is a great place to grow your favorite herbs from and fills the space with an incredible aroma. It’s also the ideal place to start off tomato plants, bell peppers and squash that benefit from that extra bit of nurturing and protection in the early days. What’s more, bringing your organic garden directly into your kitchen in this way is incredibly inspiring when meal planning.

Herb garden in containers

Like these planters? I found them here

Before planting your seeds you need to ensure that your soil is as fertile as possible. Add essential nutrients by working the soil through with rich compost manure and high quality fertilizers before you get started to guarantee your end result of delicious, healthy produce. On top of this you will need to maintain a regular watering routine, depending on the weather and soil you have planted into and the types of vegetables you are growing. As a general rule, leafy vegetables need to be watered more frequently than root vegetables. Be sure to add proper drainage to your soil to allow your vegetables to have the best chance of growing fully. Compost or bark chippings achieve this for you easily.

With all this in mind you are now ready to plan your own organic kitchen garden to ensure you are supplied with tasty, home grown food all year round. With some daily dedication to your plot you’ll enjoy following the seasonal patterns of planting, pest control and feeding as you watch your vegetables grow, inspiring you with ideas for new recipes to experiment with for highly nutritious, cost effective and deliciously organic mealtimes.

Author Bio: The article is being written by Peter Smith. He loves to renovate his home every year for purchasing new furniture or accessory he trusts the brand Mayer Blue.

Releasing ladybugs in your garden


When we started my garden at my our current house my daughters and I noticed we didn’t have any ladybugs roaming around the leaves. Now I would like to think that aphids and mites feared me so much to dare to step foot in my garden, but the reality is I live in a newer neighborhood with vegetation in its early stages and with the lush forest around me it is hard to compete.

If the ladybugs will not come to your garden your only choice is bring them there yourself. I did this by purchasing some ladybugs at our local home and garden store which ours starts carrying them a little after the local last frost date. Unfortunately, I took my daughters with me when I bought a bag of 1000 lady bugs for $5.00 so no every time we go to Home Depot they need to check to see if the ladybugs are there today, guess this will be a yearly tradition. If you can’t find them locally you can always purchase live ladybugs online.

Why would I want these bugs in my garden? Well other my girls get a lot of joy searching in our garden for them they are also an awesome beneficial insect which each one can eat up to 5000 aphids/mites in their lifetime. When you decide to release them be sure to follow the directions on the package and do so at night so they don’t all fly off to the neighbor’s yard. If you have kids you might want release a 100 or so during the daytime so you can make sure you get some cute pictures like the one below.


UPDATE:
Shortly after posting this I was taking some pictures of some of my mystery bulbs coming up and noticed the lady bug below, guess my garden can actually attract a few of them on its own.

Protecting Your Plants and the Planet: Eco-Friendly Large Pest Control


Photo from Alberta Home Gardening

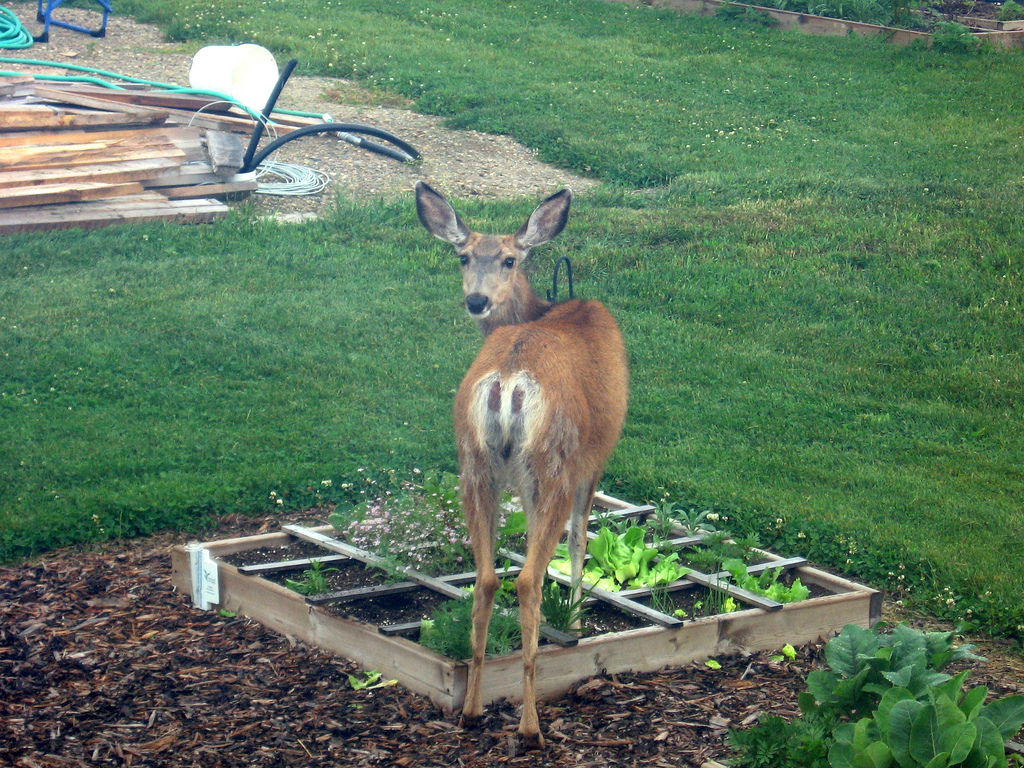
You’re not the only one who enjoys your garden–deer, rabbits and even household pets may find your flowers or vegetables to be tasty treats. And, of course, dogs and cats may mistake your garden beds for a great place to do their business.

While organic or eco-friendly pest control is a good idea for combating any type of pest, it is especially important to use non-harmful deterrents when dealing with larger animals, particularly household pets. Fences, lighting, noisemakers and a variety of biological sprays and spreads can help make your garden less appealing and less accessible to unwanted guests.

Physical Pest Control Methods

Perhaps the easiest way to keep animals out of your garden is to fence it in. Dogs, rabbits and even deer will dig, so a good garden fence should extend at least a foot underground, and the spaces should be too small for little heads to poke through. Deer can also jump, so a good deer fence will be 8 feet high. Depending on the size of your yard or garden, a fence can quickly become an expensive means of pest control, but it can also be a beautiful landscape element itself, and well-built fencing will last many years.

If a fence is not an option, then floodlights, noisemakers or motion-activated sprinklers are also effective, but less intrusive, pest deterrents. Neither cats nor rabbits like water, and dogs’ ears are sensitive to certain pitches that can’t be heard by humans. Deer tend to shy away from brightly lit areas and may also be startled by sprinklers or noisemakers, causing them to retreat and avoid the area in the future.

Unique Pest Control Methods

If physical pest control methods don’t work or aren’t enough, there are also many natural chemical options. Diluted hot-pepper sauce sprayed over plants will make them unappetizing. A sprinkle of coyote urine, available at many hunting and outdoor supply shops, around the border of your garden will deter rabbits and deer from coming near, and may also keep dogs and cats at bay.

Biological Pest Control Methods

Of course, like people, animals like certain plants and dislike others. Rabbits, for example, prefer clover to vegetables and hate onions, so planting clover will keep them away from your vegetable garden, and planting rows of onions along the outside of your garden will deter them from going after the tastier vegetables in the middle.

Deer, too, prefer certain plants–namely, clematis, roses, tulips, lettuce, peas, broccoli, azaleas and fruit trees (among others). Avoid these plants, or locate them in a less accessible area of the yard or garden. Disguising these plants among less desirable offerings–such as mint, onions, chives, daffodils, boxwood and butterfly bush–may also protect them.

Author of this guest post is Marco who is an editor over at Luma Gardening.

Using used coffee grounds in your garden/compost

coffee_posterI have wanted to leverage used coffee grounds in my garden/compost but not being a coffee drinker myself I never seemed to be able to have the right timing to find any at local coffee shops.  Recently a colleague taunted me with a picture from his cell phone of a few bags in the coffee shop in our cafeteria at work and my quest began.

After just two days I have accumulated 40 lbs of coffee grounds, now how can I use this stuff in my garden?

  • Throw it in your compost: Coffee grounds are 1.45% nitrogen and contain calcium and magnesium to add some trace minerals you may not get from your other organic material.  Coffee grounds are a green material (I know coffee is brown, but same idea as grass clippings) so you should add with at least equal amounts of brown material (leaves) but if you are like me my browns are way to high already.
  • Add it directly to your garden: I have seen some arguments that coffee grounds are acidic, but others claim it loses most (or all) of its acidity during the brewing process.  Due to my natural curiosity I need to know the answer.  So the answer is, it has an average pH of 6.9 so for all intents and purposes, it is neutral. Though if you are really tired and forget to brew it, it will be somewhat acidic.
  • Fertilizer: Sometimes your plants need a little boost in the morning as well.  Simply add a couple cups of coffee grounds to a bucket of water and let it seep for 24 hours and apply to plant in the same way you would compost tea.  Using gardener terms I can’t think of any better name for this as “coffee tea”  If you are busy/lazy you also can use it as a side dressing on top of your soil and let the rain seep it for you.
  • Annoy your pests to stay out of your garden: It has been said that coffee grounds can deter cats from using your garden as their own personal commode.  There are also reports that it can deter slugs as well.  I am not sure if it is the abrasive soil effect on their sensitive underside or just the cruel reality that with their slow pace they can’t do anything with the caffeine rush they get.  Coffee grounds may annoy ants to convince them to move their home elsewhere.
  • Feed your worms: To worms this stuff is like ice cream, if you listen carefully you may hear them cheer your name when you add a handful to your worm bin when your greens from the kitchen may be a little lacking.

According to Starbucks brochure I picked up on my last visit, you should use the coffee grounds within 3 weeks to get the most nutrient value, though if you are composting I am sure you can start out the process in the bag if you really want to.  Given that 16.34 billion pounds of coffee is produced each year there is plenty for you to save from ending up in a landfill.  This is a great way to help the environment while also adding value to your garden without affecting your pocketbook.

IKE