Garden Salsa recipe
14.8 years ago cilantro, garlic bulbs, harvest, onions, recipe, tomato
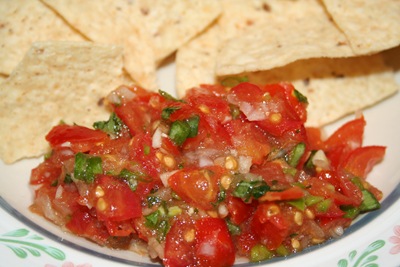
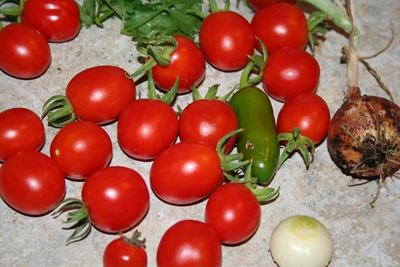
Big moment this week, I was able to make salsa entirely from ingredients. I normally don’t use cherry/grape tomatoes for salsa but my Early Girls are not that early this year and have not quite turned red.
CVG Garden Salsa Recipe
- 2-3 tomatoes (or 12-15 cherry/grape tomatoes)
- 2 cloves garlic
- 1 small onion
- green onion
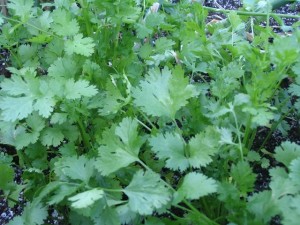
- 5 sprigs of cilantro
- tablespoon vinegar
- 1 jalapeno pepper (seeded)
- sugar
Directions: Coarsely chop tomatoes (removing seeds, though if I few sneak in it is not a big deal), onion, and green onions and add to bowl. Finely chop garlic, cilantro, and seeded jalapeno pepper and add to mixture. Add vinegar to bowl and mix thoroughly. Let sit for 10 minutes and add sugar until salsa does not have a spicy aftertaste (normally 1-2 teaspoons) If you like the spice skip the sugar and include seeds from the jalapeno.
Tags: cilantro, garden seeds, garlic bulbs, pepper plants, salsa garden, tomato plants
Mango Salsa Recipe
I am starting to get some cherry tomatoes turning red but not enough to make salsa so yet again so I decided to make some Mango Salsa. It is great to eat on tortilla chips the same you would for regular salsa or black bean corn salsa. One of my favorite things to do with is as a topping to blackened salmon (salmon grilled with dusting of Cajun seasoning)
CVG Mango Salsa Recipe
- 3 mangos
- 2 cloves garlic
- 1 small onion
- green onion
- 5 sprigs of cilantro
- juice of one lemon (or lime)
- 1 jalapeno pepper (seeded)
- sugar
Directions: Finely chop 1 mango (or blend in blender/food processor) this will create a base for the salsa. Coarsely chop remaining mangos, onion, and green onions to have more defined texture and add to bowl. Finely chop garlic, cilantro, and seeded jalapeno pepper and add to mixture. Squeeze in juice of lemon into bowl and mix thoroughly. Let sit for 10 minutes and add sugar until salsa does not have a spicy aftertaste (normally 2-3 teaspoons)
Now if you really like the spice you can leave the seeds in and/or skip the sugar but for the blackened salmon it give a good contrast to the spicy meat and people just are not usually expecting fruit to be spicy.
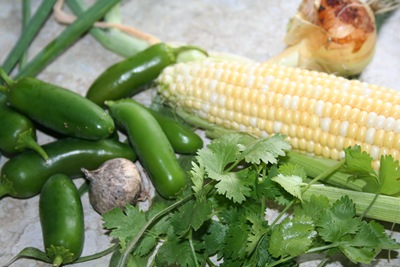
I can proudly say with the exception of mangos, lemons, and sugar the remaining ingredients came right out of my garden.
Tags: cheap, cilantro, garden seeds, garlic bulbs, led, pepper plants, salsa garden, tomato plants, vegetables
Black Bean and Corn Salsa Recipe
14.8 years ago corn, peppers, recipe, salsa
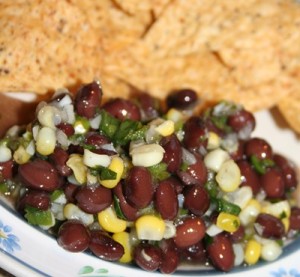
My jalapeños peppers have been growing like crazy and I have had to start harvest to prevent the plants from stop producing. Given my tomatoes are still green I have been itching to do something with them, I decided to make some corn salsa. Given I couldn’t find a recipe that matched the ingredients I had on hand I decided to make my own.
CVG Black Bean and Corn Salsa Recipe
- 2 ears of corn (1-1/2 cups frozen corn)
- 1 small onion (chopped)
- 1/4 cup chopped cilantro
- 1/4 cup sliced green onions
- 2-3 cloves of garlic (chopped)
- 1/4 cup white vinegar
- 3 T sugar
- 1 chopped seeded jalapeño
- 1 chopped unseeded jalapeño
- 1-1/2 cups black beans (canned)
Directions: Cook corn for 2 minutes in boiling water and submerge in ice cold ice water. This helps stop the corn from cooking any more and also make handling while cutting the kernels a little more pleasant. Cut off kernels and add to bowl. Chop/slice remaining ingredients and add to bowl, stir, and refrigerate and serve chilled.
If you like your salsa a little spicier leave both pepper seeded.
Tags: cilantro, garden seeds, garlic bulbs, led, outdoor plants, pepper plants, salsa garden, tomato plants
How to freeze herbs
14.8 years ago cilantro, freezing, herbs, mint, peppermint
One of my goals in my garden is to make salsa entirely from ingredients from my own garden. In the past I have come close only requiring the purchase of a couple jalapeño peppers from the grocery store but this year with much effort and a strangely hot summer for the Pacific Northwest I have all the ingredients growing in my garden. Though unfortunately the ingredient cilantro could be my elusive ingredient since hot weather means great growth then subsequent bolting. My solution to this problem is successive planting and freezing herbs.
Now drying is also a viable option though I prefer freezing since many moist herbs can lead to mildew without the right equipment to dry efficiently. Frozen herbs also maintain the same potency for several months in the freezer as fresh so no guessing on measurements of your frozen herbs.
There are actually a few different methods for freezing herbs, each of which depends on how you plan on using them later.
The first method is great for keeping the herbs texture and flavor intact. The process is nearly identical to that of freezing berries.
Flash freezing herbs
- Pick the best freshest herbs you can find
- Wash and pat herbs dry
- Lay on layer of wax/parchment paper on cookie sheet
- Freeze overnight
- Place leaves in freezer bag(s), using a straw to suck out excess air
If you are planning on using your herbs in soups or stews, I would definitely recommend the ice cube method.
Ice cube tray method
- Pick the best freshest herbs you can find
- Wash and pat herbs dry
- Hand chop (or use food processor) leaves
- Put chopped pieces into ice cube trays and fill with water of stock
- Freeze overnight
- Place cubes in freezer bag(s), using a straw to suck out excess air. You may also put the trays right into the freezer bag sucking out the air if you wish.
Note: Also try mint with a little extra water to add to drinks during the summer (or winter)
Now if you are planning on using your herbs for dishes that require oil such as Pesto with your Basil. This is a great time to do a little up front preparation.
Ice cube tray method (with oil)
- Pick the best freshest herbs you can find
- Wash and pat herbs dry
- Add 1/3 cup of oil for each 2 cubs of herbs to food processor or blender
- Put chopped pieces into ice cube trays
- Freeze overnight
- Place cubes in freezer bag(s), using a straw to suck out excess air. You may also put the trays right into the freezer bag sucking out the air if you wish.
Now in a few months you can add some parmesan and have some previously frozen pesto in the middle of winter.
Tags: cilantro, herb garden, outdoor plants, pepper plants, salsa garden
How to grow seeds in your garden
14.8 years ago cheap, seed saving, seeds
Because of a strange heat wave we had in June, I seem to be growing more seeds than vegetables this year. Now as they say when life gives you lemons, make lemonade. In that spirit I am planning on increasing the number of plants I will allow to completely go to seed this year.
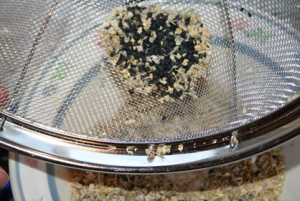
I have always saved cilantro seeds, the first time it was almost an accident my daughter liked the pretty white flowers and after neglecting my garden at the end of the summer I had perfectly dried cilantro seeds on the plant. Free and renewable supply of seeds, what could be better. If I don’t have you convinced here are some more reasons:
Cheap: You really can’t beat free. With the price of seeds increasing depending on the variety of seeds you grow this could save you a considerable amount of money per year.
Easy: The creation of seeds of seeds is a completely natural process that has been happening for millions of years. In many cases you can do practically nothing other than harvest the seeds before the birds do.
Natural selection: With a little attention you can hand select only your best plants to harvest seeds from. If the plant survived to produce seeds it has to be at least a little disease tolerant and if you intentionally pick plants that bolted early you can also establish your own slow bolting variety.
Limited availability: Even with all the resources on the internet your favorite seed company may not always carry your favorite varieties or in some cases just a few seeds might be hard to come by. If you play your cards right you may even be able to make a few bucks selling your rare seeds.
Seed Exchange: If you collect seeds you more than likely will get more seeds than you need for the next 2-3 years from a single plant. This is a great supply to use for local or mail seed exchanges. Not only are you supplying someone else with seeds they need but also adding seeds to your collection which you can harvest and repeat the process again.
Growing sprouts: If you are paying for seeds growing sprouts for some plant varieties can be pretty expensive…unless your seeds are free. This is a good healthy way to use up some of those extra seeds you can’t get rid of any other way.
This year I am planning on harvesting spinach, pea, carrot, and radish seeds (along with my previous onions and cilantro) so stay tuned for more details.
Tags: birds, cheap, cilantro, garden seeds, outdoor plants, vegetables
Growing sprouts in a Mason jar
14.8 years ago cheap, kids, sprouting
My daughter was required to do a presentation which included an experiment using plants for school and of course her mother directed her to me. Given there was not a lot of time until the presentation I suggested that she grows sprouts, given you can go from seeds to a jar full of sprouts in less than a week.
Construction
You really can grow sprouts in almost anything. We chose a mason jar, though plastic storage containers, trays, or even fabric bags (just drip in water and hang)
The important thing is to provide plenty of airflow, if you don’t your seeds will produce an awful stank that you won’t want in your house let alone eat. We used a piece of an old pair of leggings, which we stretched over the opening of the jar and applied the mason jar ring….well that’s about it.
How to Grow Sprouts
The process starts with seed selection. You can grow any seed as a sprout though you may not want to eat them. Cilantro is a good example it will grow great but the root of a cilantro/yellow mustard sprouts are very potent so use with cooking, not raw. Some good suggestions are alfalfa, broccoli, buckwheat, cabbage, chickpea, garlic, lentil, oats, yellow mustard, peas, onion, radish, sunflower, fennel, arugula, pink kale, fenugreek, wheat, or wheatgrass. In our case my daughter wanted to determine how quickly and big seeds grew depending on the initial size, so I gave her a several different types of seeds for her experiment.
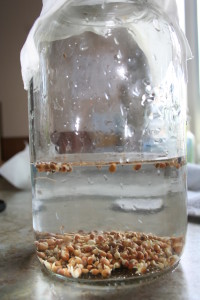
Take about a tablespoon of seeds and soak in room temperature water with a couple drops of liquid fertilizer overnight.
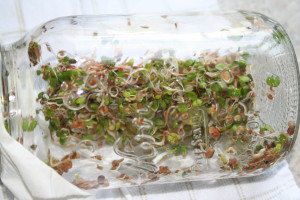
In the morning drain, rinse and let sit out of direct sunlight. Repeat the drain/rinse process once a day (twice a day if your sprouts begin to smell) During the first couple days it is advisable to shake and/or roll the jar on its side to allow the seeds to spread out a little. Doing this simple procedure within about a week you should have a jar full of fresh healthy sprouts.
Why grow sprouts?
Fun: Great for kids with limited attention spans. Within a day or two they can see their seeds sprout growing more and more each day. It is also a great way to keep your sanity during those long winter months.
Cheap: For mere pennies you can grow pounds of greens.
Nutritious: These little sprouts pack a ton of nutrients for their little size.
Easy: The process is pretty fool proof, just rinse with water, set them on your counter, and eat. What could be easier
Tags: cheap, cilantro, garden seeds, garlic bulbs, outdoor plants
