I forgot to plant cilantro, but mother natures got my back
13 years ago cilantro, coriander, outdoor seed starting

Being busy with work and a new baby at home, I completely forgot to plant my cilantro. Though I got a little surprise when I pulled back the shredded leaves I used on my beds…I nice blanket of cilantro seedlings, almost like mother nature knew I was going to be lacking focus this season.
I was pretty good about picking my cilantro (or coriander at this point) at the end of the season a little prior to the flowers were completely dried out to allow for crop rotation. Crop rotation is the process of moving species of plants to alternate locations to prevent build-up of specie specific diseases, fungi, or miscellaneous annoying pests. By not planting the same plants in the location for a couple years this causes these undesirables to die off making it safer to plant at that location on the third year.

In the previous years I have been lazy and just let the plants self seed but after 3 years probably a good idea to move things around…oh well maybe next year.
How to make your own onion sets
13.6 years ago onions, outdoor seed starting

For a couple years now I have attempted to start onions from seeds and the same thing happens each year. All is going well, good strong seedlings, then I run out of space in my grow box and the poor seedlings get kicked out to fend for themselves a few weeks to early leading to very few survivors.
This summer I decided to try something new, during the end of July I spread onion seeds generously over about two square feet of my garden. Now after a month and a half I have some nice little onion seedlings coming up.

I plan on keeping them in the ground until after the first frost the leaves will go yellow/brown and I will harvest my onion sets and lay them out to dry for a few days and store them in an old mesh container where I have bought onion sets a couple of years ago. Where I can replant them this spring as soon as the soil can be worked.
The benefits of growing your own onion sets is you can grow varieties from species that you can not find even at your favorite online seed company. Obviously the sets are also much cheaper than buying them already in the set form. You can grow the onion sets to the specific size you want, which is important because small onion sets grow up to be onion bulbs with the larger ones growing up to become onion flowers.
The best part of this with the amount of rain we have been getting here in the Pacific Northwest the past month, I haven’t even had to water these seeds, so other than a few minutes of sprinkling the seeds, no real effort on my side.
Successive Pea Planting
14.1 years ago outdoor seed starting, peas, spring

Last year by 5 year old learned she likes to pick and eat fresh pea pods and was very diligent on harvesting new peas as she found them. Unfortunately this meant less peas for me. This year I am using successive planting to ensure I get my fill this year but also do not get overwhelmed with one big harvest all at once.
I started the process about a month ago by soaking my sugar snap peas in water overnight…then forgetting about them and ended up planting them by flashlight in the rain the following day. I couple weeks later I did the same for my snow peas in a separate part of my garden.
If everything goes as planned I should get some early snap peas and followed by some snow peas 2-3 weeks later. Even if my plants do not cooperate and I get overwhelmed with too many peas I can always leave a few on the plants and harvest the pea seeds for next year.
Tags: cheap, garden seeds, outdoor plants, vegetables
Cheap Homemade Cold Frame
14.2 years ago cheap, cold season crops, outdoor seed starting
When we bought our house we found a screen door in the garage. Not wanting to have or install the screen door we tried many times to get rid of it without success.
Finally I decided to use the parts to create a cold frame. I did consider using the whole door and hinges as a cold frame but decided I could make something that looked a little better by taking it apart.

The construction was very simple, by taking measurements of the windows I made the box out of cedar with similar dimensions. Wanting to try out my new circular saw I decided to make the cuts at 45 degrees for a more finished look. Last I simply screwed the sides into a length of 2” by 2” I placed at each corner

I have two squares of glass and a screen of the same size so I should be able to switch these in/out to make sure I am not frying the plants when it is time to harden them from the nice warm garage.
Later I plan on making a more secure (from the wind) hinged top but wanted to see what I could create with a small budget and I could not resist the 3 pack of seedling trays which took a decent chunk of my budget from this project which was sponsored by my Lowes Gift card winning from Rob’s World.
Tags: cheap, garden seeds, outdoor plants, vegetables
Protecting your seedlings when your weather does not cooperate
15.2 years ago cold season crops, outdoor seed starting, sieve
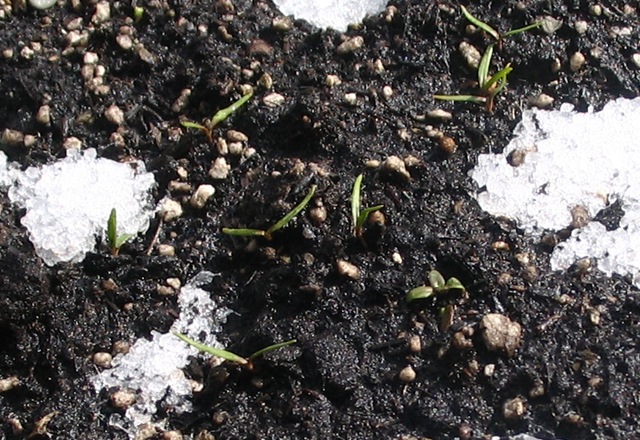
I like to push the envelope my luck when I decide to start seeds outdoors and this year is not an exception. Just yesterday I posted about planting the rest of my outdoor seeds where karma responded with a freak snow storm and freezing temperatures.
I am not too worried about about the new seeds I planted since many have been sitting dormant in the refrigerator for almost 12 months so few more days in about the same temperature shouldn’t be too traumatic for the lettuce, carrots, and cilantro.
The plants I have concerns with are the spinach seedlings which have just started to break through the soil. Fortunately spinach are pretty cold tolerant but weight of the snow on top of them is not a great way for them to start their time in the world.
After a quick search through the garage I found a great solution, a plastic storage tub, which fit perfectly over the irregular rectangular space I planted them.

Tada. If I wanted to get all fancy, I would add some holes for venting/etc but I chose to set a small cinder block on top and call it good. After a couple days, I should be able to remove it until the next freak storms comes our way.
Stupid groundhog…
Update: This is what the tub looked like after a few minutes in the sun (instant humidome)

Tags: cilantro, garden seeds, outdoor plants
Finish outdoor seed planting with coffee grounds
15.2 years ago garlic bulbs, onions, outdoor seed starting
It has been a blessing that the competition for free coffee grounds at the Starbucks at my work has increased now the weather warmed up and I have freed from the temptation to grab yet another free shiny silver bag of grounds. The reason is, I have put four bags in my compost, worked generous amounts into my vegetable garden and I still have six bags left. Now I am looking at inventive ways to use the rest up. I tried mixing with perlite to make a cheap potting soil (failed still no room for roots) but I believe I have come across one success I thought I would share.
When you are finished planting seeds outdoors apply a thin layer of coffee grounds. This will deter slugs from going after your new seedlings and keep cats from mistaking your nicely loosened and raked soil for their kitty litter.
I have done this for my larger seed plants (peas, garlic, onions, cilantro) but for the small seed plants (carrots, lettuce, spinach) I used the coffee grounds as a seed covering.
So far the results are great. All of my peas/garlic/onions/spinach have sprouted with no signs of pests (four-legged nor zero-legged).
Tags: cheap, cilantro, coffee grounds, compost, garden seeds, garlic bulbs, led, outdoor plants, vegetables


