How to save Bhut Jolokia peppers seeds
14.5 years ago Bhut Jolokia, ghost pepper, harvest, seed saving
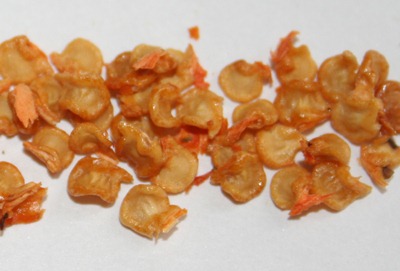
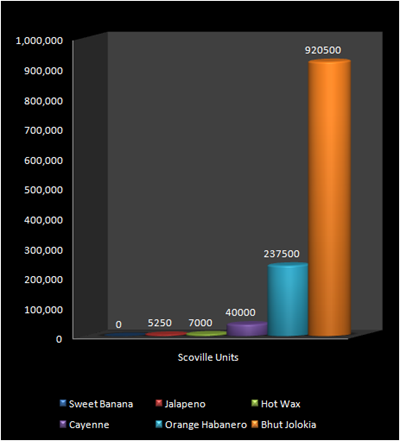
I was lucky enough to win some Bhut Jolokia pepper seeds from Red Icculus. In case you haven’t heard of these they are the hottest peppers on earth having a heat rating of over 1 million scoville units. Just to put that into comparison jalapenos are around 5000 scoville units. One property of this pepper is the way the heat builds after consumption, on first bite it is spicy but takes a few seconds until you really feel the burn which is where it gets the name “ghost pepper.”
Now when dealing with these peppers I recommend using extreme caution I have some pain in my nose hours later just from breathing around these things so vinyl gloves and possibly even a mask would be recommended.
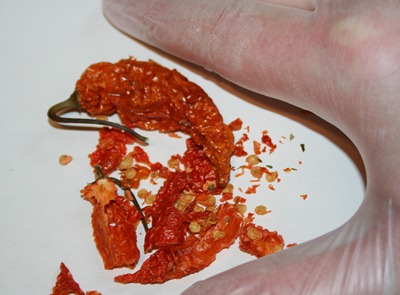
Once you have the safety precautions in place the process is actually very simple. Just break them up and pick the seeds up and store in a homemade seed packet. Now eating the pepper whole is not a challenge I want to take though saving the dried pepper flakes and adding a pinch so some chili might be up my alley. Though if you want to watch some people in pain taking see these videos of people taking the Bhut Jolokia pepper challenge on YouTube. Here is my favorite and my inspiration to not take the challenge.
I am planning on trying to grow one of these using my new hydroponic setup, well at least once I get around to building…so stay tuned.
Tags: cheap, garden seeds, pepper plants, vegetables
How to save pumpkin seeds
14.6 years ago harvest, pumpkin, seed saving, seeds
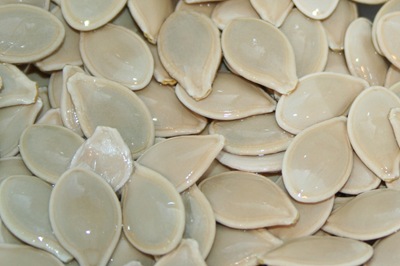
The kids and I carved several pumpkins this year but we waited carve the three pumpkins we grew in our backyard until Halloween since these were the seeds I wanted to save for planting next year. First, I know exactly how these pumpkins were grow, organically and free of any pesticides. Second, I was able to let these pumpkins grow undisturbed until the day I picked the seeds, so the seeds should definitely be mature.
The process is very simple, while getting the “goo” as my 5-year-old would say out of the pumpkin set the seeds aside and add to a colander. Give them a good rinse and remove any orange “goo” that may have snuck in. Pat dry with a towel and let the seeds dry on wax or parchment paper for a couple days. Once they are dry to touch put them layered on a paper sack and let them dry for a few weeks until putting them in homemade seed packets until the are ready for next year.
If you have way too many seeds than you need (I know I do) you can also use the great recipe to roast some of you extra seeds as a snack:
CVG’s Roasted Pumpkin Seeds
- Extra pumpkin seeds
- 1/2 tsp oil
- 1/2 tsp of Worchester sauce
- 1/4 tsp of seasoning salt
Directions: Add ingredients to bowl and mix well. Lay on a single layer on a cookie sheet and bake at 325 for about 25 minutes being sure to flip the seeds after about 10 minutes. Eat as soon as you can without burning your mouth.
Tags: cheap, garden seeds, organic vegetables, outdoor plants, vegetables
How to save corn seeds (Kernels)
14.6 years ago corn, harvest, seed saving, seeds

Corn is one of those crops I really don’t have space to grow but still like to try every year. This past year I only had one ear that made it to maturity, in the plants defense we have a very hot summer and I didn’t have the most consistent watering schedule so I am to blame for most of their demise. Given I used the last of my corn seed this year and wanting to make the best out a bad situation, I decided to use this ear for seeds for next year.

I decided to go the natural route and simply let the corn stay on the stalk until I was ready to pull up my corn stalks my wife got tired of looking at our dead corn stalks in the backyard which turned out to be yesterday (October 31st) As you can see from the picture above the corn kernels have dried out pretty well, though still contain a little moisture.

To remove the kernels I started by braking the cob in half and then starting where I split the cob pushing the loose kernels off with my thumb starting from one end to the other. Once I have this first row off it should be pretty easy to attack these kernels at any angle.
Lastly I layered the kernels in a single row in an open ended brown lunch bag to allow air flow to allow the remaining moisture to be removed. I put the bag on top of our cabinets in the kitchen and will add them to a homemade paper seed packet after a few weeks or drying (or when I remember they are up there more like a few months late) then store in the refrigerator until time for planting next year.
Now I have more seeds than I probably will ever need for a few years and hopefully will have better luck (or at least remember to water them better) next year.
Tags: cheap, garden seeds, outdoor plants, vegetables
How to determine your seed germination rate
14.7 years ago germination, seed saving, seed storing, seeds
Whether you are trying to determine if those seeds you have been stored for 3-4 years are still good or questioning your ability to harvest seeds on your own testing germination is a great way to take away from of the guesswork and avoid disappointment next spring.
The process is very simple, I believe I did the same thing in second grade during our plant section. Though that was to observe how a seed sprouts/roots the concept is exactly the same.
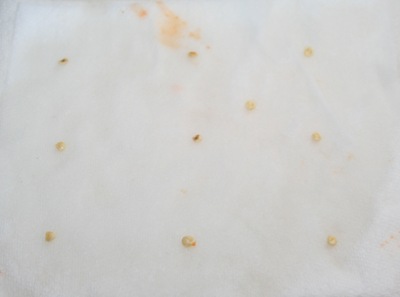
Take a wet paper towel and place 10 seeds on it and place the wet paper towel in a Ziploc bag. After a few days (or weeks depending on the normal germination rate) check back on your seeds and count how many sprouted.

In my case six out of ten of the jalapeno seeds sprouted. So just do the simple math using the following formula:
Germination rate = (# seeds sprouted/# total seeds sprouted) X 100
So in my case:
(6 seeds sprouted/10 seeds total) X 100 = 60% germination rate
Of course the more seeds you use in your “trial” the more accurate the results will be for my purposes the error rate is good enough for me.
If I was a seed seller this would be disastrous since most distributors have germination limits (90-95%), but given these are for my own use and I have about 300 more seeds that I will use no major loss. Though I will need to remember when I plant these out I will want to plant 2 seeds per cell to have good odds one of the seeds will germinate.
Another option is to give your 4 year old a handful of seeds and a pot full of dirt and see if most of them sprout. Much less scientific but my daughter didn’t seem to notice.
Tags: garden seeds, outdoor plants
Alternative seed saving containers
14.7 years ago cheap, seed saving, seed storing
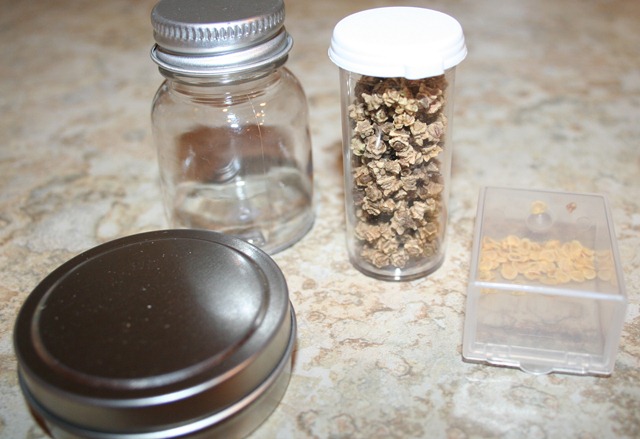
When I am storing seeds for months at a time my homemade paper seed packets work great, but for seeds I seem to use many times throughout the year I was looking for a new option.
My solution was small plastic/metal resealable containers. They are small and do not take up too much extra space and securely close so now worries of reaching into my pocket do find it full of seeds (had this happen more than once) They are also water resistant (if not waterproof) so now worries about setting these down on some moist soil soaking the seeds.
You probably have many of these containers lying around your house from other products (prescription, OTC drugs, food containers, etc)
Unfortunately (I guess fortunately) I do not need prescription drugs too often and wasn’t smart enough to save any of my past containers so I opted to get some from an online supplier. This particular one many options for specifically for seed saving containers at very reasonable prices. I am also considering using these when I share seeds with others as gifts.
What sort of creative options have you used to store your saved seeds?
Tags: cheap, garden seeds, vegetables
Make your own seed packets (packet templates)
14.7 years ago seed saving, seed storing

Last year I did origami seed packets last year which worked out pretty good though I only got two per sheet of paper and didn’t hold too many seeds (especially large seeds like peas) with the many types of seeds I am collecting this year I decided to try another option.
I looked online and found many templates, though I couldn’t find any with standard seed package sizes. Eventually I gave up and created my own and thought I would share.
| Small Seed Packet (2.75” X 3.00”) | 4 packets per sheet | pdf doc docx |
| Typical Seed Packet (3.00” X 3.75”) | 2 packets per sheet | pdf doc docx |
| XLarge Seed Packet (4.50” X 5.25”) | 1 packets per sheet | pdf doc docx |
Basic idea is pretty simple, just print them out and glue the flaps on the inside. I used a plain old grade school glue stick which worked out great. Not only does this work great for new seeds collected, but I also used them to reduce much of the space my large seed packets were taking for a small number of very small seeds.
Tags: cheap, garden seeds, vegetables


