Gard’n Gro Garden Filter review and giveaway
13.7 years ago giveaway, water
As I have mentioned on my post on watering, I like to dechlorinate my water by filling 5 gallon buckets with water and letting them sit overnight. Though this year I always seemed to not have enough time (or foresight) to be diligent about this and ended up just dragging the hose out and watering the plants chlorine at all.
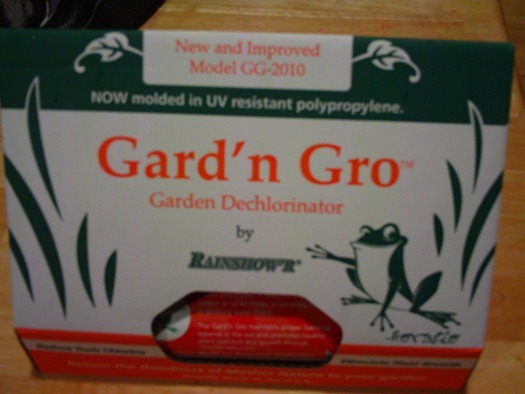
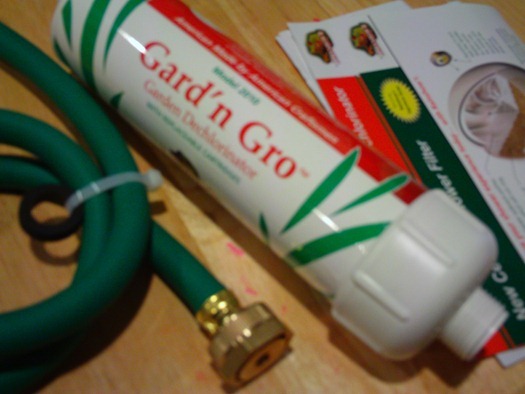
Fortunately our friends at AllFilters have a solution to this problem with the Gard’n Grow Garden Filter, by simply adding this small inline filter it can remove at least 85% of the chlorine in your water without needing to prefill or carry around heavy buckets.
After opening the package the installation process was a piece of cake. You simply attach one end of the hose to your outdoor faucet and the other end to the filter. Attach your garden hose to the other end of the filter and turn on the water.
Now to test this thing out, unfortunately I don’t have any equipment to test for chlorine, but given I am under city water I can smell the chlorine pretty easily. So for my first test I went with the very scientific smell test and confirmed a huge difference between using the Gard’n Grow Garden Filter.
To try to redeem myself a little more, given I had two cups of water I was sniffing anyway, I put my TDS meter (which for non hydroponic readers measures the total dissolved solids in the water) and though this does not measure chlorine specifically it does pick up various salts in the water. Actually to my surprise there was a significant difference between the filtered water and the water straight out of the tap, given this benefit was not mentioned in the Gard’n Grow’s literature. With the tap water the reading was 38ppm and the filtered water 33ppm.
Tap Water Filtered Water
Last the instructions mentioned that you may have a slight reduction in pressure after installing the filter. Now this is definitely expected, but I needed to confirm how “slight” we are talking here. For this I did the 5 gallon fill test. For the unfiltered test I was able to fill the bucket in 71.6 seconds or 4.18 GPM and the filtered test finished in 79.9 seconds or 3.76 GPM. Though this is a reduction of volume of about 10%, given my small garden I don’t think I would notice the extra 8.3 seconds I would spend watering.
Overall I was very impressed with this filter and am looking forward to using it to fill my reservoirs for my hydroponic experiments this winter and my garden next spring/summer.
AllFilters has graciously offered to sponsor a giveaway for one of these filters, so as in our other giveaways just leave a comment and a winner will be picked at random on 9/20/2010 Midnight Pacific Time. If you haven’t already became a fan of CheapVegetableGardener.com on Facebook add us and you can enter an additional comment for a second chance to win.
Soil Logic Moisture X-Tend testing and review
13.7 years ago moisture sensor, product review, Uncategorized, water
I was contacted by SoilLogic and offered a free sample of their product Moisture X-Tend. Though I could attempt to describe their product, I will let them do it in their own words…
Moisture X- Tend helps water penetrate the surface of the potted soil easier and remain within the soil root zone up to 4X’s longer than untreated water.
This innovative soil moisture management product helps prevent water from evaporating too quickly or draining past the roots of the plant. Moisture X-Tend is so easy to use — just add and mix the recommended amount directly to our watering can and water as usual.
The specific claim on the bottle that got my attention was that by using the product you can actually water plants 4 times less often. I must say I was a little skeptical about this claim, though I decided to give it a try.
My first attempt was shortly after I brought out a couple of my pepper plants from my grow box. They both were bearing fruit of similar size and overall plants were of very similar size. I started by watering one plant with water and the second with Moisture X-Tend and I observed their physical appearance over a period of time. There was one problem on day two it rained ruining my results.
Having an empty client controlled grow box in my garage equipped with a moisture Vegetronix sensor, I decided this would be a great place to conduct my testing. I watered two identical pots filled with Miracle Grow Potting Mix (without moisture control) with 250ml of liquid. One being purified water, the second with Moisture X-Tend as described in the directions and monitored the moisture saturation over time.
As you can see the Moisture X-Tend started out with a much greater water saturation immediately after the watering and continued to hold the moisture 1.5 times longer than water alone.
Now this 1.5 times is quite a difference between the 4 times claim on the bottle, though in their defense this was from a single application and the FAQ on their website mentions that watering frequency is reduced after about a month of use. I also was using a 4 inch pot and I would suspect that a larger pot would show better results. If there is interest I am considering extending this experiment over a longer period of time to attempt to prove/disprove the 4 times claim that they mention on the bottle.
Though for me this is not practical to use all summer Moisture X-Tend is a great option when you are going away for a few days on vacation and do not have an automated watering solution or are forgetful like me and just get busy and neglect those poor plants for a day (or two) too long.
Tags: water
1 Gallon Milk carton upside down tomato planter
14 years ago cheap, peppers, tomato, upside down planter, water
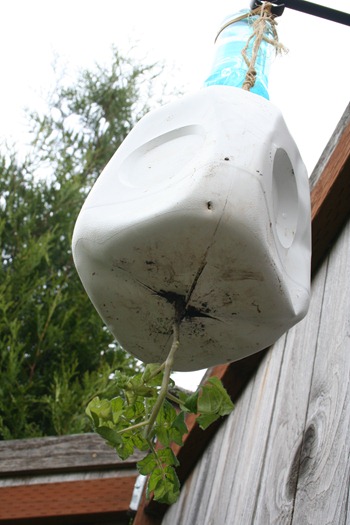
I wanted to see if (how much) my yields varied by allowing more volume of dirt in my homemade tomato planter, so I made this variation with the same type and size “Husky Cherry” seedling I am using in my 2-liter planter version.
The build for this one is also very simple:
- I started with an organic milk carton given it was already opaque, but if you have the non-organic variety you will want to paint or cover the outside with duct tape.
- Next cut or drill a 1/2 inch hole on the bottom of the milk carton, this will be where the stem of the plant will fit through.
- Cut four slits out from the center of the 1/2 inch hole to make it easier to insert the plant into the planter.
- Insert plant through the bottom.
- Fill with soil (mix of 1 part peat moss/coconut coir)
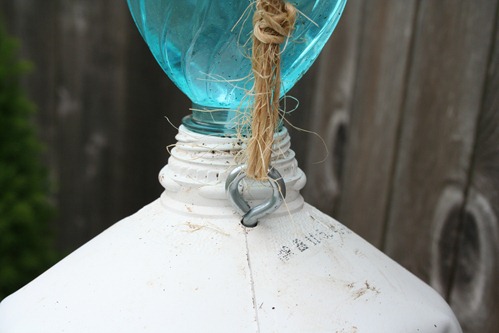
- Finally drill a hole and feed though eyelet secured with a nut from the back side
Now here is where you can stop or you can go with the advanced auto-watering option.
Materials Needed:
- 20 ounce water bottle
- plastic straw
- sponge
Build Instructions:
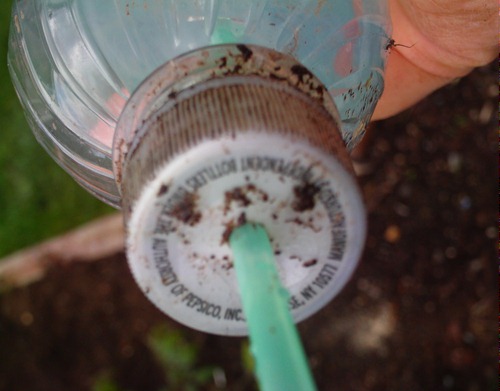
- Drill hole just large enough to barely be able to pull the straw through
- Cut a 1 inch long piece of sponge just wide enough to be able to slip inside the straw.
- Fill with water and screw on cap and insert into top of planter
As the dirt dries it will also dry out the sponge which will release water and repeat as necessary. This works in a very similar concept as a Aqua Globe you may have seen advertised on TV.
Tags: cheap, garden seeds, organic vegetables, outdoor plants, tomato plants, upside down tomato planter, vegetables
Solar Powered automated Rain Barrel watering system
14.1 years ago electronics, water
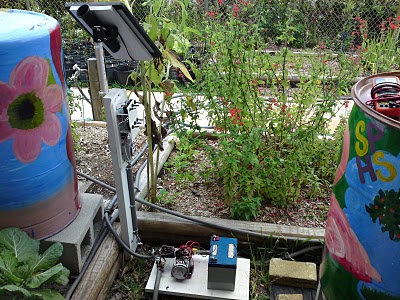
This is a very cool project, grab a few rain barrels, timer, water pump, and a solar panel and have automated the tedious task of watering. With all the rain we get (especially this week) in WA could fill up a dozen barrels in a short time. My only suggestion would be to add a moisture sensor to only water when it has not rained lately.
Might be another project to add to my ever growing list…
Tags: cheap, vegetables
pH needs of plants in soil or hydroponics
14.3 years ago hydroponics, pH, water
With the exception of some of my acid loving plants and flowers I normally do not have to worry much about the pH of my soil. This is because I have amended my gardens with nutrient rich soils in raised beds over my alkaline clay I get naturally in my area. This and the fact that due to natural and manmade causes the rainfall is slightly acidic and given the average range for the sweet spot of most edible vegetables (see table below) is 5.8 to 6.0 having your soil slightly acidic this is perfect.
Now when it comes to hydroponics this is entirely different. My tap water has a pH of around 7.5 and the fluctuation of plant using nutrients and transpiration can cause great havoc on the pH on your hydroponic system. Now this creates a challenge but also an opportunity to have control with great precision your pH and keep your plants growing in the sweet spot for the healthiest plants and the greatest yields.
So whether you are growing hydroponically, or simply trying to figure out why your Fennel didn’t do so well last year take a look at the table below, hopefully for some hints of what happened.
Recommended pH Ranges of Vegetables/Herbs
| Plant | Low | High | Plant | Low | High | |
| Artichoke | 6.5 | 7.5 | Millet | 6.0 | 6.5 | |
| Asparagus | 6.0 | 8.0 | Mint | 7.0 | 8.0 | |
| Average | 6.3 | 7.8 | Mushroom | 6.5 | 7.5 | |
| Basil | 5.5 | 6.5 | Mustard | 6.0 | 7.5 | |
| Bean | 6.0 | 7.5 | Okra | 5.5 | 6.0 | |
| Beanroot | 6.0 | 7.5 | Olive | 5.5 | 6.5 | |
| Beet | 6.0 | 6.8 | Onion | 5.5 | 6.5 | |
| Broccoli | 6.0 | 6.8 | Paprika | 7.0 | 8.5 | |
| Brussel Sprouts | 6.0 | 6.8 | Parsley | 5.0 | 7.0 | |
| Cabbage | 6.0 | 6.8 | Parsnip | 6.0 | 6.8 | |
| Calabrese | 6.5 | 7.5 | Pea | 5.8 | 7.0 | |
| Carrot | 6.0 | 6.8 | Peanut | 5.0 | 6.5 | |
| Cauliflower | 6.0 | 6.8 | Pepper | 5.5 | 6.0 | |
| Celery | 6.0 | 6.5 | Peppermint | 6.0 | 7.5 | |
| Chicory | 5.0 | 6.5 | Pistacio | 5.0 | 6.0 | |
| Chinese Cabbage | 6.0 | 7.5 | Potato | 4.5 | 6.5 | |
| Chives | 6.0 | 7.0 | Potato, Sweet | 4.5 | 6.0 | |
| Corn Salad | 6.0 | 6.5 | Pumpkin | 6.0 | 6.8 | |
| Corn, Sweet | 5.8 | 6.8 | Radish | 6.0 | 6.8 | |
| Courgettes | 5.5 | 7.0 | Rice | 5.0 | 6.5 | |
| Cress | 6.0 | 7.0 | Rosemary | 5.0 | 6.0 | |
| Cucumber | 6.0 | 6.8 | Rutabaga | 6.0 | 6.8 | |
| Eggplant | 5.5 | 6.0 | Sage | 5.5 | 6.5 | |
| Fennel | 5.0 | 6.0 | Shallot | 5.5 | 7.0 | |
| Garlic | 5.5 | 7.5 | Sorghum | 5.5 | 7.5 | |
| Ginger | 6.0 | 8.0 | Soybean | 5.5 | 6.5 | |
| Horseradish | 6.0 | 7.0 | Spearmint | 5.5 | 7.5 | |
| Kale | 6.0 | 7.5 | Spinach | 6.0 | 6.5 | |
| Kohlrabi | 6.0 | 6.8 | Squash | 6.0 | 6.8 | |
| Leek | 6.0 | 8.0 | Swede | 5.5 | 7.0 | |
| Lentil | 5.5 | 7.0 | Swiss Chard | 6.0 | 6.5 | |
| Lettuce | 6.0 | 6.5 | Thyme | 5.5 | 7.0 | |
| Marjoram | 6.0 | 7.5 | Tomato | 6.0 | 6.5 | |
| Marrow | 6.0 | 7.5 | Turnip | 6.0 | 6.8 | |
| Melon | 6.0 | 6.8 | Upland Cress | 6.0 | 6.5 |
Tags: garlic bulbs, herb garden, outdoor plants, pepper plants, peppermint plant, tomato plants, vegetables
Best DIY cheap soil moisture sensor
14.5 years ago cheap, electronics, moisture sensor, water
My first version of my cheap soil moisture sensor has worked great for me but it did have a couple flaws. The first issue was construction, though I had great luck on my first attempt though after trying to recreate additional sensors given the small amount of gypsum between the sensor and the probes were so thin it was extremely easy to crack the sensor and I normally have about a 25% success rate on later creations (must have had beginners luck on the first one.
The second issue was durability. Given we are playing with gypsum and as it is suspended in water it will eventually breakdown and there is very little we can do about it. Though with my latest changes to my automated grow box which includes automated watering based on moisture content I want to ensure my measurements stay accurate throughout the season. To help with this I have decided to increase the sensors size and also am using galvanized nails to prevent rusting. After a few attempts I have come up what I feel is a pretty foolproof method of creating a moisture sensor.
How it works:
There were many questions in the comments in the previous post so hopefully I can clear this up a little here.
Technically a gypsum block measures soil water tension. When the gypsum block is dry it is not possible for electricity to pass between the probes, essentially making the probe an insulator with infinite resistance.
As water is added to the problem more electrons can pass between the probes effectively reducing the amount of resistance between the problem to the point when it is fully saturated where the probe has virtually zero resistance. By using this range of values you can determine the amount of water than exists in your soil.
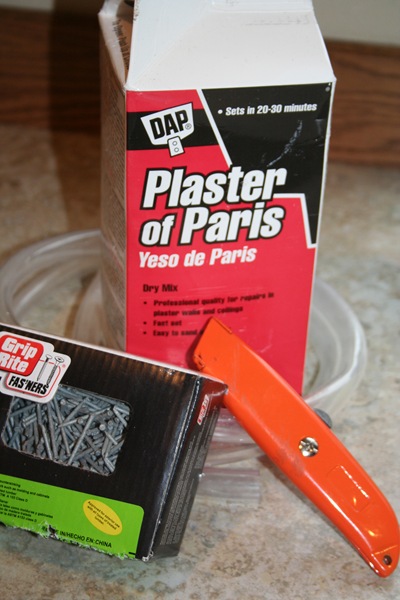
Parts for cheap soil moisture sensor:
- Plaster of Paris
- 2 Galvanized Finish Nails
- 1/2 inch plastic tubing
- utility knife
Construction:
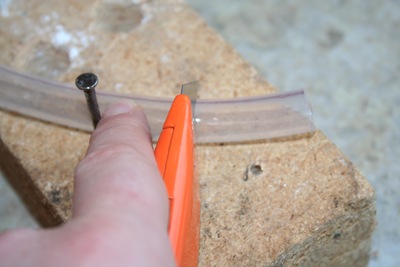
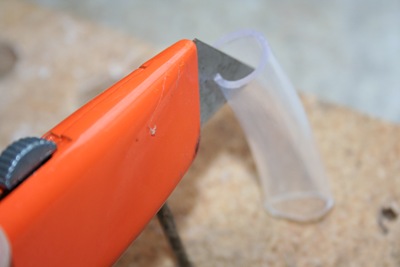
Take your utility knife and cut the tubing slightly longer than your galvanized finishing nails. Try to make the cut as straight as possible though it doesn’t have to be completely perfect.
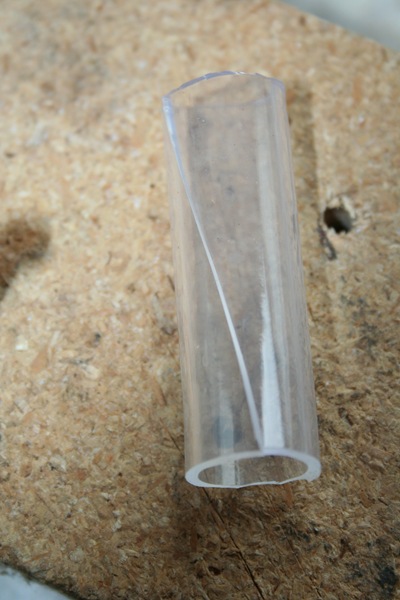
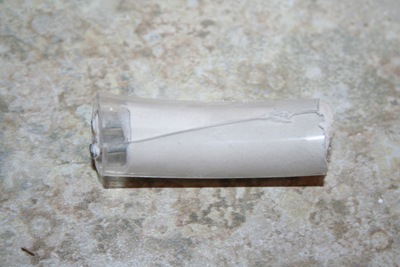
Use your utility knife to cut the smaller plastic tube lengthwise, this will allow easier removal of your soil sensor after the mold cures.
Optional: Make the cut diagonally to prevent a potential vertical fracture line.
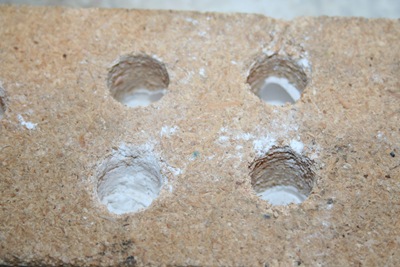
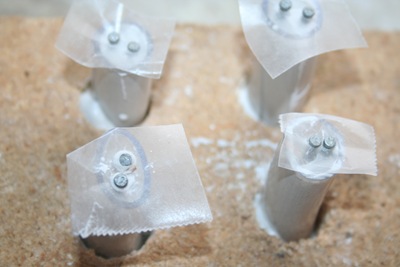
If you were very careful on you vertical cuts you can avoid this step, but to completely avoid spilling plaster onto my workbench I drilled four holes slightly larger than your tubing. I used these holes for support but also to catch any of the plaster in the gaps from you less than accurate vertical cuts.
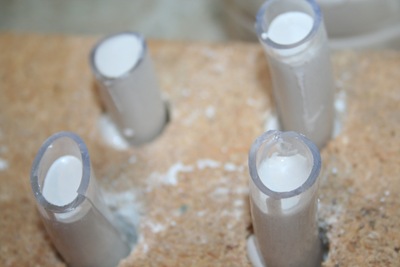
Being careful that the tubing fits together where you split the tubing vertically, insert the tubes into the holes (or carefully on a flat surface) Mix Plaster of Paris and carefully fill with to the top. The friction between the tubing should keep a water tight seal where you made the cut, though if the plaster is a little thin and it appears to be leaking through wait a couple minute for the plaster to setup some and try again, at that time it should not have the viscosity to seep through the very small gap that may be causing the leak.
Take your two galvanized nails and push them through a small piece of wax paper. You may also allow the plaster to setup for a few minutes and then float the nails in the the plaster. I like the first method since gravity will help ensure they fall straight down and parallel to each other. As for spacing, I have done some experimentation with the gaps between the probes and my conclusion was, it doesn’t make much difference. As long as there is a gap (they are not touching) you should get reliable results.
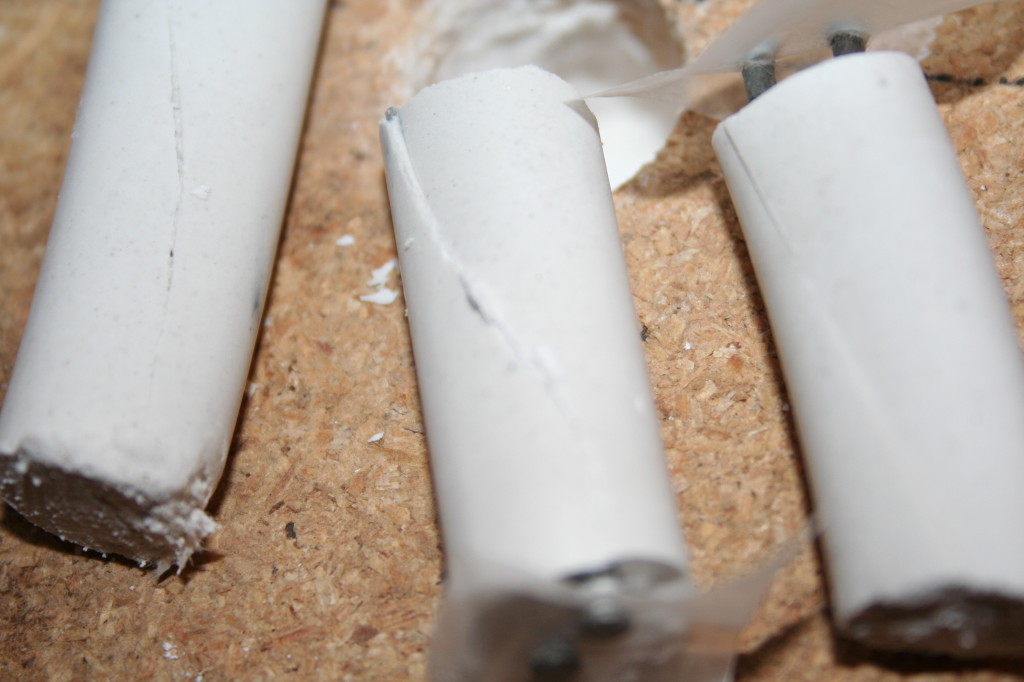
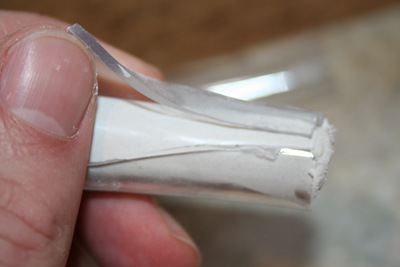
After allowing the sensor to cure for about and hour remove it from the holes you drilled in the wood.
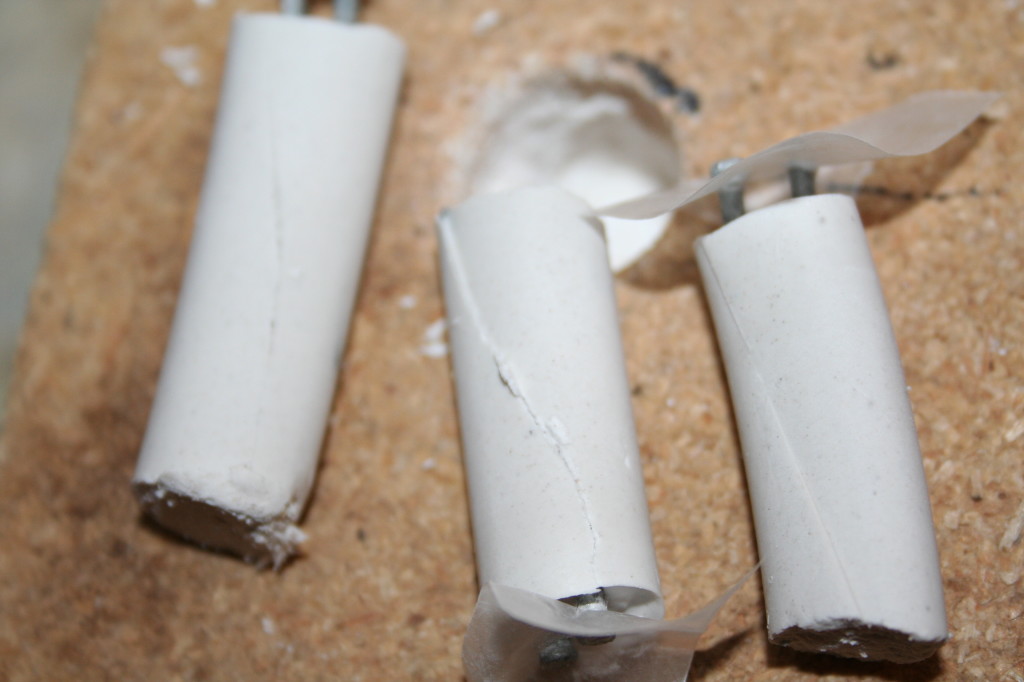
Gently pull back the plastic tubing and you have a nice clean soil sensor.
Lay them out to dry for 24 hours to cure completely and their construction is complete.
For attaching the wires there are a couple options. The best would be to solder them to the probes though to do this you need to heat up the nail hot enough to enable a strong solder connection. My little 15W soldering iron just can’t produce the heat for this so I am option for the wire wrap method. I take about an inch of wire and strip off about an inch of insulation and tightly wrap around the probe. Given copper will rust and could be a point of failure you will want to insulate this connection and the probes from the moisture. A few dabs of hot glue works pretty well. I am planning on trying liquid plastic, though I am currently out and when I have some on hand I will update with how it went.
How to use your cheap soil moisture sensor
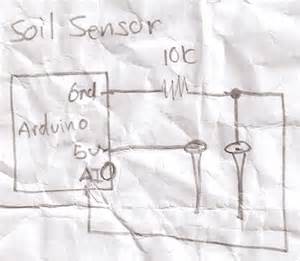
You can simply hook up a multi-meter and check the resistance though if you want to create anything automated you would need to use an integrated circuit (IC) or a electronics prototyping platform such as Arduino. By applying voltage to one side of the sensor and using a voltage splitting circuit connected to ground and an analog input you can then measure the voltage making it through the probe. The higher the voltage, the higher the moisture content of the soil.
Conclusion
The above should give you everything you need to know to create your own cheap soil moisture sensor and how to use it. This can be used as a moisture soil sensor for watering your indoor plants like I am using it. This same moisture sensor could be for monitoring your outside soil moisture content to trigger (or preempt your irrigation system) to save some money on your water bill and/or maintain consistent moisture levels in your plants which could drastically improve water sensitive crops such as tomatoes.
Tags: arduino, cheap, growbox, led, outdoor plants, tomato plants, vegetables
