How to freeze herbs
14.8 years ago cilantro, freezing, herbs, mint, peppermint
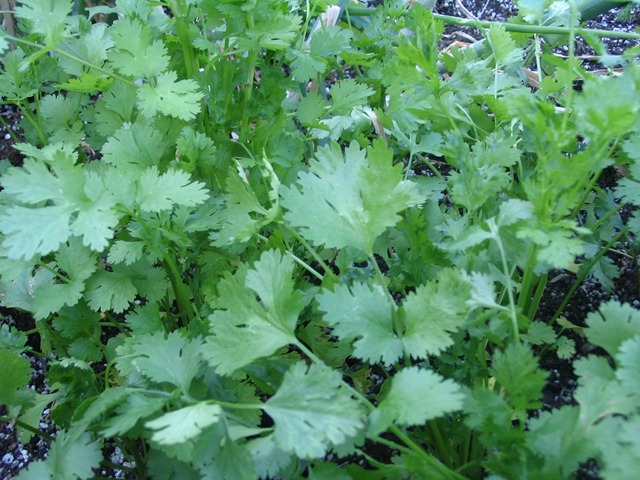
One of my goals in my garden is to make salsa entirely from ingredients from my own garden. In the past I have come close only requiring the purchase of a couple jalapeño peppers from the grocery store but this year with much effort and a strangely hot summer for the Pacific Northwest I have all the ingredients growing in my garden. Though unfortunately the ingredient cilantro could be my elusive ingredient since hot weather means great growth then subsequent bolting. My solution to this problem is successive planting and freezing herbs.
Now drying is also a viable option though I prefer freezing since many moist herbs can lead to mildew without the right equipment to dry efficiently. Frozen herbs also maintain the same potency for several months in the freezer as fresh so no guessing on measurements of your frozen herbs.
There are actually a few different methods for freezing herbs, each of which depends on how you plan on using them later.
The first method is great for keeping the herbs texture and flavor intact. The process is nearly identical to that of freezing berries.
Flash freezing herbs
- Pick the best freshest herbs you can find
- Wash and pat herbs dry
- Lay on layer of wax/parchment paper on cookie sheet
- Freeze overnight
- Place leaves in freezer bag(s), using a straw to suck out excess air
If you are planning on using your herbs in soups or stews, I would definitely recommend the ice cube method.
Ice cube tray method
- Pick the best freshest herbs you can find
- Wash and pat herbs dry
- Hand chop (or use food processor) leaves
- Put chopped pieces into ice cube trays and fill with water of stock
- Freeze overnight
- Place cubes in freezer bag(s), using a straw to suck out excess air. You may also put the trays right into the freezer bag sucking out the air if you wish.
Note: Also try mint with a little extra water to add to drinks during the summer (or winter)
Now if you are planning on using your herbs for dishes that require oil such as Pesto with your Basil. This is a great time to do a little up front preparation.
Ice cube tray method (with oil)
- Pick the best freshest herbs you can find
- Wash and pat herbs dry
- Add 1/3 cup of oil for each 2 cubs of herbs to food processor or blender
- Put chopped pieces into ice cube trays
- Freeze overnight
- Place cubes in freezer bag(s), using a straw to suck out excess air. You may also put the trays right into the freezer bag sucking out the air if you wish.
Now in a few months you can add some parmesan and have some previously frozen pesto in the middle of winter.
Tags: cilantro, herb garden, outdoor plants, pepper plants, salsa garden
Cheap DIY fogger aeroponic system
15.3 years ago aeroponics, cheap, hydroponics, indoor growbox, indoor seed starting

In my post about basic the basics of hydroponics I mentioned the potential high cost of entry but with a little creativity this can be avoided. I went through this exercise and here is a pretty inexpensive way to try out hydroponics without having to spend hundreds on a prebuilt system. The solution I came up with cost me $1.00 to setup though I did have many of the items on hand, if I had to purchase everything cost would be in the $10-15 range.
Supplies
- Small shoebox sized plastic tub /w lid — (I purchased a clear generic one from Home Depot for $1.00)
- 2 inch hole saw and drill
- 6 — Empty Trix yogurt cups (can be any brand as long top is approx 2 in diameter)
- Duct tape (no one should be without this)
- Pond fogger – single disc (can be found on eBay for less than $10, I had one from humidifier)
- Perlite
- Water (tap water is fine, fancy bottles work as well)
Assembly
From looking at the supplies this might be able to guess the construction steps, but I will list them out anyway.
- Take lid and add drill six 2-inch holes using hole saw. If the tub is not made of rubbery material be sure to take your time to slowly create the holes to prevent cracking/shattering. You can also do this with a utility knife but for non-rubber lids I highly suggest against it if you like your fingers.
- Test fit your cups and ensure they fit snuggly, if they do not quite fit you can use some sandpaper to expand the holes slightly
- Remove cups and cut (utility knife) or burn (soldering iron) 1/4 in lines in a pattern similar to the
 figure to the right to ensure extra support and prevent the medium (perlite) from falling through. WARNING: Burning plastic emits toxic fumes and should be done (if at all in a well ventilated area) Knifes are sharp and can cut fingers so if you not careful. I would recommend buying 2 inch hydroponic net pots which can be purchased for about $0.25 each online, which I would have done if I wasn’t so impatient.
 - Given that nutrients+water+light=algae, be sure that your box is as light tight as possible. If you container is not clear like mine you should be in good shape, otherwise cover your box with duct tape or spray paint the box using plastic adhering paint. I would recommend keeping a small vertical line exposed so you can get a quick look at water condition and level without having to disturbing the plants.
- Fill cups with perlite 4/5 full (some expansion may occur)
- Pour water into cups until reservoir is full
- Dump water out water
- Repeat steps 4-6 until water appears clear
- Cut small hole in the corner of the lid and feed power line to fogger through
- Put fogger in tub and fill with water until it is about 1/2 inch above fogger
- Replace lid and plug in fogger and enjoy the mysterious fog

What can I grow with this?
The short answer is anything. Self regulation wicking properties of perlite it should keep most plants happy for some time. The major limitation you may see is some types of plants will outgrow this setup and will require transplant outside in soil or in a larger hydroponic setup (coming soon). Though with careful selection of plants and frequent harvesting you can grow many plants to maturity in this small system. It did not occur to me until after I completed the project but the size and spacing is pretty close to that of an AeroGarden so plants like greens, herbs, strawberries, cherry tomatoes, peppers would do well in this system. For starting plants you can simply drop a few seeds, cover with some perlite and a clear plastic container (I used empty applesauce cups, but bottom of water bottles also would work well) You may also add seedlings by carefully placing in them in the damp perlite.

What about nutrients?
Keeping the project cheap I opted to use some balanced liquid plant fertilizer I use for my seedling/indoor plants. I mixed it at the recommendation it stated for indoor watering (2 pumps per gallon) I noticed it did not contain any Magnesium I also added a half a teaspoon of Epsom salt. After a couple weeks empty contents and replace with water let run for about an hour to allow sediments to clear up and then empty contents. This is good for your plants but also can help keep the disc on your fogger clean. Refill with water and nutrient mix and repeat. This will work for most plants in vegetative state of growth though if you want your plants to move to a flowering state (peppers, tomatoes, etc) I would recommend purchasing specific hydroponic solution for flowering plants.
For a very small investment you can have your own hydroponic system and experience the benefits of growing without soil.
Tags: cheap, garden seeds, herb garden, outdoor plants, pepper plants, strawberry plants, tomato plants, vegetables
The most profitable plants in your vegetable garden
15.4 years ago cheap, cilantro, garlic bulbs, organic, seedling, seeds, vertical gardening, winter garden

Many vegetables can be expensive to purchase by growing the most expensive vegetables in your garden and buying the least inexpensive vegetables at your grocery store you can easily help drop your food budget. This especially important for people like me with very limited space to grow everything that I consume.
It may be impossible to put a price on the satisfaction of bringing in a basket of produce fresh from your garden. As well as the enhanced flavors from having truly fresh produce from your garden compared to that of your local supermarket. Though when I was harvesting my potatoes this summer with my daughter I did have the thought, Would it have been smarter for me to grow something else in this space? I estimate out of the 4-5 square feet I used for these plants I probably got about $4-5 worth of potatoes.
I did a little research first to determine yields of various plants per square foot and secondly what the value (organic supermarket prices USD) of the yielded produce at harvest. Given I am a city dweller with a fairly small footprint for my vegetable garden (about 30-35 square feet) making decisions on what to buy at the supermarket and what to grow in the garden may be a huge money saver with just a few dollars invested in some seeds for your vegetable garden
Now from the results below you can see the winners for the most produce value per square foot are many of the leafy green vegetables/herbs (cilantro, lettuce, chives, dill, Swiss chard) next comes many of the larger vine plants (tomatoes, squash, pumpkins, peas) with many of the root plants taking up the rear. Now much of this makes sense where many of the vine plants grow on trellises and are allowed to spread, which I guess is sort of cheating the square foot rule but I will let it slide. Compared to the root plants whose production is entirely dependent on the space allowed in square footage they have to grow as well as these are normally inexpensive produce items to begin with.
| Vegetable | USD Value/SF |
| Cilantro | $ 21.20 |
| Arugula-Roquette | $ 20.92 |
| Green Salad Mix | $ 17.55 |
| Chives | $ 16.40 |
| Dill | $ 16.40 |
| Lettuce | $ 16.20 |
| Tomato, Cherry, small & medium | $ 15.57 |
| Turnip | $ 9.90 |
| Tomato, large | $ 9.50 |
| Squash, Winter | $ 8.40 |
| Tomatillo | $ 8.00 |
| Cucumber | $ 7.74 |
| Basil | $ 6.63 |
| Radish, Red | $ 6.22 |
| Pumpkin | $ 6.20 |
| Chard, Swiss | $ 6.14 |
| Celery | $ 6.00 |
| Squash, Summer | $ 5.96 |
| Choi | $ 5.70 |
| Peas, Snow | $ 4.50 |
| Pepper, Jalapeno | $ 4.50 |
| Squash, Summer, Zucchini | $ 4.17 |
| Onion, Bunching | $ 4.14 |
| Pepper, Bell | $ 3.60 |
| Brussels Sprouts | $ 3.59 |
| Carrots | $ 3.56 |
| Rhubarb | $ 3.25 |
| Squash, Winter, Butternut | $ 3.20 |
| Kale | $ 3.07 |
| Grass, Lemon | $ 3.00 |
| Peas, English | $ 3.00 |
| Onion, Bulb | $ 2.63 |
| Radish, White | $ 2.60 |
| Bean, Bush | $ 2.51 |
| Peas, Edible Pod | $ 2.50 |
| Artichoke, Globe | $ 2.40 |
| Cabbage, Chinese Napa | $ 2.24 |
| Squash, Winter, Delicata | $ 2.10 |
| Spinach, Spring/Fall | $ 1.80 |
| Leeks | $ 1.75 |
| Potatoes | $ 1.50 |
| Parsnips | $ 1.50 |
| Garlic | $ 1.37 |
| Squash, Summer, Yellow | $ 1.34 |
| Parsley | $ 1.31 |
| Corn | $ 1.25 |
| Squash, Winter, Acorn | $ 1.20 |
| Squash, Winter, Hubbard | $ 1.20 |
| Eggplant | $ 1.10 |
| Greens, Mustard | $ 1.10 |
| Rutabaga | $ 1.00 |
| Beet | $ 0.89 |
| Cabbage, Savoy | $ 0.80 |
| Broccoli | $ 0.80 |
| Kohlrabi | $ 0.75 |
| Cauliflower | $ 0.60 |
| Broccoli, Chinese | $ 0.60 |
| Cabbage | $ 0.50 |
Sources: http://www.mcgoodwin.net/pages/ppatch.html for plant yield information, http://shop.safeway.com for current produce prices
Now even with this information I will still plan on growing some onions and garlic since I more than likely would be forced to use dehydrated alternatives due to being too lazy to drive to the supermarket to buy fresh varieties. Though I may be adding some more herbs/greens to my garden this year.
One important thing to remember is you still have to eat the vegetables, throwing $20 worth or arugula or cilantro into the compost bin is not exactly a sound investment. You can also get higher yields by growing vertically, but don’t forget those tall plants produce a larger shadow so you may still need some extra ground space to support these alternate growing methods.
So go out and get some cheap vegetable seeds (or in many cases free) and plant some profitable vegetables in your backyard/patio garden this spring.
Tags: cilantro, compost, garlic bulbs, herb garden, organic vegetables, outdoor plants, pepper plants, tomato plants, vegetables
Planting seeds outside
16.1 years ago germination, outdoor seed starting, seed storing

I always enjoy any seeds I required to start outdoors since they normally thrive with little effort from myself other than the occasional watering and given I live in the rainy Seattle area that does start until mid-June. Even if you have started many of your seeds indoors to extend your growing season some seeds should always start outdoors since they are sensitive to transplant shock. If you have been to a garden center or nursery lately you can get an idea by what types of plants can be transplanted easily. If you are now looking at your seed packets wondering if you should plant these indoors or outdoors here are my suggestions:
Plants that can be started indoors:
Broccoli, Cabbage, Cauliflower, Celery, Cucumbers, Cukes, Eggplant, Herbs, Kale, Leeks, Lettuce, Muskmelons, Onions (seed), Parsley, Peppers, Swiss Chard, Summer squash, Tomatoes, Zucchini
Plants that should be started outdoors:
Beans, Beets, Carrots, Cilantro, Corn, Cucumbers, Garlic, Muskmelons, Onions (sets), Peas, Potatoes, Radishes, Scallions, Spinach, Turnips, and Winter/Summer squash
You can see from the list there are some plants on both lists which shows that it is definitely possible to transplant some of these sensitive plants, but if you want to avoid the hassle and avoid killing a few plants without requiring surgical precision I would recommend opting for the direct seed planting approach.
Hopefully now you have an idea what you can plant so now comes how to actually do it. Your seed package which will normally give instructions something along the lines of planting the whole package of seeds in a row and thin out to the appropriate spacing. This has been the basic method that many gardeners have been doing for years. This normally leads to thinning 70% of the seedlings or so of the row, which is time consuming and since you can save seeds over a few years this method will definitely be more costly. To avoid this, I plant 1-2 seeds at the proper spacing, if the seeds have been saved for a couple years I add a couple extra seeds since even with proper seed storage the germination rates can decrease over time. After a week or two I simply thin the weakest of the seedlings by chopping them off with a small pair of scissors being careful to not disturb the seedling next to it. If you want to give your larger seeds a little head start, try soaking them in lukewarm water (add inoculants if they are in legume family) overnight before planting them.
Following these steps you should have some great activity in your garden with minimal maintenance and cost.
Tags: cheap, cilantro, garden seeds, garlic bulbs, herb garden, outdoor plants, pepper plants, tomato plants, vegetables


