Simple and cheap homemade ebb and flow hydroponics system
14.3 years ago cheap, ebb and flow, hydroponics

Though not my first hydroponic system this is is definitely a little more complicated than my last attempt of an fogger system created last year. This time I decided to go with an Ebb and Flow system, where the concept it pretty simple, flood the planting area with water nutrients and let it drain, wait a defined amount of time and then repeat. For this build I had a few requirements:
- Must be inexpensive: Hey this is the cheap vegetable gardener site
- Must be small: I have a limited space to grow and nutrients can be expensive and given what I am growing is legal don’t really need $20 basil
- Must be safe from flooding: Though this is running in my garage, I really don’t want to come in with 10/20 gallons of water/nutrients on my floor.
- Could be adapted for alternate hydroponic system.
Given these requirements, this is what I came up with and how I built it:
Materials
- 18 gallon opaque Rubbermaid container (happened to have one of these around
- 5 gallon basin — SLUGIS box from Ikea ($5.99)
- vinyl tape (plumbers tape)
- 1 inch hole saw
- 1 inch threaded (diameter) to 3/4 PVC adapter
- 3/4 inch threaded (diameter) to 1/2 in hose adapter
- 2 3/4 inch PVC caps
- Cheap pond/fountain pump (100 GPH)
- 1 foot of 1/2 inch plastic tubing
- 2 foot 3/4 inch PVC pipe (only need couple inches but smallest length I could buy)
- aquarium/food grade silicon (optional I used this to ensure very watertight seal but found not necessary)
Construction
Take the 5 gallon basin and drill two 1 inch holes in the middle of each side. One whole should be drilled from the top and the other should be drilled from the bottom.�

Take both threaded adapters and apply liberal amount of vinyl tape.

Screw in the 1/2 inch hose adapter from the bottom with just barely enough clearance to pop through. When the pump stops the water will drain through this same hole.

For the overflow pipe, screw in the 3/4 inch PVC adapter in from the top until hand tight.

Take both caps and drill in a bunch of holes slightly smaller than your media. The basic idea is you don’t want some Hydroton clay balls falling into your pump or reservoir.
Cut about 2 inches of 3/4 PVC pipe and attach to overflow and top with PVC cap with dozen or so holes in it.
Lastly attach the 1/2 plastic tube to your pump and place everything on top of your 18 gallon Rubbermaid tub (which fits perfectly and is very sturdy) Fill with water nutrients and hook up your water pump to a 24 hour timer (or grow box controller)


Here is the Ebb & Flow system in action, as you can see very simple but very cheap and versatile.
Tags: cheap, growbox, led, outdoor plants, vegetables
Teaching children patience with gardening
14.4 years ago germination, hydroponics, kids, seeds
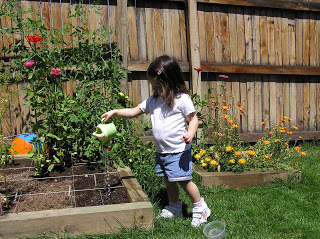
It shouldn’t be a surprise that kids these days are not as patient as previous generations. Personally I feel this is less on a change of parenting but a result of children’s expectations created because of the advance of technology. For example, When my daughter asks to watch a particular show “On Demand” and then 5 minutes later asks me to “pause it” so she can go potty. This makes me think back to the days of having a single TV station we could pick up with our antenna, which seemed to play reruns of MASH 24/7.
The great thing about gardening is with the exception of seed hybridization, synthetic fertilizers, and maybe techniques like hydroponics the hobby hasn’t changed too much in the past few hundred years. It still takes 1-3 weeks for seeds to germinate not matter what technology you throw at them. This is why I feel gardening is a great activity to share with the young ones in your life to help offset the instant gratification they see on a daily basis.
Here are a couple of ideas how to do this any time of year:
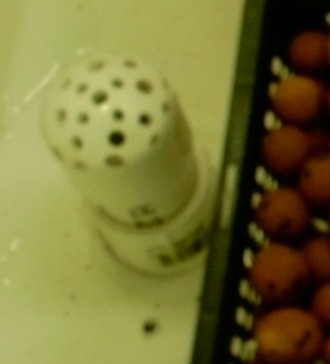
Cup of Dirt: Give your young one a cup of dirt and some seeds. To keep them interested give them a spray bottle to water everyday to keep them coming back every day to check how their plant is doing. The spray bottle will provide just enough water on the surface to allow the seeds to germinate and what kid doesn’t like to play with a spray bottle.
Sprouting in a Jar: I have a complete post on this topic, but the process is pretty simple. Get a mason jar and add some seeds. Rinse, drain and repeat. In just a few weeks you will have tasty and healthy sprouts you can add to your salads, sandwiches, stir-frys, etc.
Growing plants in water: Now this can be as complicated as setting up a hydroponic environment or as simple as taking a spider plant start and placing it in some water and letting your young one watch as the roots develop and transplant and care for it as a new plant.
Tags: cheap, garden seeds, outdoor plants, vegetables
Growing peppers at high latitudes
15 years ago hydroponics, indoor growbox, peppers

Here in the Seattle area we are, as you say, latitudelly challenged. We are fortunately to have the Pacific Ocean to give us mild winters and summers though our distance from the equator provides our plants with less intense light and a relatively short growing season for summer crops. One in particular difficult summer crop are peppers.
This is important because one of the major exports of my garden are the ingredients to allow me to make homemade garden salsa (tomatoes, garlic, onions, cilantro, jalapeño peppers) Al ingredients come from my garden (except for jalapeño peppers) This year I am determined to fix this.
I have a couple strategies for doing this, the first is to “start early” pepper plants require 80-110 days from seedling to harvest, timing is everything. Given our late winters here over the past couple years, I don’t really have much of a cushion here and would also be nice if the peppers were ripe when the tomatoes are getting red as well. To get a head start many weeks ago I planted several jalapeño pepper seeds and they currently are turning into some great looking pepper plants in my grow box. As they have grown I have potted them up to encourage them to continue to grow vigorously.
Not wanting to put my eggs peppers in one basket, I have decided to try a few different techniques in case one completely fails I hopefully have a couple backups:
- Grow pepper plant in grow box in WonderSoil
- Grow pepper plant hydroponically using a Grodan Gro-Blocks
- Grow pepper plant in the ground beside my tomatoes
- Grow pepper plant in large pot in sunniest location
I honestly can not really predict the outcome of this experiment. The grow box as the advantage of accurate temperature control but the CFLs though work great can’t compare to full sun. On the other hand outdoors has the great light intensity of the actual sun though given the pepper plants can stop growing lacking 60 degree nights and at least 70 degrees during day. Given we don’t have too many nights greater than 60 degrees the grow box might have a chance.
UPDATE — 05/25/2009
Plant grown in WonderSoil in grow box at temperature controlled to remain above 60 degrees at night and a high of 80 during the day. This is amazing results compared to the 2.5 inch plants I started with less than a month ago.

Plant grown hydroponically using a Grodan Gro-Blocks also in temperature controlled grow box.

Plant grow in actual dirt outside in good light

Plant grown in pot outside…well this one is already out after some high winds and cold mornings this one was looking pretty bad to I brought to the infirmary (the grow box) to bring it back to life, which seems to have done wonders.

The obvious winner at this point is the pepper plant in WonderSoil in the grow box, though I have noticed some recent growth in the outdoor plant now the weather has started warming up, so might be some time for Mother Nature to redeem itself. Overall I have been very impressed with the results of the grow box but still need to see if I can get flowers and fruit…until the next update…
UPDATE — 06/20/2009
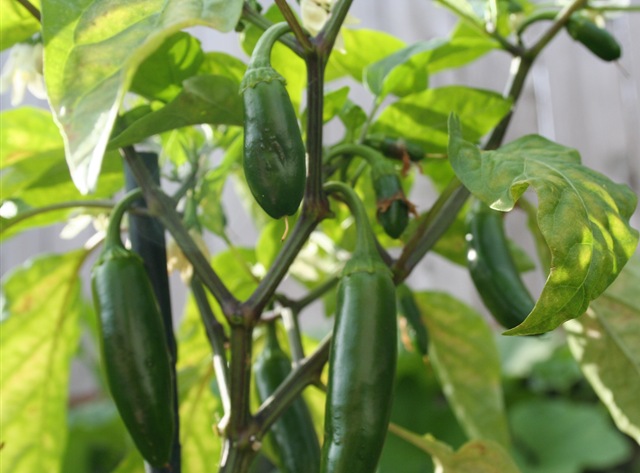
We were blessed with some warm weather so the outdoor potted plant has been doing great blossoming and almost a dozen of good sized peppers growing.
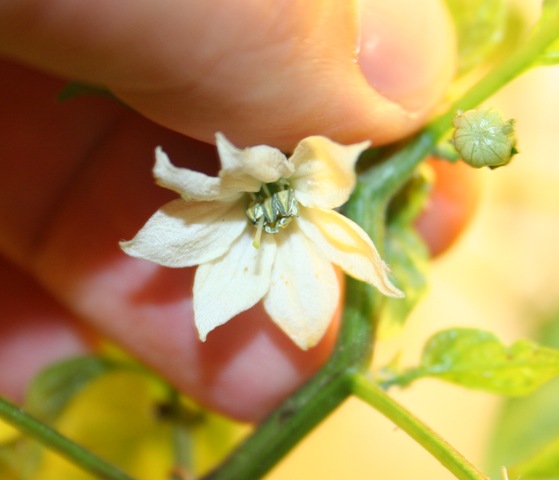
I have seen plenty of blossoms on the pepper plants in the grow box though I have not have and fruit set. I have two theories what is causing this, first is we have hat some hot weather with the garage getting over 85 degrees even with best exhaust and airflow it was hard to keep the temperature from exceeding 90 degrees which causes the blossoms to drop. The second reason is I have been attempting to hand pollinate the flowers with the absence of some nice bees to do the work for me. I have been using a fine paintbrush without much luck. Switching to having better airflow and using a Q-Tip to simulate a bees bottom.
The plant I had in the ground eventually got overtaken by a pumpkin plant which I removed and moved to the grow box given it had not shown any significant signs of growth since I transplanted it there.
Right now seems the best method is grow the pepper plant to about 18 inches and just let mother nature take care of things at that point.
Tags: cheap, cilantro, garden seeds, garlic bulbs, growbox, led, outdoor plants, pepper plants, salsa garden, tomato plants, vegetables
Cheap fogger hydroponics final results
15.1 years ago aeroponics, cheap, hydroponics, peppers, tomato

In case you missed them here is the original post on the creation of this fogger hydroponic system, and the latest update (before this one).
The plants still are still looking pretty healthy with the exception of a little phosphorus deficiency, but the blame goes on me for that one. Been a little busy at work and have been neglecting the plants.
I decided to end this experiment since their roots were starting to get tangled and I want to use these plants for another project.

These roots are healthier than they look, some soil leached in when I put some of my pepper plants on top of the hydroponic box.

This pepper plant look really good, haven’t decided what to do with it yet. Maybe the victim volunteer for the next hydroponic experiment.
Tags: cheap, led, outdoor plants, pepper plants, vegetables
Growing with hydroponics in the grow box
15.1 years ago cheap, hydroponics, indoor growbox, tomato

There has been some major changes since I started the plants above in my cheap DIY hydroponic setup about a month ago. Since then I have added a couple of pepper plants I saved from thinning. I must say the plants are doing better than I expected. I am still using the same homemade nutrient solution, 2 pumps of liquid plant fertilizer and half a teaspoon of Epsom Salts.
The sickly plant on the bottom left is a cloning experiment which is not going great but the plant is growing roots and apparently surviving.

Some views from below:


Tags: cheap, growbox, outdoor plants, pepper plants, vegetables
Cheap DIY fogger aeroponic system
15.2 years ago aeroponics, cheap, hydroponics, indoor growbox, indoor seed starting
In my post about basic the basics of hydroponics I mentioned the potential high cost of entry but with a little creativity this can be avoided. I went through this exercise and here is a pretty inexpensive way to try out hydroponics without having to spend hundreds on a prebuilt system. The solution I came up with cost me $1.00 to setup though I did have many of the items on hand, if I had to purchase everything cost would be in the $10-15 range.
Supplies
- Small shoebox sized plastic tub /w lid — (I purchased a clear generic one from Home Depot for $1.00)
- 2 inch hole saw and drill
- 6 — Empty Trix yogurt cups (can be any brand as long top is approx 2 in diameter)
- Duct tape (no one should be without this)
- Pond fogger – single disc (can be found on eBay for less than $10, I had one from humidifier)
- Perlite
- Water (tap water is fine, fancy bottles work as well)
Assembly
From looking at the supplies this might be able to guess the construction steps, but I will list them out anyway.
- Take lid and add drill six 2-inch holes using hole saw. If the tub is not made of rubbery material be sure to take your time to slowly create the holes to prevent cracking/shattering. You can also do this with a utility knife but for non-rubber lids I highly suggest against it if you like your fingers.
- Test fit your cups and ensure they fit snuggly, if they do not quite fit you can use some sandpaper to expand the holes slightly
- Remove cups and cut (utility knife) or burn (soldering iron) 1/4 in lines in a pattern similar to the
 figure to the right to ensure extra support and prevent the medium (perlite) from falling through. WARNING: Burning plastic emits toxic fumes and should be done (if at all in a well ventilated area) Knifes are sharp and can cut fingers so if you not careful. I would recommend buying 2 inch hydroponic net pots which can be purchased for about $0.25 each online, which I would have done if I wasn’t so impatient.
 - Given that nutrients+water+light=algae, be sure that your box is as light tight as possible. If you container is not clear like mine you should be in good shape, otherwise cover your box with duct tape or spray paint the box using plastic adhering paint. I would recommend keeping a small vertical line exposed so you can get a quick look at water condition and level without having to disturbing the plants.
- Fill cups with perlite 4/5 full (some expansion may occur)
- Pour water into cups until reservoir is full
- Dump water out water
- Repeat steps 4-6 until water appears clear
- Cut small hole in the corner of the lid and feed power line to fogger through
- Put fogger in tub and fill with water until it is about 1/2 inch above fogger
- Replace lid and plug in fogger and enjoy the mysterious fog

What can I grow with this?
The short answer is anything. Self regulation wicking properties of perlite it should keep most plants happy for some time. The major limitation you may see is some types of plants will outgrow this setup and will require transplant outside in soil or in a larger hydroponic setup (coming soon). Though with careful selection of plants and frequent harvesting you can grow many plants to maturity in this small system. It did not occur to me until after I completed the project but the size and spacing is pretty close to that of an AeroGarden so plants like greens, herbs, strawberries, cherry tomatoes, peppers would do well in this system. For starting plants you can simply drop a few seeds, cover with some perlite and a clear plastic container (I used empty applesauce cups, but bottom of water bottles also would work well) You may also add seedlings by carefully placing in them in the damp perlite.

What about nutrients?
Keeping the project cheap I opted to use some balanced liquid plant fertilizer I use for my seedling/indoor plants. I mixed it at the recommendation it stated for indoor watering (2 pumps per gallon) I noticed it did not contain any Magnesium I also added a half a teaspoon of Epsom salt. After a couple weeks empty contents and replace with water let run for about an hour to allow sediments to clear up and then empty contents. This is good for your plants but also can help keep the disc on your fogger clean. Refill with water and nutrient mix and repeat. This will work for most plants in vegetative state of growth though if you want your plants to move to a flowering state (peppers, tomatoes, etc) I would recommend purchasing specific hydroponic solution for flowering plants.
For a very small investment you can have your own hydroponic system and experience the benefits of growing without soil.
Tags: cheap, garden seeds, herb garden, outdoor plants, pepper plants, strawberry plants, tomato plants, vegetables


