Seedlings thriving in the grow box
13.1 years ago indoor growbox, indoor seed starting, onions, peppers, tomato

I have almost everything planted at least germinating in my grow box. As you may be able to see from the labels I am growing a variety of peppers this year as well as a few different onions and tomatoes. I also have garlic and some onions I overwintered already outside and peas already in the ground.

I did successfully grow some peppers in the grow box over the winter, though as you can see below their size was lacking and the plant has been perking up a bit with some new growth once I added some better controlled heating and the LED lights.

Tags: grow lights, growbox
Urban Farmer Seeds Vegetable/Flower seed kit giveaway
13.2 years ago giveaway, indoor seed starting, seeds
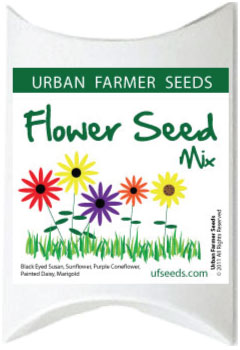
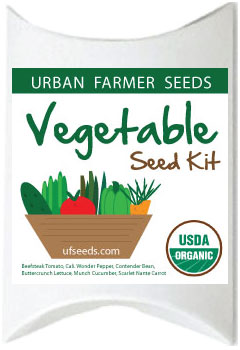
They great people at Urban Farmer Seeds have graciously offered their Flower Seed Kit and Vegetable Seed Kit to giveaway to the readers of CVG. Like many seed companies Urban Farmer Seeds is environmentally conscience, one unique thing they do is use recycled magazines to make their seed packets as you can see in the picture below.
We will pick a winner on 02/12/11, as usual there are multiple ways to enter:
- 1. Add a comment to this post
- 2. Like CheapVegetableGardener on Facebook (add an additional comment to the post)
- 3. Mention this giveaway on your site/Twitter (add an additional comment to the post)

Tags: seed
First seeds started: onions, leeks, purple cone flower
13.2 years ago indoor growbox, indoor seed starting, LEDs, seeds

My youngest daughter has been patiently waiting all winter to plant some seeds (as have I) Finally it was time in my area to start planting the “start 8-10 weeks before first frost” seeds. Which for me included onions and leeks, though as I was picking up the leek seeds my daughter talked me into getting some purple coneflower seeds as well.
After carefully mixing my special blend of 3 parts normal potting mix with 1 part perlite we filled some trays, sprinkled on the seeds, applied some light pressure to ensure good contact, and placed them in my small Christmas light grow box.

This provides me a small of convenient location to care for these seedlings until they are big enough to move into the computer grow box which if all goes well should be getting a slight makeover this weekend, which I should post about soon.
Starting seeds in paper towels
13.9 years ago indoor seed starting, seeds

Most often I start my seeds in a mix of coconut coir and perlite in seeding cells or small containers, though there are occasions when it may be better to start your seeds in a simple paper towel.
Before going into the benefits first lets go over the technique:
- Get a paper towel, napkin, or coffee filter and spray with water so it is moist (not soaking wet or the seeds could rot)
- Add a few seeds and folder over the paper to cover them.
- Place the paper and seeds into a zip lock bag (I like to use the snack sized ones) and place in a warm location (top or refrigerator, water hearer, etc)
- Check every day or so do see if seedlings have emerged and water as needed
- When seedlings emerge very carefully place the strongest seedlings into dirt cups.
Tips
- Instead of trying to remove the seeds from the paper, you can simply cut around the seedling and plant both into the ground. The paper will eventually erode away without affecting the seedling.
- You can also use this technique to plant the seedling right into the ground.
This technique is great for many reasons:
- Allows for faster germination rates and times
- Great if you have limited space for seedlings (stack of zip lock bags take up much less space than 40/50 seed cells)
- More consistent moisture
- Less dirt on your counters
- Great option for rare, poor germination rates and/or very slow germinating times (think hot peppers with 3-4 weeks germination delays) With this method you can keep close tabs on the progress and know after a week or two if you need to start some more (or buy some new seeds)
For the home grower this is a great space saving technique and due to the water retention in the bags it is nearly impossible to lose seedlings due to lack of watering.
Tags: paper towel, starting seedling
Cheap Light Bar for Seedlings
14.2 years ago cheap, indoor seed starting

A couple months ago we replaced a couple of bathroom light fixtures and it didn’t take too long for me to find the old ones a new home. An old extension code couple electrical connectors and I have a completely non-code light bar. I used the smaller fixture and replaced my light bulbs hanging from sockets using zip ties.
When I have some more time I will plan on making a reflector to redirect more light on the plants but for now the little peppers/tomatoes look very happy.
Tags: cheap, garden seeds, outdoor plants, pepper plants, tomato plants, vegetables
LED grow box gets an upgrade
14.2 years ago cheap, indoor growbox, indoor seed starting, LEDs, seeds

In our family we are not just cheap in the garden we also keep our house pretty cool to save on heating costs. Unfortunately since the LEDs in my grow box do not put out very much heat the inside is only about 68 F degrees even placing it on top of my refrigerator. For most seeds 77 F degrees is a great ball bark number to shoot for to get the best germination percentage as well as quicker germination times. This was the number I was shooting for, so I decided to add a string of mini incandescent bulbs to help bring up the temperature.
To do this I did exactly what I did for the LEDs just drill a hundred or so holes into the side of the box just slightly smaller than the bulb. Then had the fun job of pushing them all through.
I first tried having all the lights on but that brought the temperature up to 85 degrees, next I tried only half the lights on…70 F degrees. Then I got the idea of adding the blinker bulbs and tada 77 F degrees on the nose (ok technically 77.1 F).
So far everything is looking good have some onions, peppers, basil, and Swiss chard already sprouted and expecting more shortly.
Tags: cheap, garden seeds, grow lights, growbox, led, pepper plants, vegetables


