Make your own upside down tomato planter
15 years ago cheap, peppers, tomato

Every time my daughter sees the upside down tomato planter (Topsy Turvy) commercial on TV she asks when we can grow tomatoes upside down. I am definitely not one to pay $15 to $20 to buy one of these things in the store when I could have the fun of making my own for much less money.
Though this has been commercialized recently, the concept growing plants upside down is not a new one. Many people have been growing plants like tomatoes in 5 gallon buckets or hanging baskets for decades. Not having any spare bucket or hanging basket to sacrifice I went with my daughters suggestion and used a 2 liter bottle.
Materials required for you upside down tomato planter
- Empty 2-liter bottle
- Eye bolt with washer
- Duct tape, contact paper, or spray paint
- Drill or hot nail

Step 1 — Create access hole
Make a hole on the side of bottle, this has two purposes: it allows adding soil much easier and also provides an convenient way to water your plant. I used a 2-inch hole cutter, though you may also carefully cut a hole with a knife.

Step 2 — Add the hanger
By design 2-liter bottles are extra thick in on the bottom immediate center which will make a perfect place to hang it. I used a drill of the same diameter as the eye bolt. This allowed me to thread the bolt right into the bottle, which was pretty strong it itself. Though expecting a great harvest, I also added a bolt to prevent the discovery of my plant on the ground after having a hard fall.

Step 3 — Covering your planter
Roots can be damaged if exposed to light for long periods of time so you need to cover your planter. You should consider color depending on where you live. In colder regions a darker color will help keep the soil warm on cool mornings, though in hotter climates a dark color could fry the plant. I would recommend a medium to light green color for moderate heat absorption and little more aesthetically pleasing in the garden. Not having any paint I used good ole duct tape. Wrapping around the entire bottle (even covering the access hole.

I then cut an X through the access hole and bent the corners in to soften the rough edges caused by cutting the hole.

Step 4 — Decorate (optional unless you have kids)
We used permanent markers to personalize both of my daughters upside down tomato planters.

This completes the construction of your upside down tomato planter. I will admit the first design flaw of this planter is its size. It will be fine for root growth but it can dry out very quickly. In response to this water retention was my primary concern when deciding on medium to fill the planters with.
I chose 2 parts (peat moss or coconut coir okay substitutes) , 1 part perlite, and 1 part Groden granulates. WonderSoil it contains coconut coir which retains water well but also contains water retaining polymers. The perlite and Groden granulates both provide water retaining properties an allow for proper aeration for easy unrestricted root growth.
To give the plants a good head start I also mixed in a couple of tablespoons of bone meal and tablespoon of balanced organic fertilizer. Add some water until the mix has the consistency of a wrung out sponge .
Lastly I used my tomato plants from my hydroponic experiment and carefully fed the roots into the now bottom opening of the bottle. We then added our soil mix until it reached the bottom of the access hole. Given the plants had a well established root system just the friction and weight of the soil is enough to keep the plant from falling out

Even though the medium retains water well the plants should be watered every day to the point until some water comes out the bottom. Within 24 hours we can already see the leaves turning over to face the sun.
You can also try other heat loving plants such as peppers, cucumbers, and zucchini. So if you every wanted to try growing plants upside down with the directions above you can have your own for less than $0.50.
If you want something a little more aesthetically pleasing there is always the commercial option, this one from Gardener’s Supply seems much more sturdy than the ones I have seen on TV:

UPDATE: 05/24/09

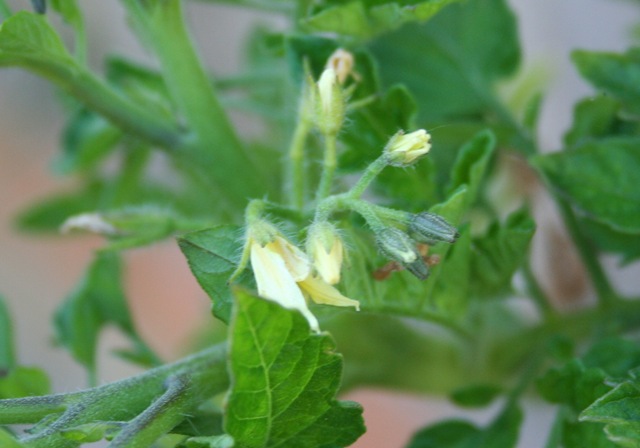
It has finally started to get a little warmer at night in my garden so seems like a good time for a little update on the upside down tomato planter. I wish I could give a direct comparison of the growth of these plants with plants a planted at the same time in the ground though unfortunately we had a light freeze that killed them off. Interesting enough both plants in the upside down tomato planter survived and even are showing some small blossoms.
Now as part of my pepper planting experiment, I also put a pepper plant in an upside down tomato planter with much less exciting success. Just to test if my super paranoid water retention worries had any backing I simply filled this one with regular potting mix. And the plant dried out very quickly which shows in the following results.

Given these results I am going to stick with my 2 parts WonderSoil (peat moss or coconut coir okay substitutes) , 1 part perlite, and 1 part Groden granulates recipe in the future.
Tags: cheap, led, organic vegetables, outdoor plants, pepper plants, tomato plants, upside down tomato planter, vegetables


15.1 years ago
What a brilliant idea!
15.1 years ago
Last year I made them using plastic planters but I ended up throwing them away. This way I can make them again cheaply with things I already have. Thanks so much!!!
15.1 years ago
An upside down tomater plant was the first article that I did a writeup on:http://red-icculus.com/?p=34It works great against pests and makes fruits easy to pick.
15.1 years ago
CVG- you are a geniuos. Bonafide- I have one of htose topsy turvey things I recieved as a gift, but I am definitely gonna try one of these!
15.1 years ago
I love this idea! My family broke down and bought a couple different upside-down tomato planters this year. Many years ago, I used to grow them upside down out of the bottom of a regualy hanging pot. It worked fine, but the plant tries to grow upright – it doesn’t really hang down like in the commercials. It will be fun to see how they all grow this year.I will be making some planters like you’ve described as well – thanks!
15.1 years ago
This is deserving of an award. Nice work CVG
15.1 years ago
this is great! I just did a post on creating your own tomato hangers, but I wish I’d had your link when I wrote the post! http://veriance.blogspot.com/2009/04/hanging-tomatoes.html
15.1 years ago
The plants seem to be holding up well, depends how sunny it is but actually holding water better than I expected. Overcast days I can skip a day between watering. They definately have turned over all their leaves but still growing downward.
15.1 years ago
I ordered three of the self watering ones this year. I am a sucker for garden gadget. It will be interesting to see how yours does compared to mine.Thanks for posting about that time lapse camera. I seen it a while ago and have not been about to find it. _______________________________Check out my veggie garden blog:http://veggiegardenblog.blogspot.com/
15 years ago
Brilliant! I have seen those expensive hangers that you can buy, but you have found a much cheaper way. I will have to go find a bottle now!
15 years ago
great idea. thanks for the how-to. I can’t wait to try it.
15 years ago
I love this post! My husband came home with the Topsy Turvy a while ago. He bought it mostly so we could use the idea as a template, thinking of tarp material or something. So far the plant has been thriving so we were looking to make more of our own. Your idea is fantastic and so simple!
15 years ago
I’ve included your idea on Green Food Tallahasee, it’s a good alternative to purchasing a device. I am curious to know if the eye bolt is strong enough to hold the gowing plant and the soil?cara
15 years ago
What a wonderful idea! We’ve started quite a few tomato plants and will try a few of them in this setup. Also – what a great way to get my 3-yr-old son involved by “decorating” it. He’ll be quite impressed with trying this.Mark F. Garso 36
15 years ago
Dan, I should do a side-by-side comparison. Maybe next year…Matron, bowreality, Madeline: Good luck on yours please let me know how they turn out.Green Tallahassee, as for if the hook can hold the weight I went for the scientific, pull on it as hard as I can technique. Given I am a pretty strong guy seems to hold up pretty well. I am concerned if sun exposure will weaken the plastic though given they should survive in landfills for hundreds of years, figure they can survive a year or two in the sun.Mark Garso, seems like many of my projects have a “decorating” part. Might also want to check out the butterfly/hummingbird project. Similar idea and can use many of the same tools and also has some decorating involved.
15 years ago
the tape is tacky lookinghttp://www.tomatogarden.info/hanging-tomato-planters.jpg
15 years ago
great idea…my hubby would love it. i have a question…do you have any ideas for keeping larger watermelons from rotting underneath…i mean a cheap idea? thanks marmee
15 years ago
Hi, just wanted to know how did the plants do,(in number of tomatoes) compared to regular planted.Thanks alot ,liked your idea alot!!!!!!!!!
14.9 years ago
That is a great idea I just planted mine buckets that I had to go buy I am curious though, are 2 liters enough soil for the plant. I am going to try a couple and see
14.9 years ago
This is a great idea, I was thinking that someone must come up with an affordable way to do this. Good job.
14.9 years ago
mary,As long as the sun to continues exist in the sky plants will grow up. Though as the plant bears fruit gravity should win and it should look more like the classic topsy turvey pictures.
14.9 years ago
I was disappointed in the three 5 gal buckets I used. Two tomato plants suffered from rot around the stem where it exits the hole. Two other identical plants bought at the same time and planted in the ground are basically large tomato BUSHES now. The bell pepper has 6 peppers on it, but they are very small. Another pepper planted in the ground at the same time has 2 large, almost ready to pick peppers on it.Basil, French tarragon and dill planted in the TOP of the buckets is doing very well.Anyway, it was an interesting experiment, but since I have the ground space, I won’t be repeating it.
14.9 years ago
EricJ, funny thing is my plants have done the opposite have had some nice weather the past week and the in ground plants are starting to do better. Definitely think average day/night temperature is a huge factor.
14.9 years ago
This is a fabulous idea. Do you think I can use 1gallon water bottles to create this?
14.9 years ago
I knew there had to be a way guess I'll have to buy a few things of soda. Something we don't drink! Thanks for the post.
14.9 years ago
The Lady, I am sure that would defiantely work. I have taken a look at our white organic milk bottles and thought about the same thing. Wouldn't even have to cover it with duct tape, though still would be a milk jug hanging from the garage :)MOGS, if you don't drink soda is always sparkling water, lemonade, etc that come in the same containers.
14.8 years ago
I follow someone on Twitter who mentioned your fantastic idea of growing tomatoes in 2 liter bottles…didn't check out your post right away…instead headed out directly (materials in hand) to the garden. Afterward, I thought it would be fitting to see how your planters were conceived…and I am so glad I did. I blogged about my experience and referenced your blog and your truly inspired planters, several times. Feel free to check it out. Many, many thanks for such wonderful DIY project!
14.8 years ago
Riveted, glad to be an inspiration 🙂 Your design looks similiar to my first version for my pepper plant. Be careful exposing the roots, some plants don't like that. I think for version three I may drill a 1 inch hole on the side instead of putting the plant through the bottom hole to prevent some of the water from getting on the too much water on them.
14.5 years ago
Great idea CVG!! There is one important thing that you all must keep in mind. If you are going to compare this to ground growing you must consider the size of the container. If you plant tomatoes in a small pot you will get smaller and less tomatoes. Use this idea for applications that make sense like herbs, Cherrie tomatoes or anything that is meant to grow small or you will always be disappointed. If you increase the container, "like the comment with the 5 gallon buckets", you need to add more drain holes and/or rocks at the bottom to allow the water to drain and the roots to breath. This is a great economical idea but sometimes you just have to spend money to get what you are looking for. I tried “Topsey Turvey” this past season and had good success with tomatoes but not good with eggplant. This was my first season trying TT so I will be trying again next year and giving less water to some of my plants. I use a Home Depot premix of compost and manure and feed with Schultz all purpose plant food all summer long. This plant food great and it's twice as potent as Miracle Grow. Personally, I hate miracle grow because the product is not as good as the manufacturer claims. I have great results with Shultz and I grow everything from pots because I have a cement yard. Sometimes you have to spend a little to get really good results. Good luck all!!
14.5 years ago
I've found that covering the watering hole helps prevent plants from drying out as quickly. Next season I'm going to try using right-side up milk jugs with plant holes at the bottoms. Five gallon buckets may produce larger fruit, but I'm not in a position to use anything that bulky.
14.4 years ago
Hi, I LOVE your green approach! I was wondering if you think a 'palm' plant which is a medium size house plant will grow in this type of planter. My daughter suffers from eczema and is allergic to dust. Palms are great air cleaner and releases a liter of moisture everyday : ) It would be wonderful to help her breath a little easier with your invention. thank you!!AL
14.4 years ago
alicelusieges, well of the features of this planter is water drains out of the bottom when it is full, which indoors would definitely be considered a design flaw. Also for grassy plants like palms my have difficulty twisting their leaves to direct the tops toward the light since I presume gravity probably would win and they will all fall straight down.Though how about just making a hanging planter out of the 2-liter bottle? Just cut the top off, punch/melt a couple holes to support and hang from the ceiling? This way no leaking water and plant can grow a little more naturally.
14.4 years ago
I love your detailed pictures! The duck tape is also a great idea. I didn't even think about roots being exposed to sunlight. I want to try it out this coming Spring.
14.2 years ago
this is a great idea
14.2 years ago
I have a new design envisioned for this year so stay tuned…
14.2 years ago
This is a great way to use two liter bottles to grow tomatoes. We have been growing tomatoes out of two liter bottles for years now but we have not had them upside down. This year we will be painting the bottles to stop light from growing algae.
14.2 years ago
How many tomatoes did you get out of your plants last year? Were they relatively good sized tomatoes??
14.2 years ago
I don’t know anything about gardening but want to grow my own vegetables. I would LOVE to use this sort of setup to grow tomatoes on my balcony. What I don’t know is: do I buy seeds or do I buy the small plants from Walmart that have already grown a bit?
I live in San Diego, so it’s 60’s right now in March and lots of sun.
14.1 years ago
Curious Newbie, I had pretty good results. I wasn’t very good and keeping them watered so probably could have had better results. Have some ideas to make this work better this season.
Sam, I would recommend getting a plant from Walmart (or other home/garden store) though if you have time to start indoors you can always grow your own seedlings.
14.1 years ago
Just planted 3 plants in 5 gallon buckets with lids. Surrounded the plant with moss and topped the bucket with potting soil. Meanwhile I planted 6 in the ground. Within 2 days the upside down ones want to grow up towards the sun. It’s still a lil cool in south Louisiana but the plants are nice and green. First year upside down, hope it works.
14.1 years ago
I’m going to try growing tomatillos upside down in 5 gallon buckets. I’m just concerned about the weight of the planters.
14.1 years ago
I’m waiting to see pictures of these upside planters with ripe fruit on them. Lots of websites are all enthusiastic when they are just being planted but I don’t see much being posted about the actual results. How many tomatoes do you get and are they smaller and stunted?
I read that when the plants get bigger they can easily get too heavy for the hooks they are hanging from, and it’s not a pretty sight when the whole thing falls over.
However, I’m still going to try upside down tomato plants this year!
14.1 years ago
Great idea. I think this is what I’ve been looking for. Thanks.
Sally
14.1 years ago
Great idea! Would be a great project for children making mothers/fathers day gifts for their parents in school…much more useful than cheap oriental trader frames that will last thousands of years in landfills.
here’s a link to color duct tape I ordered for the project… the recommendation of green but there are others for other climates
http://www.drillspot.com/products/943563/intertape_82446_48mmx60yds_82mil_620_olive_drab_colored_duct_tape?s=1
14.1 years ago
Hi there,
I was looking at your idea and I’m totally inspired –
I work at a very natural science daycare and we want to try this with the kids to grow their own tomatoes!
I was Wondering how many plants did you put in the 2 liter?
Also do you have any pictures of the results?
Hope you can help me!
-Karina
14.1 years ago
Karina/jenrie, the results were pretty good unfortunately I didn’t take any pictures. The results could have been better but I wasn’t great about watering these weekly (though this is still a requirement for the Topsy Turvy during hot weather) The peppers actually did much better than the tomatoes most likely given to the fact they like being a little dry so my lack of watering probably was a better condition for them
This year I am considering an updated design with a bigger growing area and possibly and additional water reservoir. I will be sure to post this construction and results.
14.1 years ago
I have been trying to grow tomatoes upside down for the last 3 years and have gotten a bit better each year but I would seem to have problems with drying out and blight. Last year another gardener told me about making sure there was alot of vermiculite at the top of the bucket (at the top when upside down) -this is to keep the moisture where the drinking roots of the tomato tend to be – they are generally deeper when grown the right way up but at the top of the upside down planter.
So I would stress the importance of point 6 – mixing the compost with vermiculite. This tip really seemd to bring my crop on last season. This site I found has a couple of informative articles on this whole subject of growing tomatoes upside down – http://www.practicalhomeandgarden.com/the-upside-down-tomato-garden
14 years ago
my wife bought some of the strawberry planters, which seem to be about the size of a 3 liter bottle. e have put strawberries in one and peppers (banana, chili) in the other one. My wife went to the nursery to find something to hang them with, everything was so expensive, since we already had enough $ in them. I thought i was going to have to build an A-frame and spend more $ when i saw our sons (12 yr) old swing set rusting at the back edge of the property and decided to salvage something from it. it is the perfect height and width as well as very sturdy. i just took off the slide, swings and seesaw.
14 years ago
Nice reuse there
14 years ago
That’s pretty cool!
14 years ago
I’m thinking about trying to make some of these out of my milk jugs, but I keep wondering if it would be sturdy enough. I think 2 liter bottles have sturdier bottoms in them. Also wondering if 1 liter bottles would be too small for a pepper plant. What do you think?
14 years ago
I am actually trying milk jugs this year as well. I am really bad about watering and this might let me skip a day here and there. That being said the 1 liter could be pushing it for a small pepper plant but at least they like to dry out a little so water is less of an issue. I was thinking of trying something similiar but with a hydroponic twist…By feeding the plant a diluted hydroponic solution instead of watering I should be able to reduce the amount of root growth required to sustain life. Though given jalapeno pepper plants are normally recommended to have 2-3 gallon pots as they grow to maturity, 1 liter would be a fraction of that space. Probably worth trying though I would have a backup plan 🙂
14 years ago
Has anyone determined the best type of tomato to grow?
13.9 years ago
wow, very creative a tomato can grow in this way!
13.9 years ago
I am actually reading this from Brazil. Will try this here. A good thing is the weather in the part of the country I live, from 80F to 90F the entire year.
13.9 years ago
Diogo, jealous for all year gardening….though I would not get any work done on my computerized grow box.
13.9 years ago
After reading this, I was inspired to lead fellow students in an upside down planter workshop. Our university’s garden is full of up upside down duct taped bottles and the plants (peppers, tomatoes, and lemon cucumbers) doing fabulously. Thanks for the great article!
13.9 years ago
Michael, that is great. I would love to see some pictures or possibly even better post them in our upside down vegetable forum I am sure other readers would like to see these great results as well.
13.9 years ago
Great idea. Oh the uses of duck tape! Will try it with my worm compost added to peat moss/perlite. wonder why the upside down works, anyway?
13.9 years ago
I love what you are doing but I’m a little CONCERNED. I have heard that plastic bottles do something called “leaching” – where when they are heated, they leak out toxic chemicals from the plastic they are made of. I was just wondering if you checked into the safety of these plastic bottles and their possible contamination of the soil and the crop that is eaten. Does the sun heat up the bottle enough to contaminate?
13.9 years ago
Soda bottles are made out of Polyethylene Terephthalate, or PET / PETE or recycling code #1. These do not contain Bisphenol A (BPA) and will break down as heated though would not be good to hold water for drinking in after you are done growing (which I doubt anyone would be doing this)
13.9 years ago
However, #1 plastics do contain cancer-causing phthalates. These are what will leach into your water, soil, etc when the bottle heats up. The only plastics that don’t contain these are numbers 4,5, and 7 when it also says ‘other’ underneath the recyling symbol.
13.9 years ago
Lark, still trying some more info on this, though I don’t see anything where #1 actually contains phthalates (other than part of its name which is a difference compound)
From Wikipedia
“Polyethylene terephthalate ethylene (PETE) is the main substance used to package bottled water and many sodas. Products containing PETE are labeled “Type 1” (with a “1” in the recycle triangle) for recycling purposes. Although the word “phthalate” appears in the name, PETE does not contain phthalate plasticizers. The terephthalate polymer PETE and the phthalate ester plasticizers are chemically different substances”
13.9 years ago
Cheap Veg Gardener, Thanks for looking into that. While soda bottles are not a #7 plastic, I still don’t “trust” plastic. New studies every year are finding new problems with synthetic stuff and I’m wanting to be “all-natural”. Is there a suitable container that you could recommend instead of plastic for this type of growing?
Thank you for sharing your knowledge!
13.9 years ago
Tara, I do agree there are many unknowns when it comes to plastics. Though they “should” be safe given the information we know right now of course it is impossible to know what the future may bring. As for different materials I would consider glass, wood (hanging basket), or possibly a hanging metal basket lined with moss. These would be some non-plastic options though I have not tried these options myself though I would expect these options could be costly.
13.8 years ago
Very nice article on creating your own upside down planter. With a few alterations and some imagination a beautiful looking planter can be designed using the basic ideas from this wonderful article.
13.8 years ago
Mike, the design has improved some over the years, though I will agree the duct tape verion is not the prettiest
13.7 years ago
With the way today’s economy is, I am always looking for ways to save money. This article has certainly has helped in that respect.
Thank you…
13.6 years ago
great take on an overpriced consumer product. Nice Post!
13.1 years ago
Just wondered if it would be best to grow trailing tomatoes in these? I’m doing herbs in the bottles this year (not upside down)and will be hanging them on the fence.
13.1 years ago
eve b, they don’t have to be trailing. Any cherry or globe tomato will work fine. Anything bigger would be very stressed with the limited growing volume for the roots.
13.1 years ago
[…] in buckets on your porch or from old soda bottles hanging upside down in a window or porch area (the DIY topsy turvey!), you can save money on expensive fruits and veggies, and get them fresher and more delicious than […]
13.1 years ago
What a brilliant idea.. So love it! Nice posts..
13.1 years ago
Hi. This is a great idea . Just wondered how you made the slow drip watering system.
13 years ago
[…] Make your own upside down tomato planter Apr 24, 2009 … Many people have been growing plants like tomatoes in 5 gallon buckets or hanging baskets for … […]
13 years ago
[…] Make your own upside down tomato planter Apr 24, 2009 … Growing upside down tomato plants is a great way to extend the area… […]
13 years ago
[…] Make your own upside down tomato planter – The Cheap Vegetable … Apr 24, 2009 … Why buy a Topsy Turvy upside down tomato planter when you can make one yourself with simple items … […]
12.9 years ago
Another idea to make an upside tomato planter is to use a reusable grocery bag. These bags can be obtained at your local grocery store for about $1. You can either cut 1 hole in the center for 1 plant or 2 holes at the sides for 2 plants. The bag handles makes it easy to hang up. Add some potting soil and water and watch the tomato plants grow.
12.9 years ago
best solution for my balcony )
I need just buy water pump like this http://www.pexuniverse.com/pumps
12.9 years ago
I tried a variation of this about a week ago with a cucumber plant. So far it seems to be doing well. It was a lot of fun to make. Hopefully the cucumber plant will start producing some fruit soon. Thanks for the great idea!
12.7 years ago
wow smart idea ……nice and simple but exciting …… god bless you …
12.4 years ago
[…] Ten Christmas Gifts Of All Time: #4MomentsHow to Organize Collections Toronto HoardingMake your own upside down tomato planterMake your own upside down tomato planterRecyclingÄppelmust, and a visit from the Fairy […]
12.1 years ago
You have said a couple times that you did not water them on a regular basis. Why not take another plastic 2 liter bottle and drill a small pin hole in the cap fill it with water put cap back on and put it in the access hole? and get some 55 gal. drums and collect rainwater and get your water out of there.
11.9 years ago
Gifts For The home…
[…]Make your own upside down tomato planter[…]…
11.9 years ago
It gets even better. Use GREEN bottles such as those that Ginger Ale comes in. Nothing is needed to cover the container. No algae, and roots don’t mind it…so, no taping, no painting, none of that. Just cut and grow. That’s it. I make passive hydroponic containers out of them and love being able to see what’s happening.
11.8 years ago
How do I know when to take the ‘cap’ off the bottom of my planter? Won’t it have to be off for the lant to come through? To grow down?
11.3 years ago
[…] This year I was a little smarter and planted my seeds still ambitiously but also planted a few more a couple week later. This way, if Mother Nature is cruel to my optimism I still have a backup. If she is kind I always have some extra tomato/pepper seedlings to offer to friends and neighbors or create a couple more upside down tomato/pepper planters. […]
11.3 years ago
[…] 2 Liter – The Original — This is the one that started it all. Very simple design using a 2 liter bottle covered with duct tape with a hole cut in the side to add soil and water as needed.Pros: Simple to create, dark color helped keep soil warm during the early part of the year, unlike the sibling seedling which I planted in the ground as a control which did not make it. […]
11.3 years ago
[…] my first attempt at an upside down tomato planter worked out great, I have a habit of forgetting to water the plants everyday. More commonly when […]
9.7 years ago
[…] Make Your Own Upside Down Tomato Plant–Cheap Vegetable … – Make your own upside down tomato planter. 5.4 years ago cheap, peppers, tomato. Every time my daughter sees the upside down tomato planter (Topsy Turvy) …… […]
9.3 years ago
I thinks its a great idea to grow my tomato plant upside down, but i juts cant figure it out:P… doesn’t the soil, come out every time you water it?
9.3 years ago
Danique, as long as you do not water too aggressively you will not lose much or any soil. You can also insert a sponge around the plant if the opening of your container is a bit large…